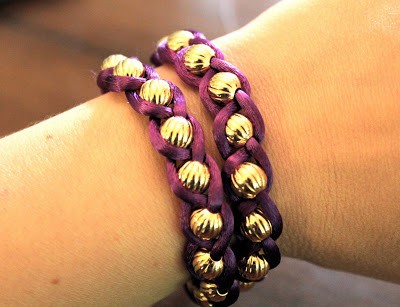
Embellished wrap bracelets are everywhere, and I am kind of obsessed with these colorful Chan Luu ones right now. But $220?
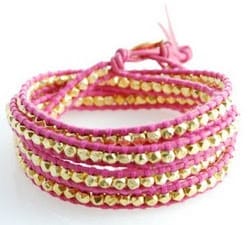
Yikes! I think we can make our own for a wee bit less. Less than $5 in fact!

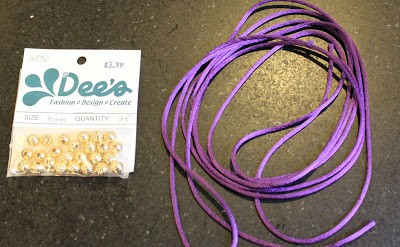
You'll need:
- 3 yards of silk ribbon cord. I got mine (purple, of course) at JoAnn's in the trim section.
- 2 dozen 8 mm gold beads. Mine were from a local craft store but these beads are similar.
Cut the ribbon into 3 equal lengths. Standard bracelet size is 7 inches so you'll want it about 29 inches long in order to wrap 4 times.
Start by braiding about 6 inches of ribbon and then secure the end with a rubber band. Anchor the end with something heavy to hold in it place.
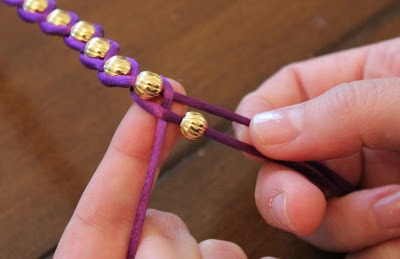
Continue feeding beads onto the middle strand until you run out (I had about 25) or until there's about 6 inches of ribbon left.
Finish with another 6 inches or so of braiding. Then clamp the ends with ribbon fasteners or just tie it in a knot.
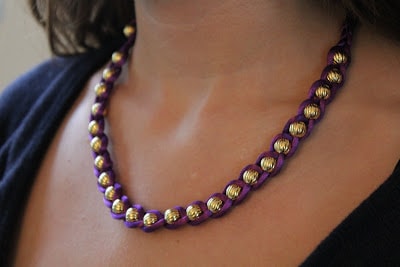
It looks great as a bracelet or a necklace!

Sandy says
I love the wrap Bracelet I'm going to try and make myself one if it comes out the way I'm hoping maybe I'll make one for each of my daughters!
Judy Kuefner says
I'm new at jewelry making and wondering how you did the ends. What did you use
Rsub says
Hi i am new at working with beads and wanted to try this out... I was wondering how the ends meet when you wear this one as a necklace? do you need to put a clasp ? i don't see one
oyun oyna says
This jewelry is fabulous! I love your blog and many of your projects. I hope you don't mind that I'm showing off your fun feathered hat on my blog today. I totally wish I had found it sooner and I would have made one for myself!
sandra sathyan says
Its not a bad idea ..........i am gonna try it out
Ashley says
We are trying to make the wrap bracelet . We have 8mm metal beads and 1/8 inch ribbon.
It won't thread thru the bead. I tried tape on the tips but that didn't help either .
Can you please advise. My daughter is very frustrated.
Thank you.
Ashley Motl-Castillo
JC says
You could try threading the ribbon on a large eye needle.
Janet Maloney says
cut an extra 1/2 inch longer on each string and apply any color nail polish. working it into a point as it dries. When you have completed your bracelet just cut off the nail polish ends.
Bailee says
Does the silk ribbon cord have a clasp at the end? I can't find it anywhere that doesn't have a clasp.
Fashion Jewelry Wholesale China says
I love this wrap bracelet!
{gemmifer} says
I'm new to your blog; hence the late comment here... I love this DIY, especially how it looks as a necklace! It's a must try!
Tweheyo Brian says
i really likes the tutorial and it really helps much because it feed me with some more idea and creativity!!!!!!!!!!!
Marge P says
I love this, Purple is my favorite cord color, I like to mix it up a bit and put turquoise with it or crystal, or well anything even gold like you have! The tutorial was excellant, I have been trying to fimd a way to use all of my old embroydre floss and I think this may just be the thing I have been waiting for. Thank you so much, your ideas are amazing and fun.
Carlotta says
Thanks so much for the tutorial. It was very easy to follow. I didn't realize not every bead marked 8mm or whatever size, may not have the same size hole. I managed to get the beads through a large enough hole by putting scotch tape on the tip of the silk cord. Hope that helps someone. Thanks again for the tut!!
Mary Gordon says
Whats your trick in getting the cord through the beads?
J says
If you use, a little bit of, any tpe of clear tape wrapped around the ends of the chord, you should have an easier time getting it through the beads.
Connie says
Use a large binder clip to clip the cord to a cutting board on one side. That gives you a secure hold and allows you to work on the cutting board in your lap. My cutting board has recessed grooves around the edges to keep beads from falling off.
angela says
the bracelet is great but the instructions how to make it is not well done...you should make a short video...I've tried to follow the explanation but has not worked...sorry, I love this link but some times things are not explained in clear manner.
JC says
When i would try to pull the string s together the beads would just slip out how do u fix this??
gerbermom says
Hey JC - yes, this can be a problem, just don't pull the cord too tight or the beads will pop out. You can also dab a bit of glue on the bead after you braid to keep things in place.
Amanda says
So how to you fasten the ends, I read about the ribbon fasteners but do you have any pictures of how you finished your ends, this is my biggest road block in making these
gerbermom says
Hey Amanda - sorry I don't have a photo! Ask at the craft store for cord clamps, they can direct you to the right thing. Then you can either tie the ends together or attach a lobster clasp if you'd rather do that. Good luck!
judy says
this is very cool,I love to make things that are not too compicated while watching t.v in the evenings this will be great,thanks for sharing another great tut
nathalie says
hello from france ,
i note you a few words to say " thanks you" for the DIY bracelet .I just bought the pearl , cord and when i will get them i will try to do the same !
gerbermom says
I hope you enjoy it and thanks a bunch for passing by!