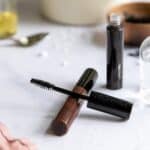
DIY Mascara Recipe
It may take several tries to perfect the color and successfully transfer the finished mascara to the tube before it hardens. But don't get discouraged! Once you've mastered it, we promise you'll never look back.
Yield: 1 tube
Cost: $10
Equipment
- Two small saucepans
- A stove
- Kitchen scale
- Empty mascara tube with wand
- Needle-less syringe
- Small whisk
- Bowls
- N95 mask (to protect you from iron oxide dust)
- Paper towels
Materials
- Iron oxide: start with 0.1 ounce, adding more as needed
- 0.1 ounce jojoba oil, divided
- 0.1 ounce candelilla wax
- 0.1 ounce beeswax
- 0.1 ounce emulsifying wax
- 0.1 ounce stearic acid
- 1.5 ounces distilled water
- .08 ounce aloe vera gel
- .04 ounce glycerin
- .03 ounce HEC
- .02 ounce preservative
Instructions
- Combine the iron oxide powder and .05 ounces of jojoba oil in a small bowl. Using the back of a spoon, stir everything together, making sure the powder gets evenly dispersed throughout the oil.
- In one small saucepan, combine the candelilla, beeswax, emulsifying wax, and stearic acid. In the other small saucepan, combine the water, aloe vera, almond oil, and glycerin. Heat them both on the stove over the lowest heat until the oils are nearly melted and water is warm.
- When the waxes are almost melted, stir in the iron oxide and oil mixture. At the same time, whisk the HEC into the water mixture.
- Slowly pour the water mixture into the wax mixture (it will get clumpy—that's okay). Place the saucepan back on the stove over medium-low heat, and stir constantly until the mixture comes together. At the very end, add the preservative.
- Acting quickly, use a syringe to transfer the mascara to a clean mascara tube before it has a chance to solidify.
- Let the mascara cure for 2–3 days before use.
Notes
Before starting the mascara-making process, make sure to thoroughly clean and sanitize all the equipment and containers you'll be using. This helps prevent any contamination that could affect the quality and safety of your mascara.