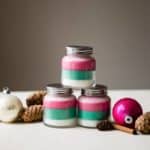
Layered Scent DIY Candle
Just a few simple ingredients make up these cute, gift-worthy DIY holiday candles layered with holiday colors and scents.
Yield: 2 candles
Cost: $10
Equipment
- Several small bowls for melting wax
- Small heat-proof jars
- Chopsticks or clothespins for holding the wicks
Materials
- Soy wax flakes
- Crayons in assorted colors
- Wicks
- Essential oils
Instructions
- Choose the number of layers you want to create for each candle. Divide the wax evenly. I used about ¾ to 1 cup of wax flakes per layer (so about ⅓–¼ cup per layer, per jar). Remove the papers from the crayons and break into small pieces. Melt soy wax flakes and crayons in a pan. Slowly stir in 5–10 drops of the desired essential oil with a wooden spoon.
- Adhere the wicks to the bottoms of the jars using a little melted wax. Wrap the wick around a skewer or toothpick so it can be suspended to keep it centered.
- Pour the first color layer into the jars. Let cool completely. You can speed up the process by placing them outside or in a cool place. Repeat the process with more wax, crayons, and essential oils. To keep the new layer from melting the previous layer, it is helpful to let the wax cool slightly before pouring into the jar.
- After the last layer is poured into the jar, let the jars sit undisturbed for several hours or overnight. Trim the wicks, top with the lids, and package up to give as gifts.
Notes
These jars are about 8 ounces each. Each layer requires about ¾ to 1 cup of wax flakes for a total of about 3–4 cups of wax flakes. (I did have some wax left over in the pan.) While you can place these in the fridge or outside to cool faster, it's best to allow each layer to completely cool at room temperature to avoid cracking or bubbling.