
Is the winter blues hitting hard? Nothing brightens a cold day like fresh, fun nails.
While salon prices keep climbing, these stunning winter designs are totally doable at home even if you're a beginner.
From subtle sparkles to bold winter motifs, check out these 10 winter nail ideas to warm up your at-home manicure.
1. Frosted Pearl Tips
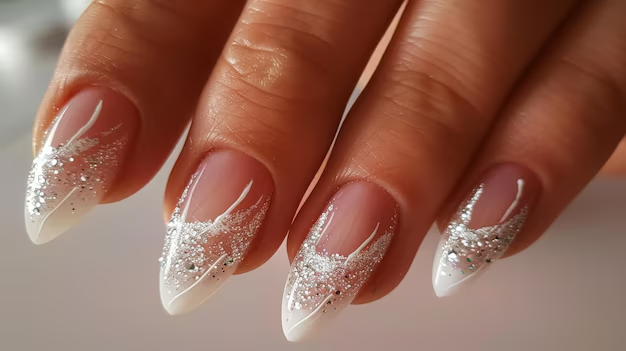
Remember the classic French manicure? This is its cooler winter cousin. Instead of plain white, use a pearly polish for the tips.
The secret is using tape as a guide. Stick it across your nail, paint the tip, and peel off while the polish is still wet.
One coat of a sheer pink base and those pearly tips will catch the light like fresh snow.
2. Sweater Weather Nails

This technique looks way harder than it is.
Paint your nails with a matte nude base then once dry, use a thin brush to draw three parallel lines. Think cable knit pattern.
The trick? Don't aim for perfection. Slightly wobbly lines actually look more like real knit.
When you’re done, seal it with a matte top coat, and you'll have cozy sweater vibes right at your fingertips.
3. Night Sky Sparkle

Dark blue nails are everywhere this winter, but here's how to make them special. Start with a deep navy base.
While it's still tacky, sprinkle on fine silver glitter just at the tips. The particles will stick naturally.
Doing this creates a gorgeous fade that looks like stars appearing in the night sky. After that, top it off with two clear coats for extra depth.
4. Metallic Mountain Peaks
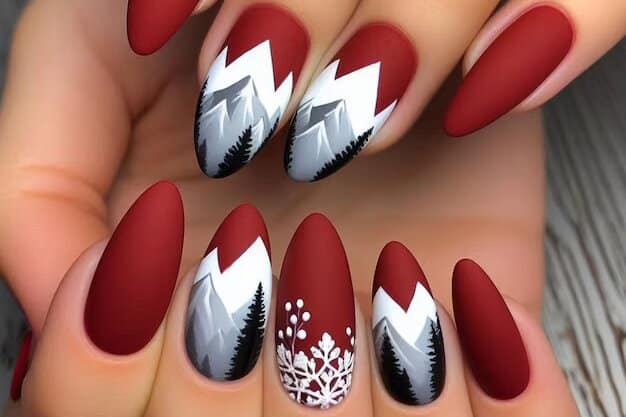
Gray and silver are winter staples, but let's make them interesting.
Paint a silvery base, then use tape to create triangle shapes from the tip down. Fill these in with dark gray or black.
The result? Abstract mountain peaks that catch the light. It's geometric, modern, and perfect for short nails.
5. Hot Chocolate Swirl

Rich browns are having a moment and so will you after trying this design.
Start with a chocolate brown base. While it's still wet, add tiny dots of white polish and use a toothpick to swirl them gently.
The result looks just like those fancy hot chocolate photos. It’s complete with swirled cream on top.
Then finish with a glossy top coat for that liquid-like shine.
6. Frost-Bitten Ombre

This one's perfect for beginners. Start with white polish at the tips, then use a makeup sponge to dab on pale blue, creating a soft fade into your natural nail.
The key is working quickly while the polish is wet. It looks like your nails are kissed by frost, and it grows out naturally.
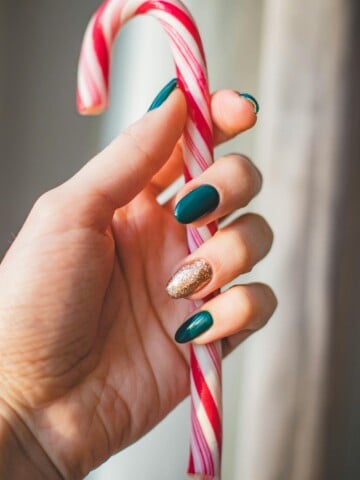
7. Pine Forest Minimalism
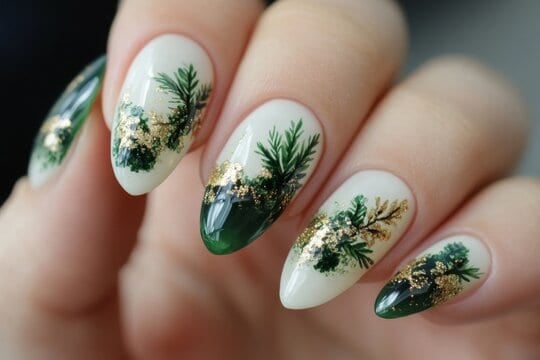
Green doesn't have to scream Christmas. Use a deep forest green as your base.
Once dry, use a thin brush and gold polish to paint tiny, simple tree shapes. Just triangles will do.
Ensure you keep them small and scattered. It's subtle enough for the office but still totally festive.
8. Aurora Lights
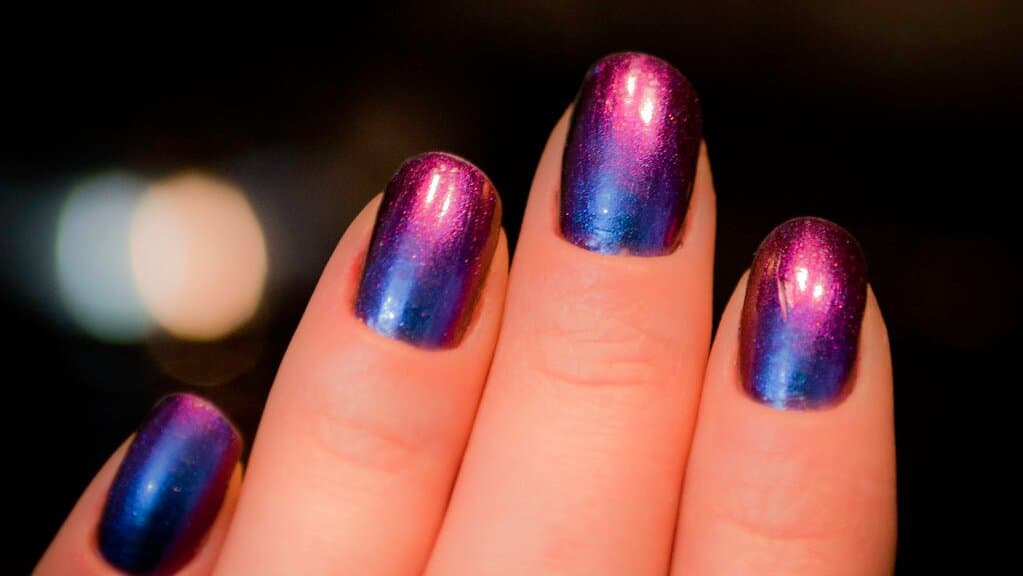
This looks complex but it's surprisingly simple. Paint your nails black. Once dry, use sheer purple, green, and blue polishes.
Dab them on randomly with a small piece of makeup sponge, overlapping slightly. The sheerness creates that magical aurora effect.
No two nails will look exactly alike and that's the beauty of it.
9. Snowflake Accent
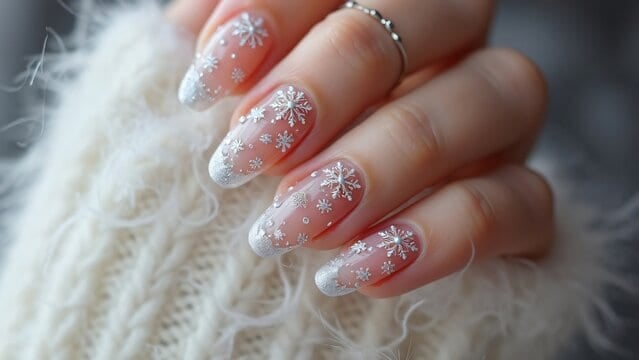
Don't try to paint snowflakes on every nail because it will only lead to frustration.
Instead, paint all nails in pale gray or white, then attempt one simple snowflake on just your ring finger.
You can use a toothpick for the design. Start with a cross, add diagonal lines, and then small dots at the ends. It's simple but so effective.
10. Velvet Touch
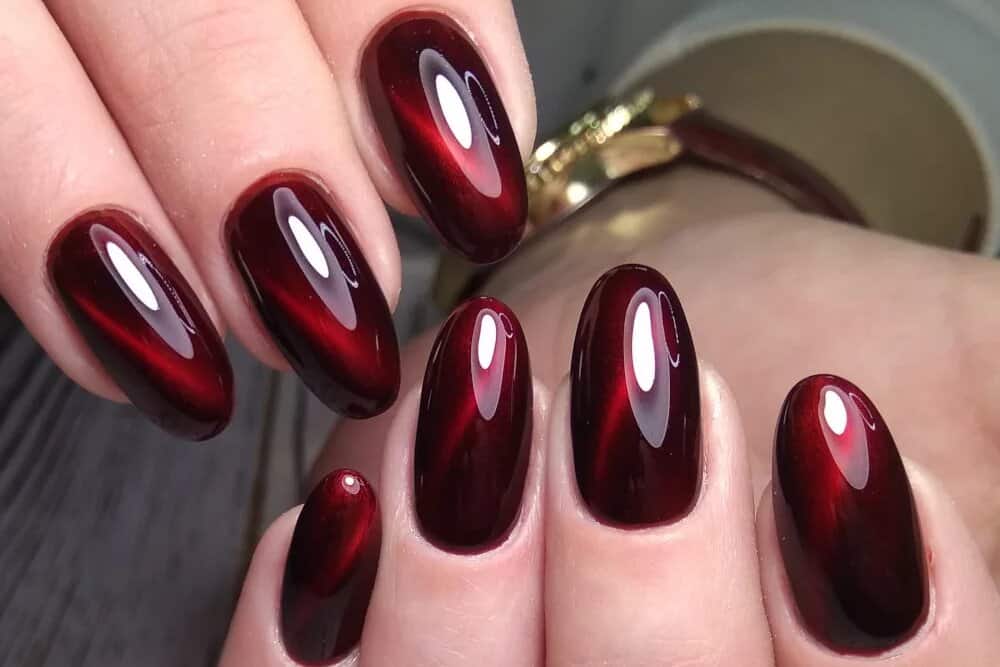
Thankfully, the velvet nail trend isn't going anywhere. To achieve this:
Use magnetic polish (yes, it's a thing) in deep winter colors like burgundy or emerald.
Then hold a magnet over your wet polish for 30 seconds. The metallic particles align to create that soft, velvet-like finish.
I love this design because it’s eye-catching but sophisticated.
Tips for Success
Even the prettiest nail design needs a solid foundation. Here's what really works:
Tip 1: Clean Base Prep
Remove all oils and old polish from your nails, then wipe with rubbing alcohol - this step alone can make your manicure last days longer.
Tip 2: Polish Application
Apply thin, even coats. Each layer should be almost see-through at first. Three thin layers look way better than one thick, bumpy coat.
Tip 3: Clean-Up Strategy
Keep a small angled brush dipped in acetone nearby: it lets you fix wobbly lines and clean your cuticles without ruining your whole nail.
Tip 4: Perfect Lighting Setup
Work in bright, natural light when possible. Poor lighting leads to streaky application and missed spots that you'll notice later.
Tip 5: Fixing Mistakes
When you make a mistake, leave it until your polish is completely dry: trying to fix wet polish usually makes a bigger mess.
Invest in quality quick-dry drops: they prevent those annoying sheet marks and save you from waiting around for ages.
Tip 6: Temperature Matters
Paint your nails in a room-temperature space: cold air makes polish gloopy and hot air makes it dry too fast and bubble.
Tip 7: Tool Kit Essentials
Get proper tools - a good base coat, top coat, and cleanup brush: drugstore options work great, just read reviews first.
Making Your Winter Nails Last
You've put in the work, now let's make sure your winter nail art stays fresh for as long as possible.
1. Seal The Deal
Cap your free edges by running polish horizontally across the tip of each nail - this stops the polish from peeling back.
2. Layer Strategy
Think of your manicure like a sandwich - base coat, color layers, top coat: each layer has a job and skipping any means shorter wear time.
3. Daily Care Routine
Apply cuticle oil every night and wear gloves for dishes: small habits make your manicure last way longer.
4. Touch-Up Routine
Keep your main color handy for chips: a tiny dab of polish and top coat can extend your manicure's life by days.
5. Protection Plan
Use rubber gloves for cleaning and hot water: exposure to both will make your polish lift and peel faster.
The key is being patient with the process. Rushing usually means starting over. With these, you'll get flawless results that last through winter.
Time to Get Started
Winter is long so why not have some fun with your nails? These ideas are just starting points. So feel free to experiment.
You can mix and match styles, swap colors, and make them your own. The best part about doing your nails at home is that If you don't love it, you can always try again.
0

Leave a Comment