We've all heard the horror stories about waxing—the pain, the redness, the bleeding, the awkward grow-out phase. And that's just when waxing your legs. I'm convinced only the bravest among us are willing to try waxing their face. The first time I tried it, I left an obvious strip of peach fuzz down the middle of my upper lip. And the second time wasn't much better. But then I discovered sugar waxing, and let me tell you, it changed the game. Not only is sugar wax for the face less painful than traditional waxing, but it's also all-natural and practically foolproof (No ingrowns! No bleeding!).
So if you're willing to take the plunge, grab a cup of tea (or a glass of wine—you may need it for the rrrriiiiip), and let's chat about the magic of sugar waxing.

What Is Sugar Wax for the Face?
If you've never made sugar wax before, this is a great starter recipe. Just note that there’s no one-size-fits-all sugar wax recipe. Things like elevation, humidity, and room temperature will affect how the wax turns out, so don’t give up if you fail the first few times.
Just take notes and learn what works for you. Or check out our beginner's guide to sugar waxing before you get started!
Face Wax Recipe
—1 cup white sugar
—¼ cup water
—¼ cup lemon juice
Step 1 | Combine the ingredients
Combine the sugar, water, and lemon juice in a small, clean saucepan.
Step 2 | Heat over medium heat
Without stirring your mixture, turn the burner to medium and wait until the sugar dissolves. Sugar can burn easily, so it's best to start with a lower heat and keep a close eye on things!
Step 3 | Turn the heat down slightly and stir
Once the sugar mixture starts bubbling, turn the heat down to medium-low and start stirring. Keep stirring until the wax becomes a deep golden brown and has the consistency of hot syrup.
Sometimes, it's hard to tell how dark the wax is, so remove it from the heat and let it cool for a few seconds. Once it's stopped bubbling, dip a clean spoon into the mixture to get a better look.
Step 4 | Transfer the wax to a clean bowl or jar
To stop the cooking process, remove your sugar wax from the heat and transfer it to a heat-safe bowl. Let the wax cool for 30 minutes. It should be warm but still thick and pliable.
How to Prepare for Waxing Your Face
Properly cleaning and sanitizing your skin before sugar waxing can help reduce the risk of infection and prevent skin irritation. Here are some best practices you can follow to keep skin issues to a minimum [source].
Avoid retinol products. A few days before your waxing session, refrain from applying any retinol products to make sure your skin barrier remains intact.
Wash your face. Start by washing your face with warm water and a gentle soap. This will help to remove any dirt, oil, or sweat that may interfere with the sugar wax process.
Exfoliate. Use a gentle exfoliating scrub or tool to remove dead skin cells and help prevent ingrown hairs. This also makes it easier for the wax to stick to the hair and remove it more effectively.
Dry the area really well. Use a clean towel to gently pat your skin dry. Make sure the skin is completely dry before applying the sugar wax.
Disinfect your skin. Use an antiseptic wipe to sanitize the area you plan to wax and kill any bacteria that may be present. Let the skin dry thoroughly before waxing.
Apply talc-free powder (optional). If you have oily skin, apply a small amount of talc-free powder, like cornstarch, to the area before waxing. This will help absorb any excess oil and make it easier for the sugar wax to grip the hair.
How to Sugar Wax Your Face
While sugar waxing the face is just like sugar waxing the body, there are a few tools and techniques that may make the waxing at home process go a little smoother (pun intended).
You'll need::
—Sugar wax
—Spatula or applicator stick (or you can use your hands if the wax is thick enough)
—Muslin or cotton strips (optional)
—Clean towel
Step 1 | Warm the sugar wax
If needed, heat up the sugar wax so that it’s warm and pliable but not too hot. I spoon the sugar wax into a microwave-safe bowl and then heat it in 10-second intervals, checking after each one until it's barely warm.
Step 2 | Apply sugar wax to a small area of the face
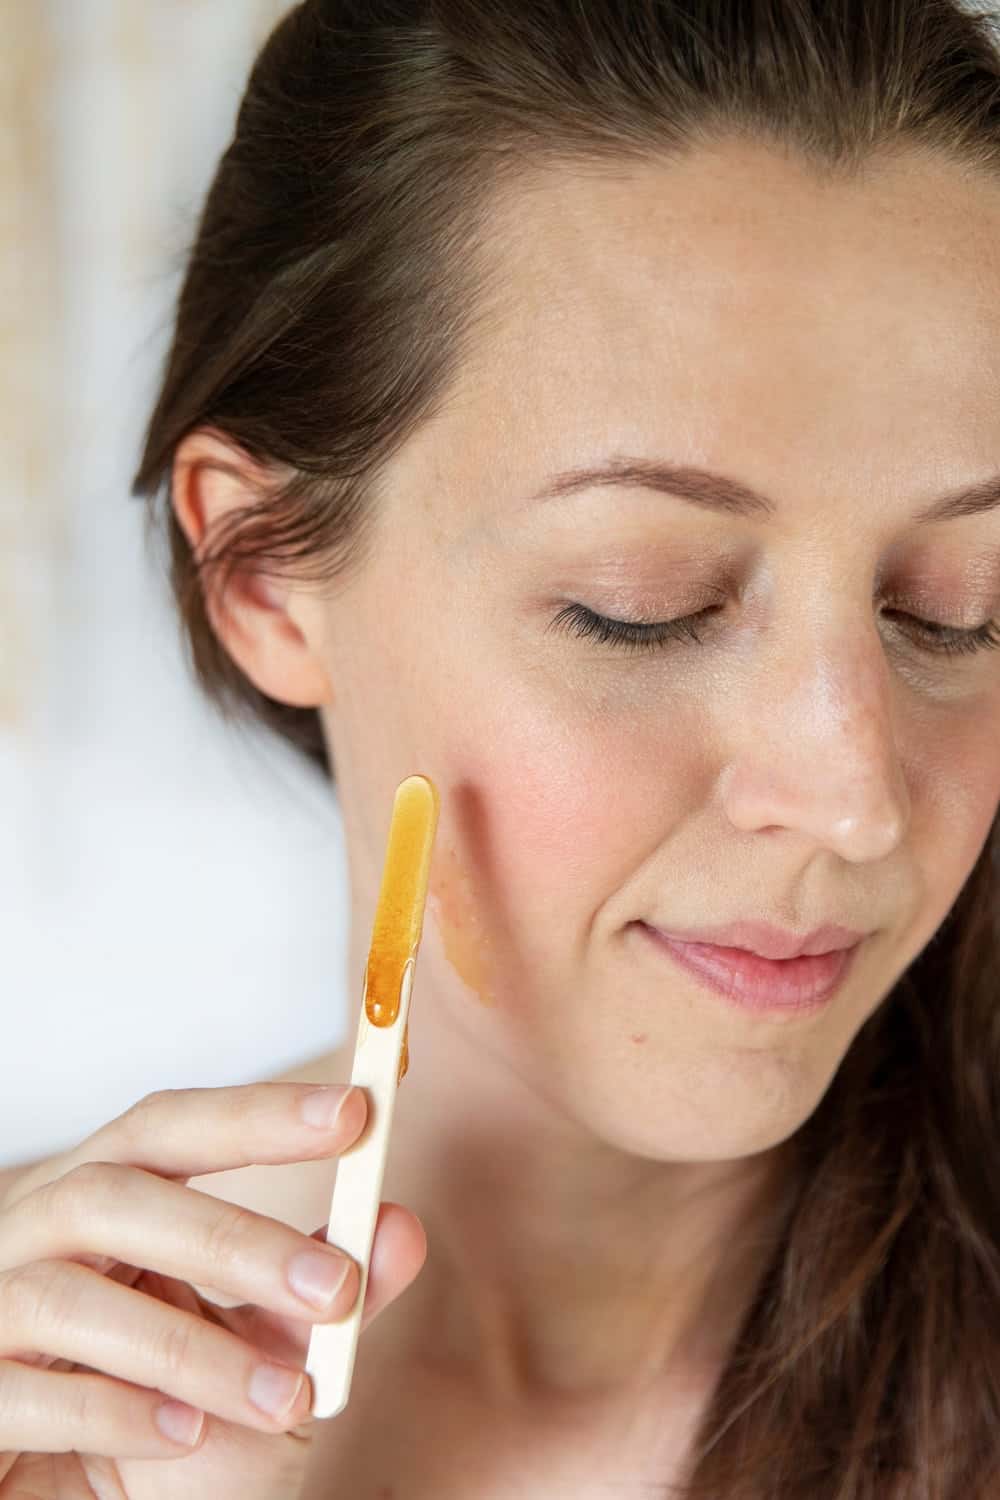
Test the wax to make sure it is not too hot. Then, using an applicator stick, apply a small amount of wax thinly and evenly against the direction of hair growth to make sure it fully coats the hair and really grabs it from the root.
You can also apply the wax with your fingers, but I find it easier to get the wax into nooks and crannies using a popsicle stick or other applicator. Make sure not to apply the wax too close to the eyes, lips, or scalp.
Step 3 | Remove the wax with a flick of the wrist
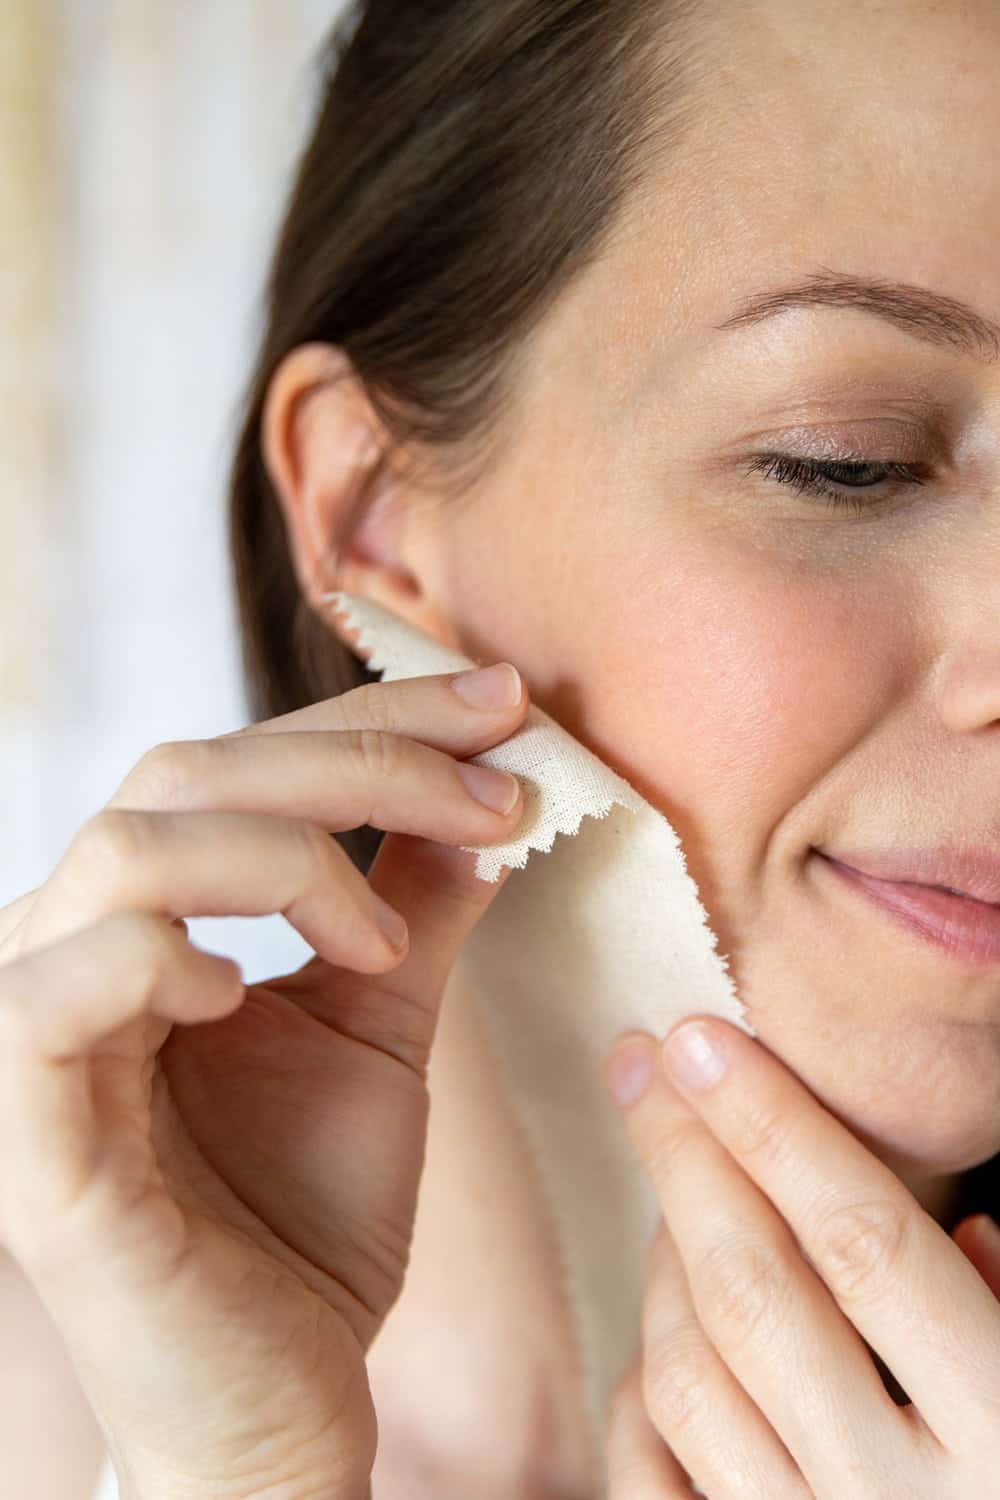
The skin of the face can be sensitive, so to make sure you get it right the first time, place a muslin or cotton strip over the wax and press down firmly. Hold your skin taut with one hand and use the other hand to pull the wax off in the direction of the hair growth to avoid breaking the hair.
If you prefer to skip the fabric strip, simply grab ahold of the sugar wax itself, and remove it with a flick of the wrist.
Step 4 | Repeat until done
Continue applying sugar wax to small patches of skin until you’ve waxed the entire area you want to treat.
Step 5 | Wipe away any leftover wax
When you’ve finished, use a clean, damp towel to gently wipe away any residue.
Waxing Aftercare
Facial skin can be finicky, so it's best to give it a little post-waxing TLC to keep redness at bay and promote quick healing.
Apply a cold compress. A cold compress applied to the waxed area can help reduce inflammation, soothe the skin, and reduce any discomfort.
Use a calming lotion. A lotion that contains ingredients like aloe vera, chamomile, or tea tree oil can help soothe the skin and reduce any redness or irritation.
Avoid hot water. After waxing, it's best to avoid hot showers or baths for at least 24 hours, as hot water can irritate the skin and cause further inflammation.
Avoid sun exposure. It's best to stay out of the sun for at least 24 hours. If you need to go outside, be sure to apply sunscreen to the waxed area—which you should do anyway!
Fax Waxing FAQs
Is sugar waxing safe for the face?
Sugar waxing is generally considered safe for all skin types. But like with any beauty treatment, it's important to do a small patch test first to check for any adverse reactions. People with sensitive skin may experience some redness or irritation after waxing, but this typically goes away within a few hours.
How often should I sugar wax my face?
The pros recommend waiting 4 to 6 weeks between waxing sessions to allow the hair to grow back fully. However, this can vary depending on your hair's unique growth rate.
Can sugar waxing cause breakouts or ingrown hairs on the face?
If done improperly, sugar waxing the face can potentially cause breakouts or ingrown hairs. It's important to prep the skin before waxing by cleansing, exfoliating, and disinfecting the area.
Can I sugar wax my eyebrows?
Absolutely! Sugar waxing is a great way to thin and/or shape the eyebrows, but it's important to be very careful and precise when working around the delicate eye area. And the eyes must be covered to prevent burns.
So it would be pretty difficult to do this safely yourself with your eyes covered! It may be best to have a professional esthetician wax your brows to avoid any mishaps.
How long does the hair need to be for sugar waxing?
The hair should be at least ¼ inch long (about the length of a grain of rice) for sugar waxing to be effective. If your facial hair doesn't get that long, using a cotton strip to grab onto the wax can help.
Reference:
Hair removal: how to wax. American Academy of Dermatology Association website.
21






Leave a Comment