For a crazy plant lady like myself, the thought of going away for a long weekend is utterly overwhelming. And a vacation? Picture me breathing into a paper bag at the mere thought of it.
After coming home to one too many sad, crispy plants, I’ve considered only buying low maintenance houseplants moving forward, but I've still got to care for all of the leafy friends I already have. Aside from hiring a plant sitter (that’s a real profession, btw), there are a few things you can do to keep your plants happy and hydrated while you’re away.
5 Self-Watering Planter Hacks
These five self-watering planter hacks are just what you need to put your plant care on autopilot.
As with any self-watering planter, the idea is to let the plant water itself by either wicking water when needed or through a slow drip irrigation system of sorts. But you don’t have to spend a ton of money on specialty (read: expensive) pots.
Just use materials you already have or repurpose old containers like soda bottles, water bottles and milk cartons for a zero-waste alternative to pricey planters. Not only will the soil stay at the right moisture level, but concentrating moisture at the roots may even help strengthen your plant's root system, thus giving you stronger, more resilient plants.
There are lots of different ways to create self-watering planters, but different methods work better for different plants. Moisture-loving ferns and hardy rubber plants have very different watering needs, so you should tailor your methods accordingly.
Same goes for size of the plant you're watering. If you’re not sure which method is best for your plant, do a test run before hitting the road.
You want to make sure the soil stays consistently damp but not soaking wet. Here are my five favorite hacks for watering plants of all shapes and sizes.
1. Pebble Tray
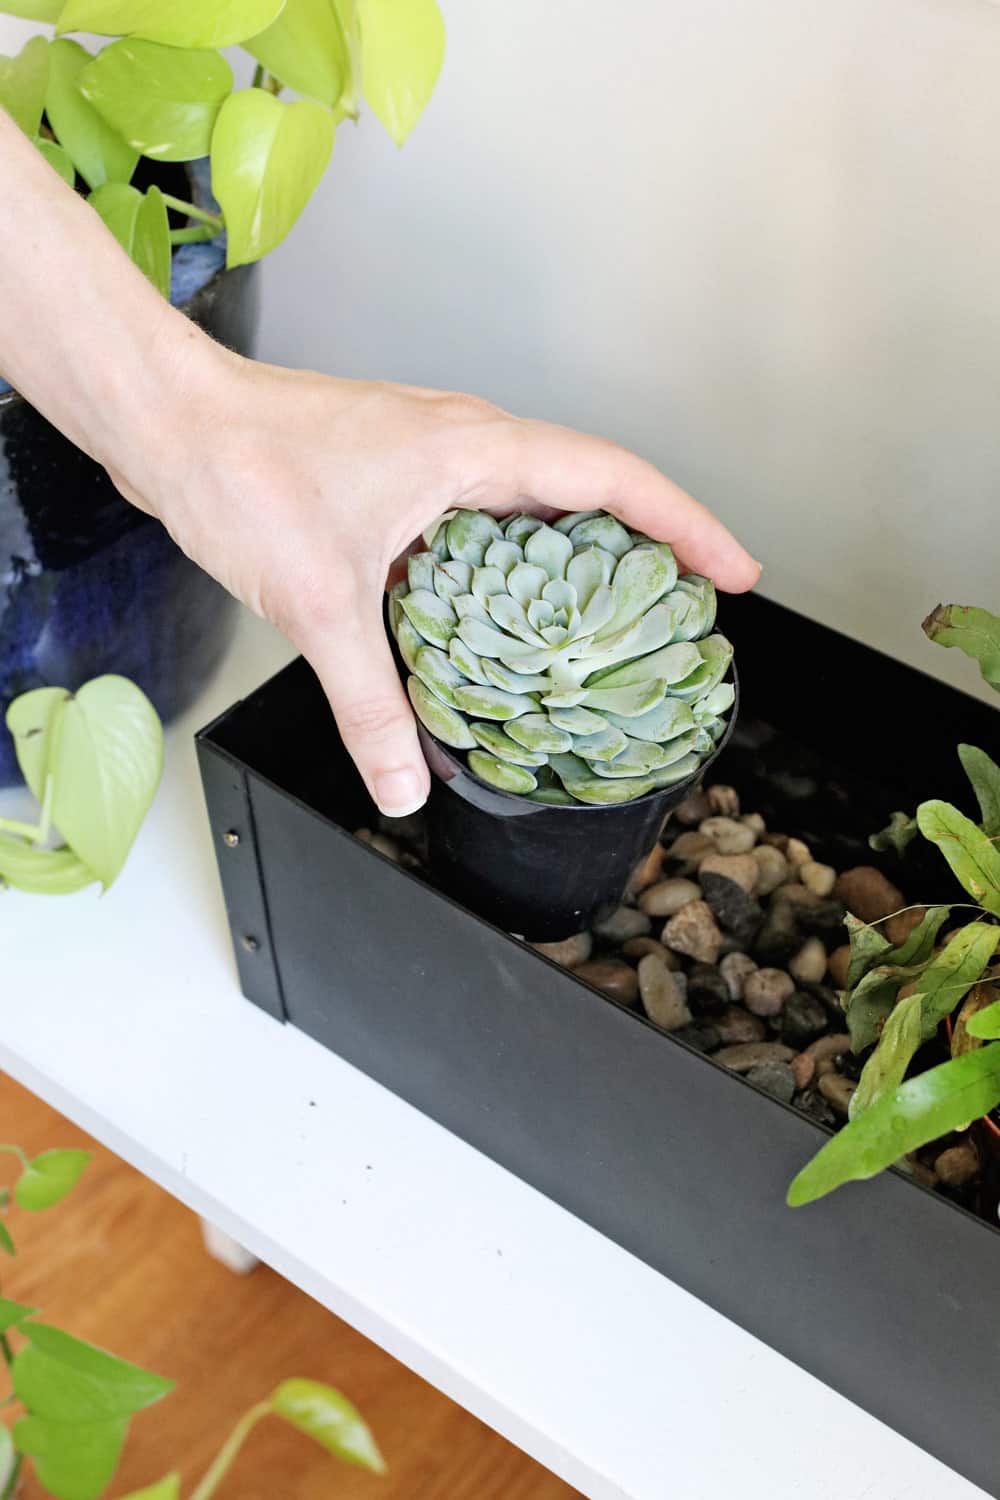
This is the easiest way to water plants, especially for small plants that don’t need a ton of water. Simply line a small tray (if using metal, make sure it has a plastic liner to keep it from rusting) with small stones from a garden supply center or the dollar store.
Place your plants in the tray and fill it with water until it comes about ⅛” above the stones. The plants will absorb the water above the stones and then bask in the humidity created as the rest of the water evaporates.
Just make sure the water doesn’t sit more than ⅛-inch above the stones, as most plants don’t like having their roots sitting in water for long periods of time. Once the water is absorbed, the plants will sit on the stones and not have their roots sitting in a pool of water.
2. Water Wicking Drip System
This method is great if you'll be away for an extended period of time or if you have lots of plants to care for because it allows you to water several plants at one time (plant lady is the new cat lady, right?!).
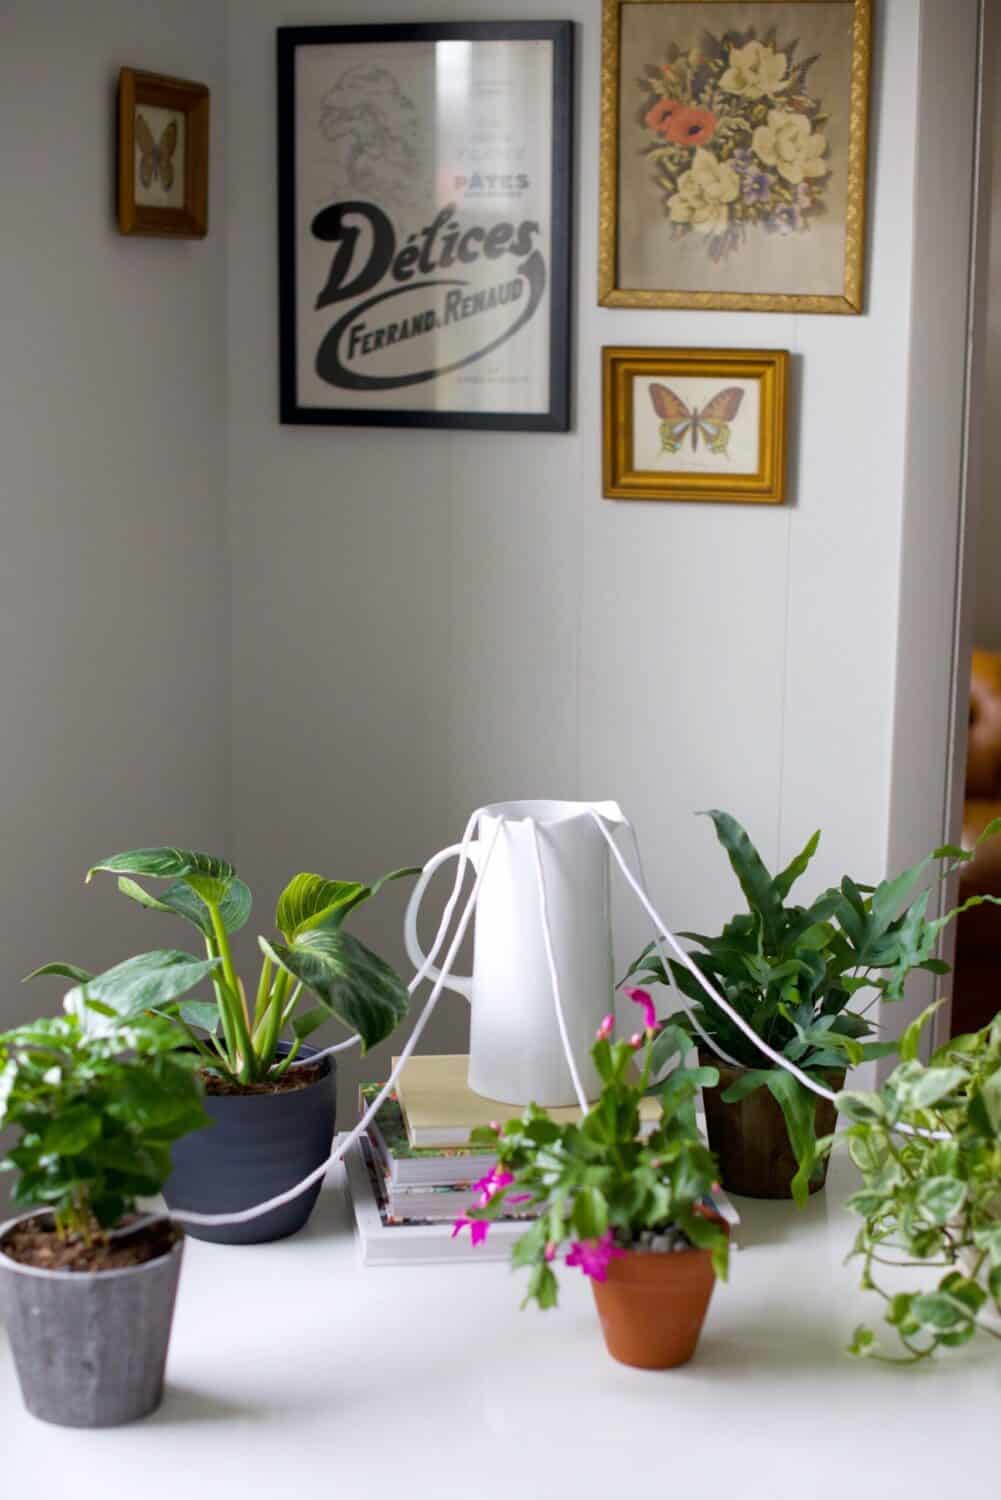
Setting up what is essentially a drip irrigation system sounds complicated, but it's actually incredibly simple. All you'll need is a pitcher or bucket full of water to serve as your reservoir and some cotton string—I ordered this self-watering wick cord online—but you can also use gardening twine.
The longer you'll be away, the more water you'll need. Be sure to choose a larger bucket if you'll be gone more than a week.
Materials
- Pitcher or bucket (even a large cooking pot will work)
- Self-watering wick cord, gardening twine or cotton string
- Scissors
1. Water your plants as you normally would to give them a head start before you leave.
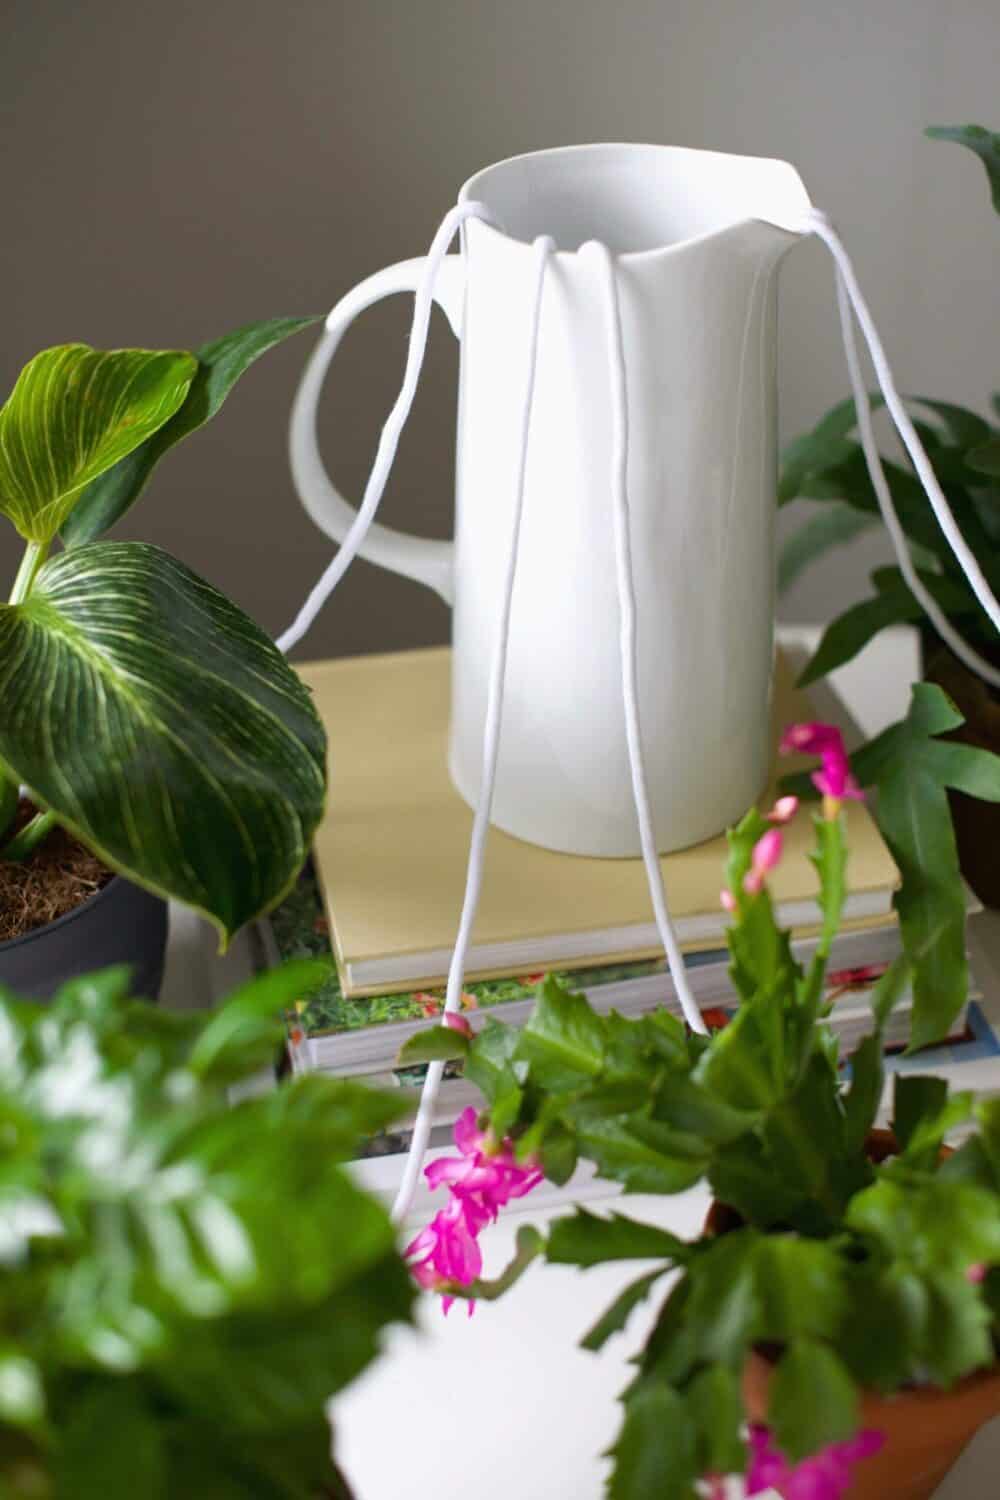
2. Fill your pitcher, bucket or vessel with water and place it on a table. Make sure the vessel is taller than your plant pots. Gravity is moving the water for you, so if the vessel isn't high enough, water won't reach the plant. I elevated my pitcher with a stack of books.
2. Cut a length of cotton rope for each plant. Make sure there is enough slack for one end of the rope to reach down to the bottom of your pitcher and for the other end to reach into the soil of your plants. I placed my plants on the table first to guide me before cutting each piece of rope.
3. Place one end of each rope into the pitcher and lightly press the other end into the soil of your plant. Push it deep enough into the soil that it feels secure and will remain in place.
4. Wait about 15-20 minutes and check to see if the ropes are wet. If they are, this means the water is traveling properly and your system is working. Mine were wet within minutes, but the speed with which the water travels will depend on the length of the rope.
3. Soda Bottle Planter
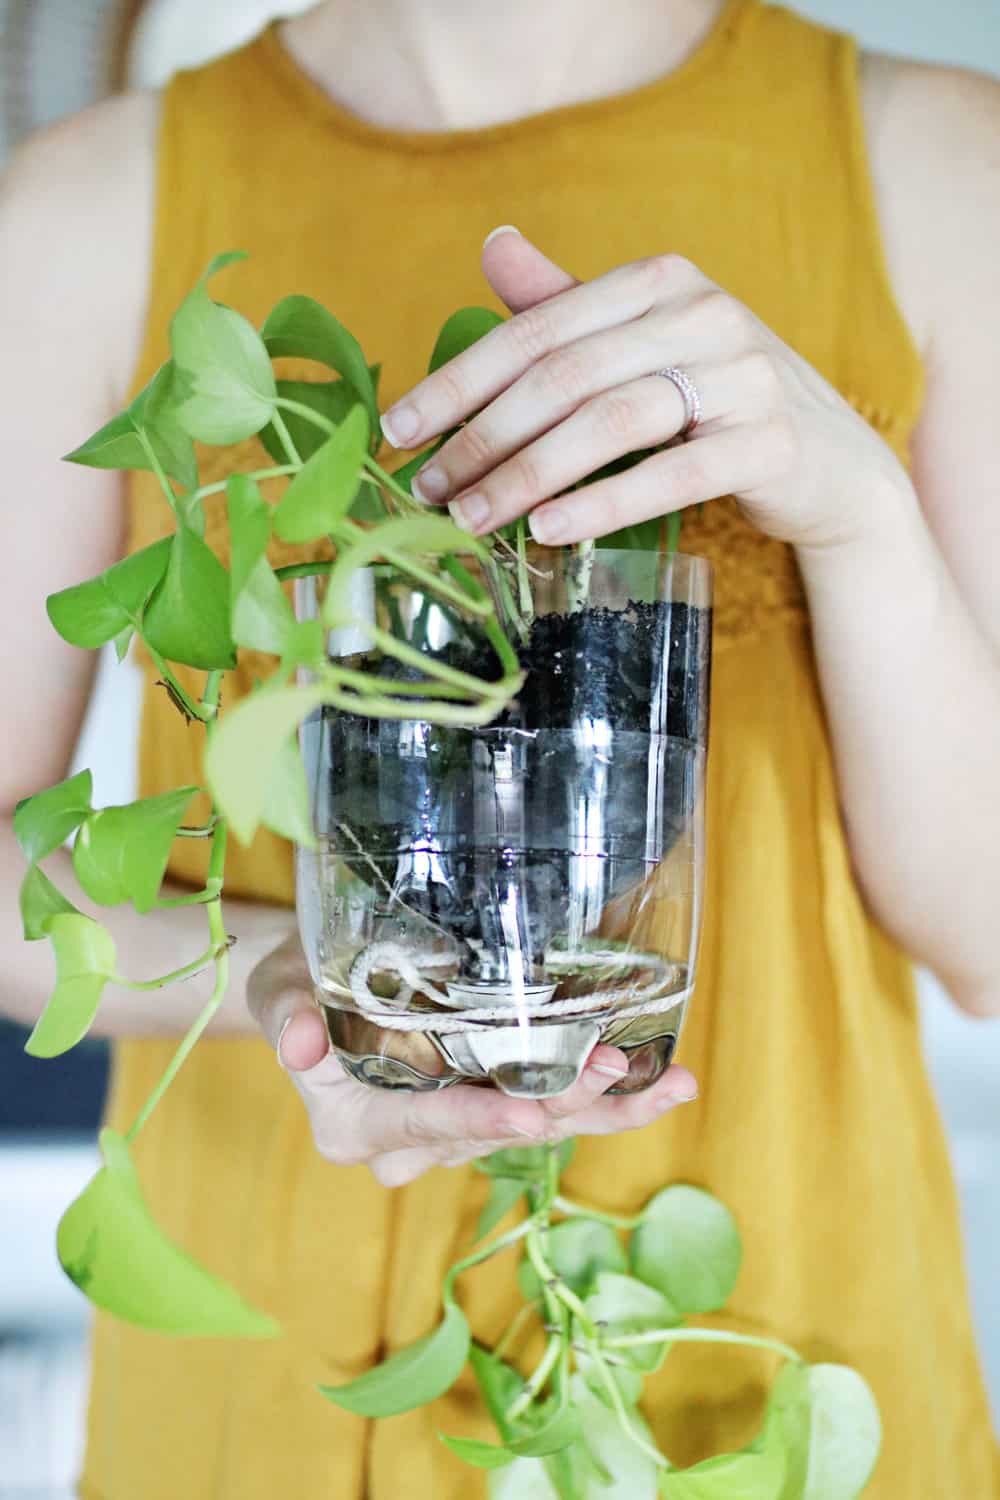
For medium-sized plants, you can turn an old plastic bottle into a self-watering planter with just a wick and a water reservoir. Trust me, it's much less complicated than it sounds.
Materials
- 2-liter soda bottle or plastic milk jug
- 24-inch-long piece of cotton string
- Scissors
- Phillips head screw driver
1. Cut the bottle in half.
2. Remove the plastic bottle cap and punch a hole all the way through using a screw driver.
3. Feed the cotton string through the hole, stopping so that the cap rests at the 12-inch mark. Tie a knot on either side of the cap so the string can’t shift.
4. Feed one of end of the string through the neck of the bottle and screw the cap back on.
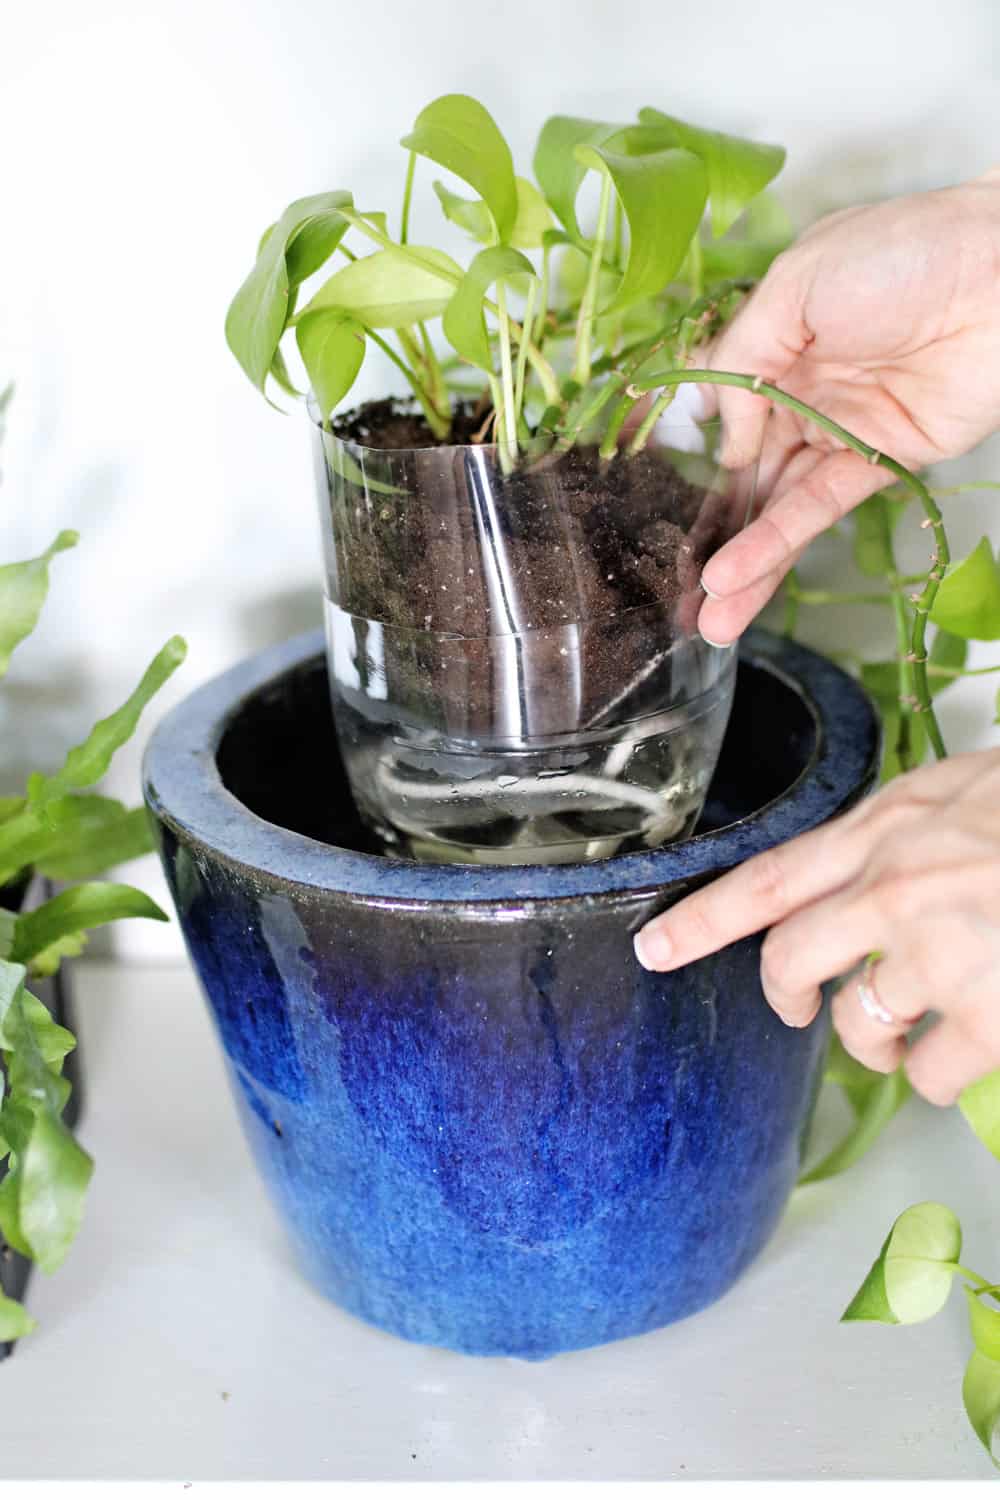
5. Fill the bottom half of the soda bottle with water, then invert the top half so the cap is pointing down. Nestle it inside the bottom half so that the loose end of the string submerges in the water.
6. Fill the top half with the potting soil and your plant. Water consistently wicks up and into the soil, helping keep it at just the right moisture level.
If you don’t like decorating your house with plastic soda bottles, simply tuck the planter into a larger pot and voila! Form meets function.
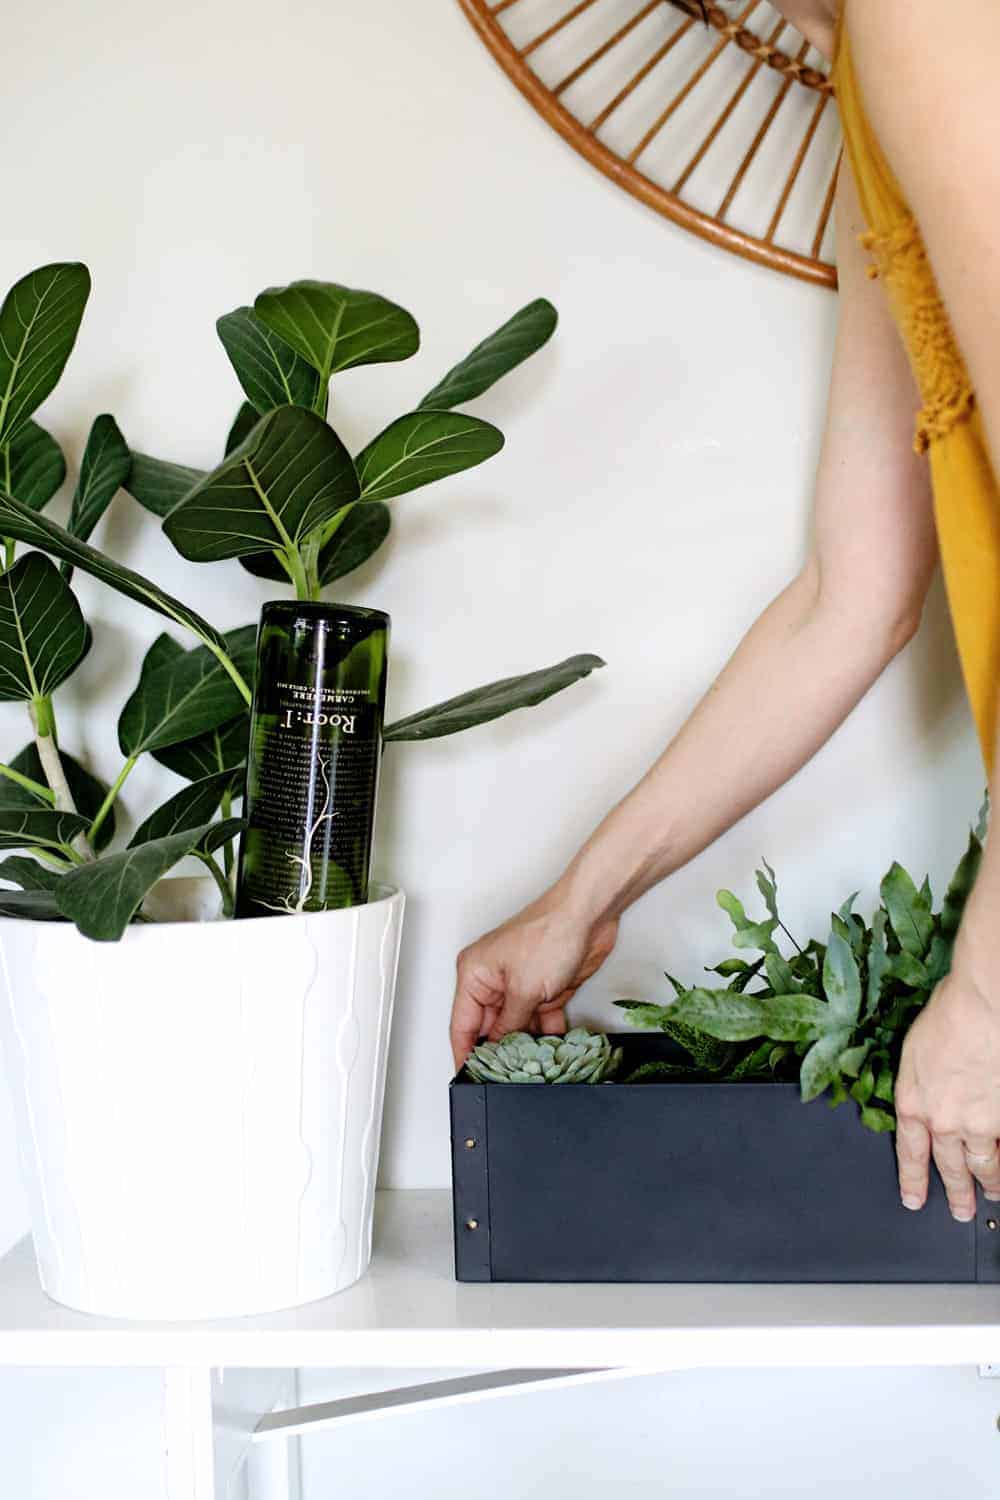
4. Wine Bottle Drip Irrigation
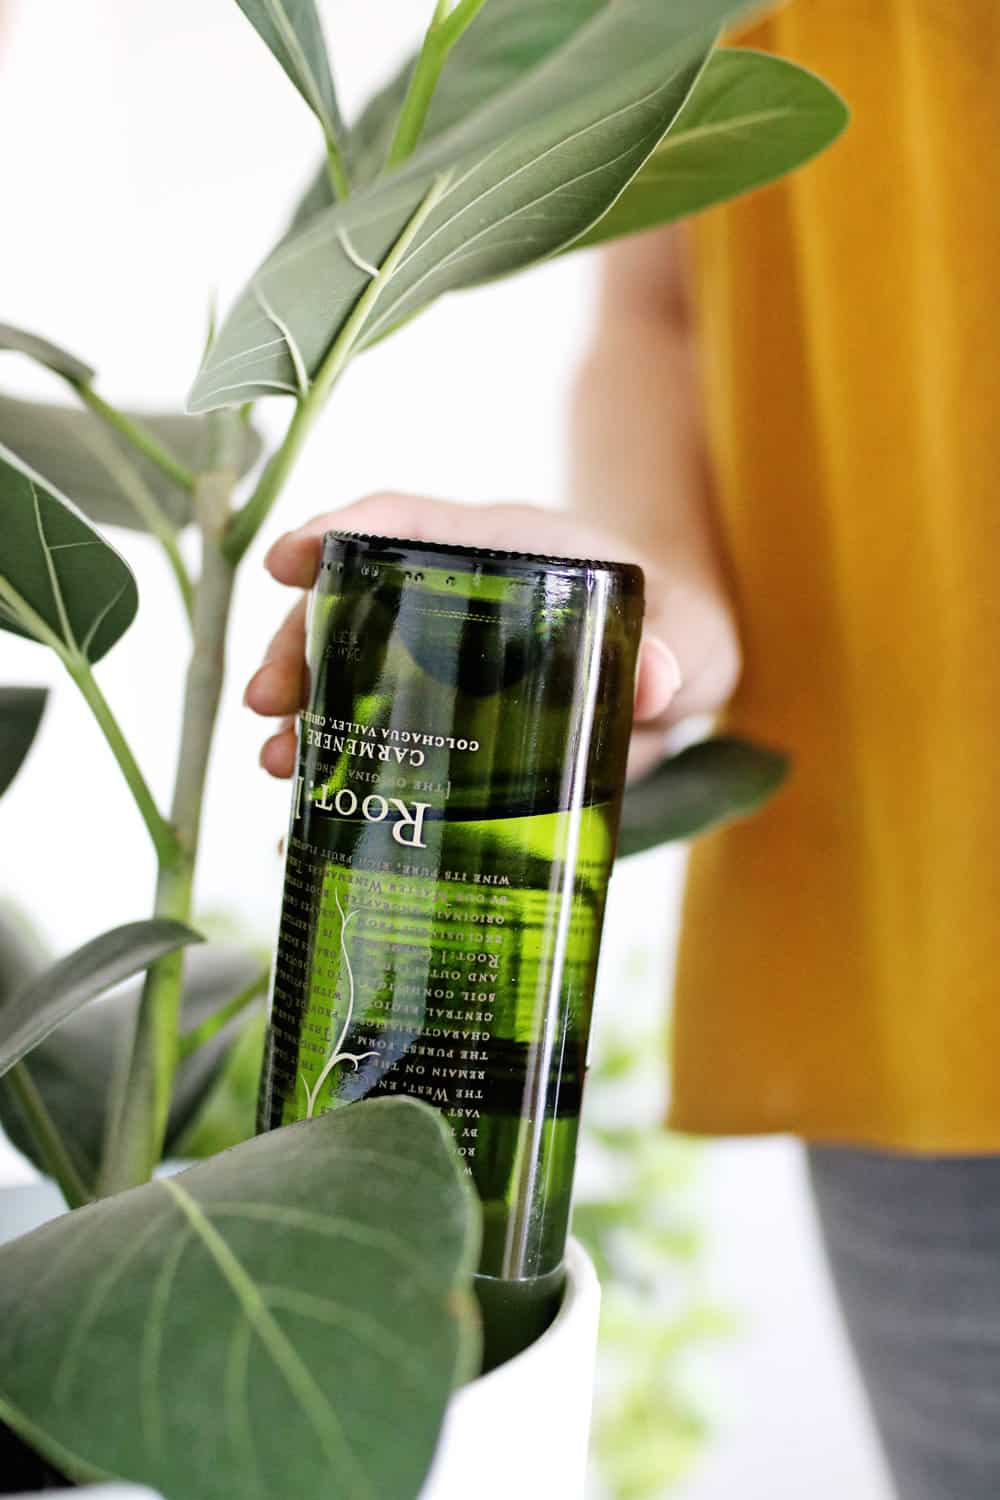
A wine bottle makes the perfect drip irrigation system for larger plants. Simply punch a few holes in the cap, fill it with water and invert it in the potting soil so the water slowly drips out.
But a word of warning: you should do a trial run for this one before leaving on vacation. You want to make sure the right amount of water drips from the bottle—not too much or too little.
Materials
- Wine bottle (I prefer the kind with a screw on cap because it’s easier to refill, but you can also use a cork)
- Hammer
- Nail
1. Remove the cap from the wine bottle.
2. Gently hammer 2-3 small holes into the cap. If using a cork, hammer the nail lengthways through the cork.
3. Fill the bottle with water and replace the cap. Invert the bottle to make sure some water drips out. If you think it’s not enough, add a few more holes.
4. Invert the bottle and bury the neck about 3 inches deep in the soil. Check on your plant the next day to see if the soil around the bottle feels damp to the touch.
5. Plastic Water Bottle Irrigation
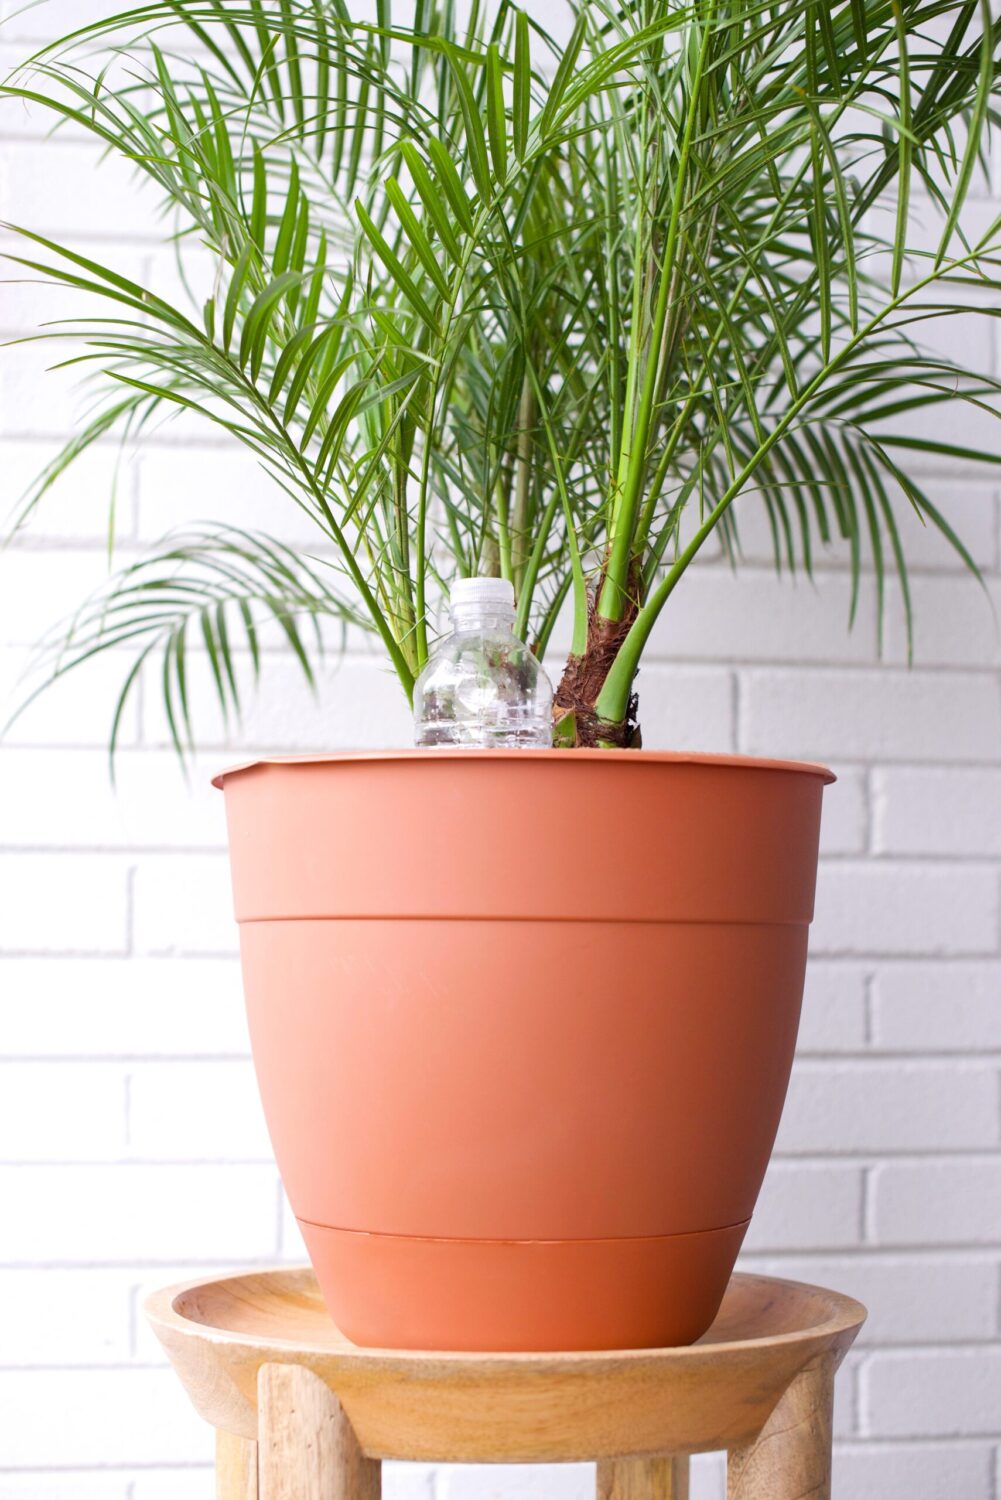
This method works much like the wine bottle drip irrigation method but is better suited for smaller plants or if you'll be away a shorter period of time. You'll simply need to punch holes in a water bottle (a hammer and nail works great), place it in the soil of your plant and fill with water.
Materials
- Plastic water bottle (size can vary based on plant size)
- Hammer
- Nails
1. Water plant as you normally would to ensure that your plant doesn't immediately drink all of the water from the bottle.
2. Using the hammer and a nail, pierce 6 holes on the sides of your water bottle and 3 holes in the bottom.
3. Bury the water bottle in the soil with the top of the water bottle facing up. Bury it deep enough that the top of the bottle sits only a few inches above the soil line.
4. Remove cap from water bottle, fill with water and replace the cap.
Self-Watering Planter FAQ
How do I know which self-watering planter method is the best for my houseplants?
Those of us who have been caring for houseplants for awhile know there's one universal truth in caring for plants: every plant is different. That's why it's best to test out your self-watering plant hack before leaving town.
If you're going to be out of town for a week, schedule time beforehand to test out your self-watering method for a week and check in regularly with your plant. If the leaves are drooping, the soil mix seems dry or if anything seems off, it's best to identify issues while you can still course correct before heading out on vacation.
Should I water my plant before using a self-watering planter?
Yes, watering your plant as usual before using one of these methods is a good idea, especially if you'll be leaving home for a longer period of time. Watering beforehand will help ensure that your plant isn't extra thirsty, which can lead to the soil soaking up the water from your self-watering method too quickly.
Will my self-watering planter cause root rot?
Unlike with some specialty self-watering pots you'll find in stores, the methods used here should not create an environment where plant roots are sitting in water, which can lead to root rot.
If you are using the pebble tray method, ensure that the water doesn’t rise more than ⅛-inch above the pebbles because too much water can create an environment where your plants' roots are sitting in water.
If something goes wrong while I'm away, can my plants recover from a lack of water?
If you return home to find that you miscalculated the amount of water necessary to keep your plant healthy and happy while you're out of town, lightly water the plant and try keeping it out of direct sun until its root have a chance to recover.
How will you know if your houseplant is on the mend? Its leaves will perk up and return to their normal color, and when you stick a finger about an inch deep into the soil, it will feel damp to the touch.
785

