
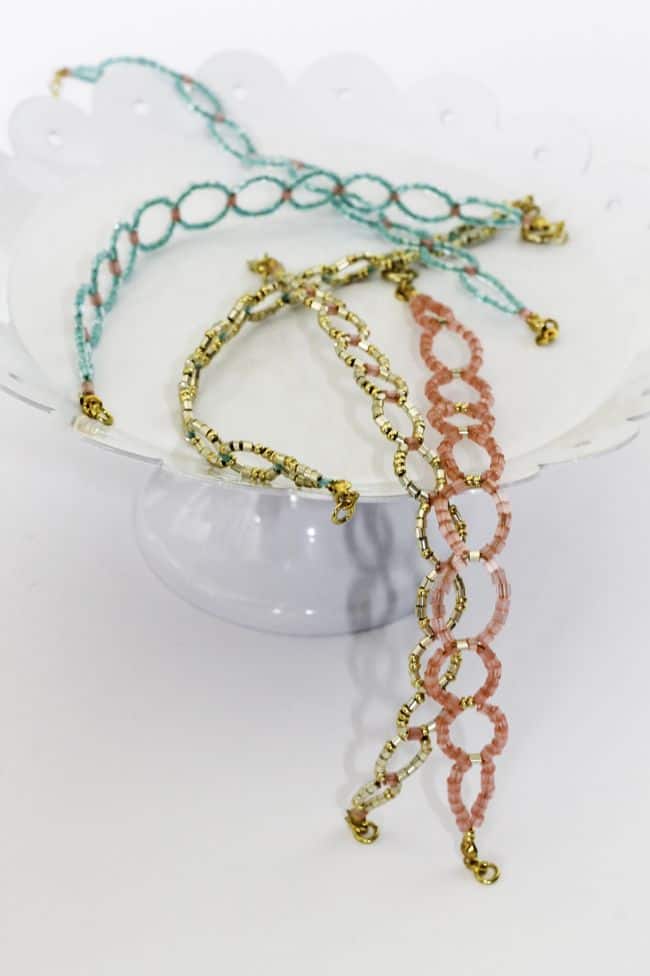
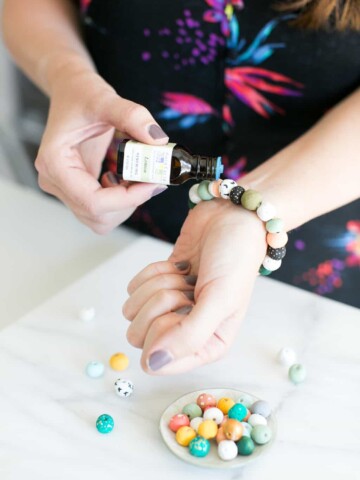
 I’m so pleased Stephanie has invited me back to share another tutorial with you all. This time I have used tropical colored seed beads to create these really pretty bracelets. I like to mix and match my bracelets and these look great worn together, but if you like to keep things simple, one individual bracelet looks fab too. It's such an easy way to brighten up an old outfit. You would have seen plenty of these projects on Pinterest (or this website!).
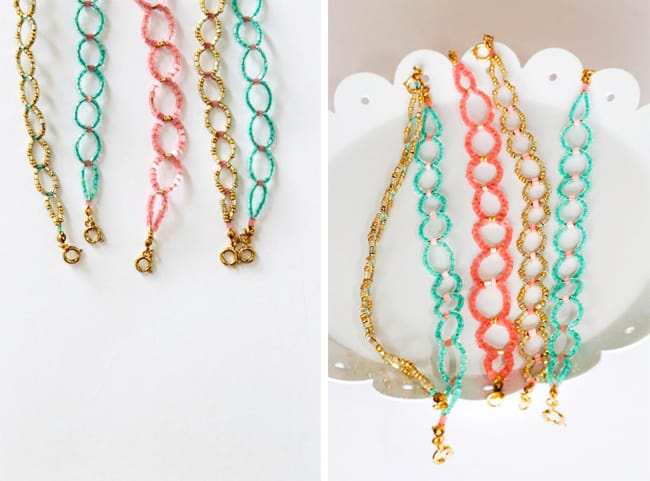 Even though this tutorial has many steps, I promise it's really easy! Once you've made your first bracelet and got the hang of it, it's gonna be hard to stop reaching a full on arm party. I had the best experience making these.
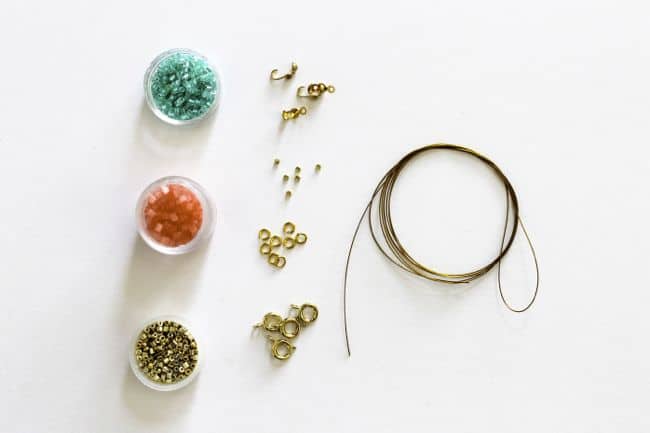 Supplies needed:
- A selection of colored seed beads
- side-hinge calottes
- 5mm jump rings
- bolt fastening
- tiger-tail
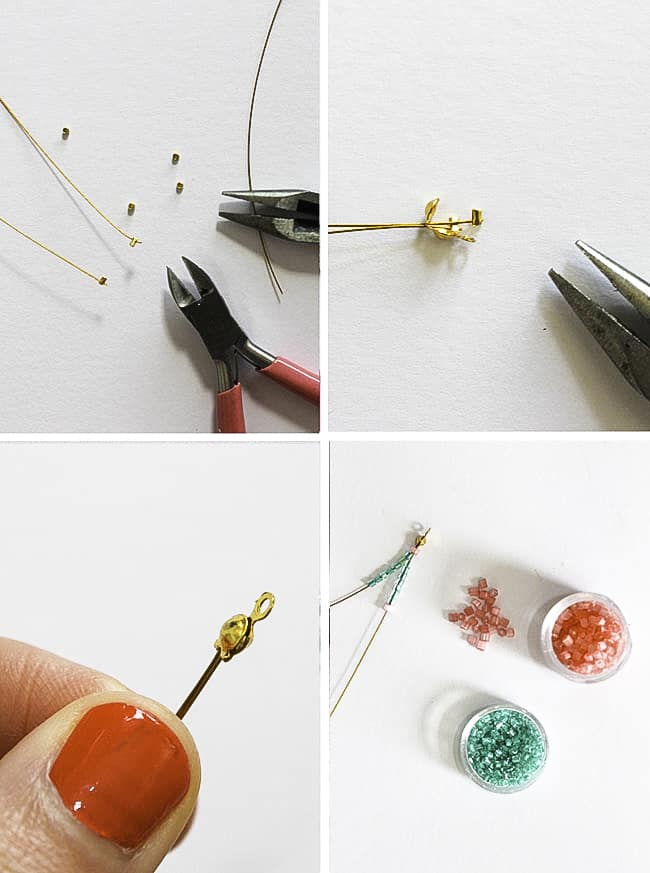 Step 1. Cut two lengths of tiger-tail 50 cm long. This will be far too much but I always think its best to go over for the first bracelet and then adjust the length for the following bracelets you make. Add a crimp to the very end of each piece of tiger-tail, squeeze tight with a pair pliers to close
Step 2. Thread both pieces of tiger-tail through the calotte.
Step 3. Gently close the calotte over the crimped ends.
Step 4. Tread a bead onto both pieces of tiger-tail. Add 7 seed beads to each strand. Add one contrasting bead to one of the strands, it doesn’t matter which one.
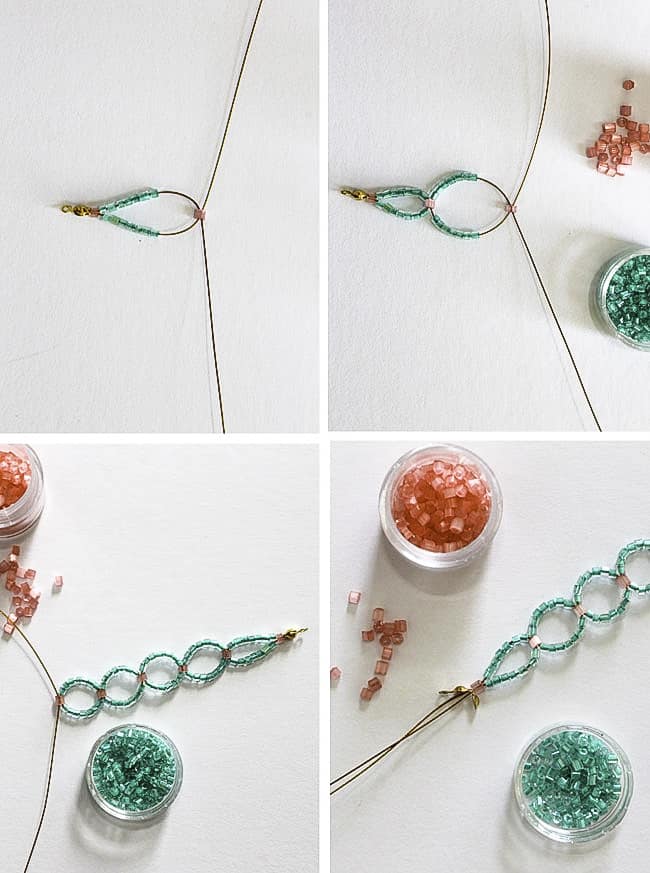 Step 5. Taking the length of tiger-tail without the contrasting bead, thread through the contrast bead in the opposite direction. This will form a loop, pull the ends gently so there are no spaces between the beads.
Step 6. Repeat steps 4 – 5 to make a circle shape.
Step 7. Repeat the above step along the length of the bracelet, mine had eleven complete circles with a tear drop shape either end. Depending on the size of your wrist you might want to have more/less circles.
Step 8. Thread 7 seed beads to both lengths of tiger-tail. Thread both lengths of tiger-tail through a contrast bead followed by a calotte and then a crimp to either length of tiger-tail.
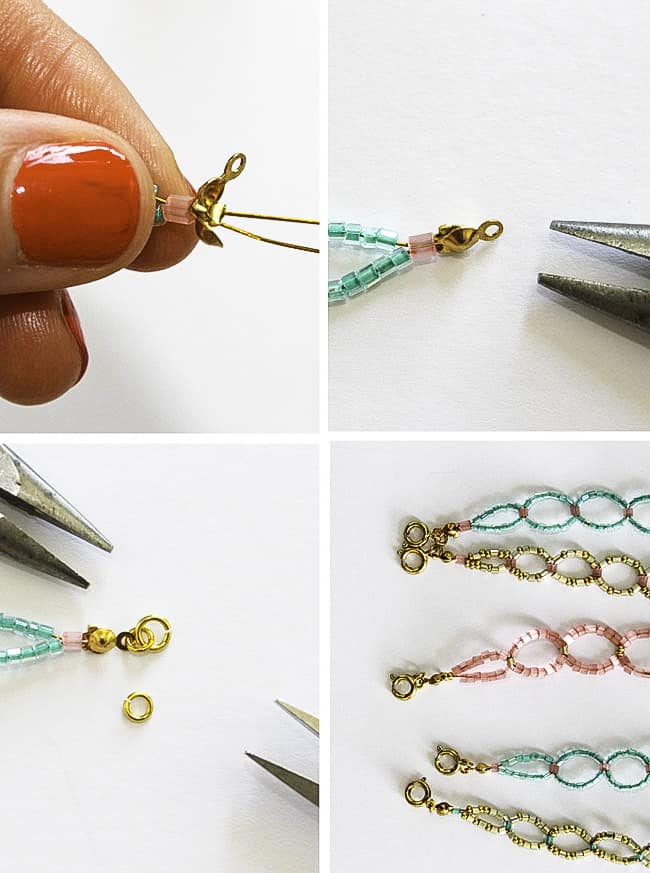 Step 9. Make sure the beads are sitting close together and then squeeze each crimp closed. Snip off any extra length of tiger-tail.
Step 10. Close the calotte over the crimps.
Step 11. Add a jump ring to one end of the bracelet.
Step 12. Using a jump ring add a bolt clasp to the other end of the bracelet.
 I hope you have enjoyed this tutorial - the bracelets use very few beads so they are an easy way to use up any bits and pieces you have in your craft supply box. Happy making!
Frequently Asked Questions
What are seed beads?
Seed beads are small, cylindrical beads that come in various sizes and colors. They are often used in jewelry making, including making seed bead bracelets. You can find plenty of inspiration for projects with seed beads on Pinterest, or this website.
How do I make a bracelet from seed beads?
To make a seed bead bracelet, you will need seed beads, spacer beads, beading thread or string, a beading needle, and a clasp or closure. Start by threading your needle with the beading thread and stringing the seed beads in the desired pattern. Once you have reached the desired length, attach the clasp or closure to finish the bracelet. You can add different spacer beads for a chunkier look as well.
What are some suggested patterns or designs for your bracelets?
There are countless patterns and designs you can create with seed beads to make unique and beautiful bracelets. Some popular patterns include peyote stitch, brick stitch, herringbone stitch, and right-angle weave. You can also mix different sizes and colors of seed beads to create your own unique designs.
How can I ensure my seed bead bracelet is secure and durable?
To ensure that your bracelet is secure and durable, it's important to use a strong beading thread or string and to reinforce the ends with additional knots or crimps. You can also apply a small amount of clear nail polish or jewelry glue to the knots to add extra security. Additionally, avoid excessive pulling or twisting of the bracelet, and store it in a safe place when not in use to prevent damage and make sure they work correctly.
170
Lady Dem says
Wow I am a designer I have made similar pattern for chokers never thought of bracelets , very clever. Thank you for a great tutorial.
Darlene Goetz says
Hello Martyna I just wanted to say I love your name! My youngest daughter's middle name was Martyne and I've Never Seen Any Variation Of It Before Now...
Debbie McCathern says
I love this pattern, I made the bracelet and then made a choker necklace for myself and then for my granddaughter for her picture day. I don't like to work with wire much but this is so easy I can whip several in one day if I want. Thank you so much for this pattern.
Katherine Andrews says
I LOVE the way you present your projects. Very easy for those who cannot understand the more advanced projects. If I were to do this it would be a lot like this. Thank you for great ideas.
Sheila Wilkins says
Hi Charlotte,
Thank you for a really lovely design I will definitely try it out.
I had to have a sort through my findings box and I actually have a bag of
calottes. They have just been sitting there as I have never used them.
What thickness wire ? I usually use 0.38mm 19 strand beading wire as it is a lot softer than the 7 strand as fine beading chain does not crimp very well.
I have also "discovered" memory wire recently and the pile of bracelets
is rapidly growing!!!
Once again many thanks from a sunny, frosty Rothwell in Northants,UK
Love
Sheila
Nana says
Pretty sweet bracelet you made! I really into it :)
Great! Thank you for sharing your ideas!
nancy says
what is tiger-tail? can you use anything else?
Laura says
thank you so much! I love the different colors, and can think of so many other color choices as well. Very well written and photographed; I just have to check my ruler to see how long 50 cm is in inches, easy to do!
annie says
It's easy and so much fun project to do. and I can add my own little twist with it :)
annie says
Thank you for the DIY. It's so easy and fun to do. I made my own based on it but adding my own twist by wrapping two seed bead circle bracelet into one :)
annie says
It's so easy and fun to do. I made my own based on this DIY but I added my own twist by wrapping two seed bead circle bracelets into one.
Jennifer says
These are so pretty and the colors you chose are yummilicious (? best way for me to describe it...lol)
Charlotte @ Lotts and Lots says
These really are simple, I hope you all give them a go!
Charlotte xx
elle sees says
gorgeous! so dainty and cute!!
Susanna says
Pretty! Thanks for sharing this
samantha says
so pretty and you have such patience. I could only do this with giant sized seed beads.
Kelsy says
Love the colors. So so pretty!
~Kelsy
Sonnet says
These are so cute! I have a million seed beads that are just sitting in my craft supply waiting for a purpose. So glad I finally know what to do with them! :)
Claire @ Claire K Creations says
So pretty! I don't think you could stop at one because you need this gorgeous colour combo!
lafeechampote says
Thanks, i like !
Debbie says
where I work we call that end piece a clam shell end tips (aka calotte)
Necole@seriouslysassymama says
These are so pretty!
Angie@Angie's Recipes says
These are really adorable!