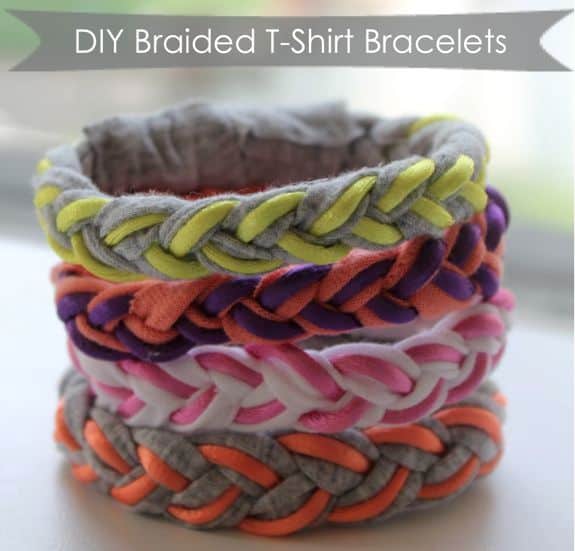
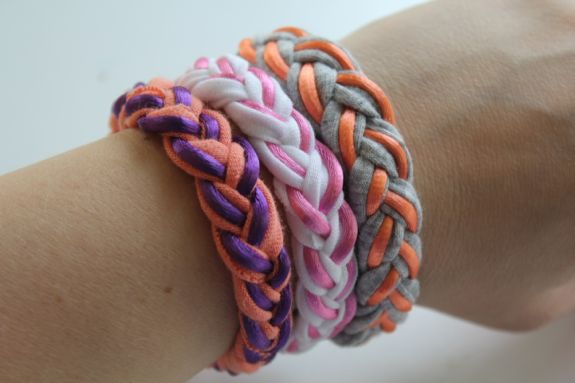
Here’s the DIY I promised last night! I spotted these pretty Roarke NYC braided bracelets in Elle magazine and loved their bright, feminine colors. I wanted a bunch of braided bracelets to wear stacked on my wrist but $60 each was out of my reach.
I’ve made braided bracelets before – like this cool braided bracelet and even a necklace – so I figured how hard could this braided t-shirt bracelet be? The price tag of these braided bracelets alone was a sign for me. Turns out it’s pretty easy and a great craft project. Otherwise, let’s be honest, I wouldn’t have figured it out. And it’s saves you money! Yahoo! Braided bracelets look good with virtually any outfit, and it’s a great way to reuse the old t-shirts you or your kids have outgrown. If you want to make your own DIY braided bracelets, keep reading. We’ll show you how.
You can use any colors that match, but I love how striking pink, purple, blue and green looks when combined with a simple grey or white T-shirt, but you can also play around with one color, e.g. using different shades of yellow, orange or brown. Explore your options with a color chart or by laying the different strips of fabric cut from your old clothing next to each other to see which ones match.
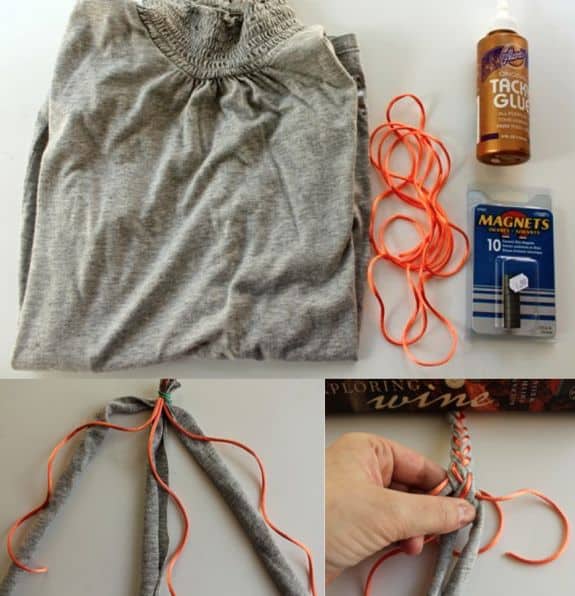
You’ll need:
- Cotton or jersey T-shirt you don’t mind cutting up. Or you can pick up a shirt at Goodwill. White and grey make good base colors for pastel or neon cord, but you can use any colors that match.
- 1 yard of rattail cord for each braided bracelet. You can find lots of fun colors at JoAnn’s for 50-99 cents a yard.
- Magnets. I got a package of 10 for $2.
- Glue. Either hot glue or tacky glue or both.
Instructions:
1. Cut the shirt into 3 strips roughly 1-inch wide and about 12 inches long. These make up the strings of the bracelet. But don’t stress cutting this precisely. The ends will roll in so you don’t need it to be pretty.
2. Cut the rattail cord into 3 10-inch strings.
3. Anchor the top with a bobby pin or rubber band, separate into 3 strings, and start braiding.
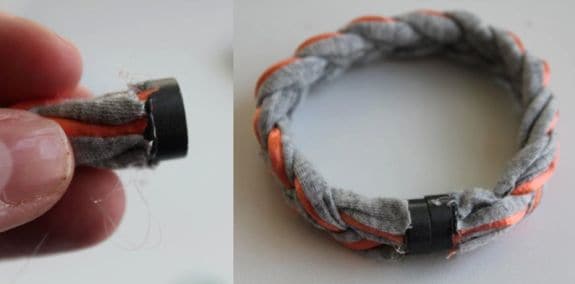
4. When you get to the end of the braid, snip the ends, bunch all of the pieces together, and glue the magnet to your braided bracelet or friendship bracelet.
5. Do the same to the other end. Wrap it around your wrist and make sure you have the right length before attaching the second magnet.
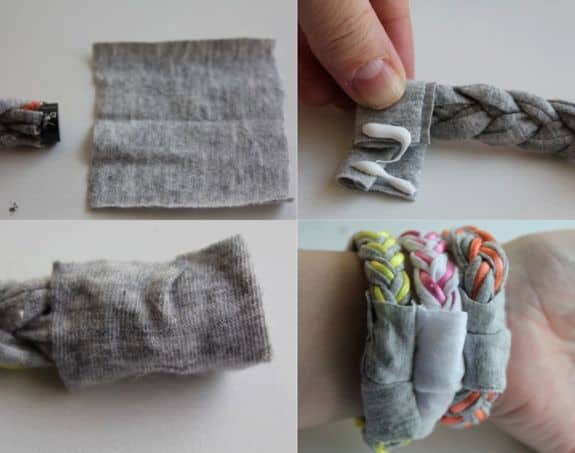
6. Cut two little pieces of fabric to cover over the magnet ends.
7. Fold the fabric over the magnet and glue together and your braided bracelet or friendship bracelet is done!
Variations
Now that you know how to make a braided bracelet, you can start making a few variations to give away as friendship bracelets or just to pass the time on those rainy days where your hands are itching for a new craft project.
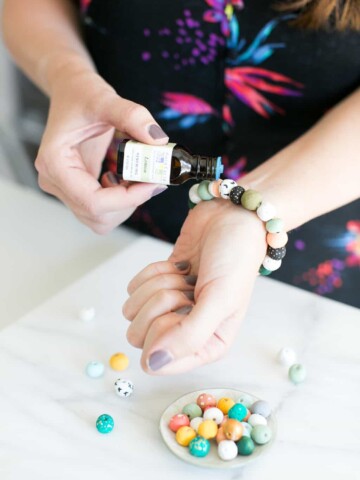
One variation that I really love is one where you use string or embroidery floss to create your braided bracelets. Embroidery floss is a smooth cotton string with a nice shine. It’s available in neon and metallic, so you can create them in any color scheme you like. I like DMC‘s embroidery floss range but you can use any other brand you like. Embroidery floss is much thinner, so if you are making braided bracelets I’d use a safety pin to move the outer string to make your braid of your friendship bracelet.
What do you think about these funky braided bracelets? Would you make one? What colors would you use?
FAQs About Braided Bracelets
What are braided bracelets and friendship bracelets?
Braided bracelets and friendship bracelets are types of jewelry that are made by weaving or braiding together strands of thread, string, or other materials to create intricate patterns and designs. Braided bracelets are considered a symbol of friendship or a meaningful connection between individuals.
How are braided bracelets and friendship bracelets made?
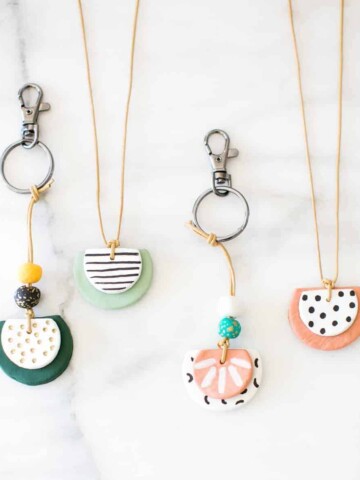
There are several methods for making a braided bracelet or friendship bracelet, but it usually involves weaving several strands of material or threads together in a special design. Some braided bracelets and friendship bracelets may also incorporate beads, charms, or other decorative elements. They are a great way to repurpose old T-shirts.
What materials can I use to make braided bracelets and friendship bracelets?
You can use cotton thread, nylon cord, leather, suede, silk, hemp, embroidery floss, or even metal chains. The material you use can affect the durability, comfort, and overall appearance of the bracelet, so choose carefully. If you are making a friendship bracelet, it’s worth taking a look at the symbolism behind different colors. Pink can symbolize childhood, blue means freedom, green means new beginnings while purple can mean magic! Your friendship bracelet can also contain charms that carry special meaning to you or your shared history with your friend.
How can I wear and style braided bracelets and friendship bracelets?
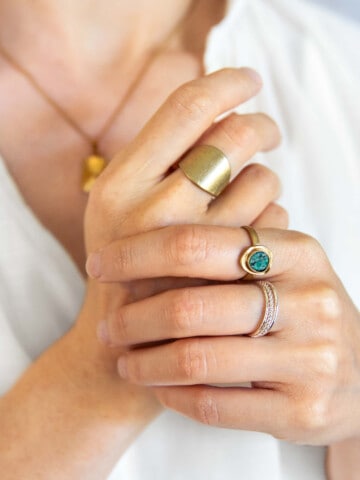
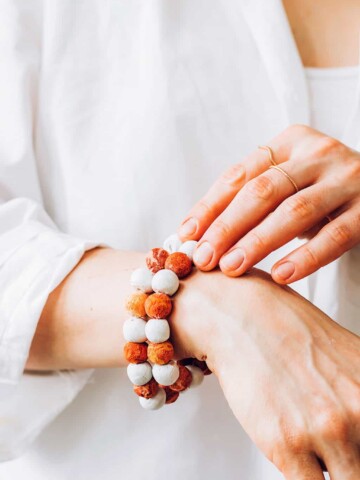
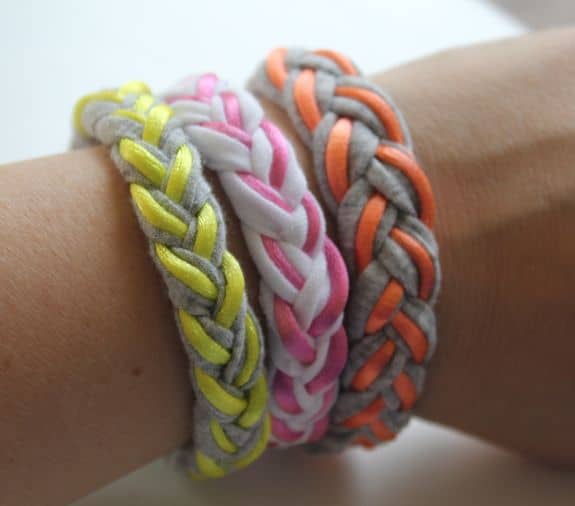
Braided bracelets and friendship bracelets are really versatile and chic. They can be worn individually or stacked together for a trendy layered look that match any outfit. They can also be combined with other types of bracelets, watches, or jewelry to create a unique and personalized arm candy! They can also be worn by men and women!
What’s the best way to gift a friendship bracelet?
Giving a friendship bracelet can be a special gesture to show someone that you care about them. You can give a friendship bracelet as a gift on special occasions like birthdays, graduations, or holidays, or simply as a spontaneous gesture of friendship. You can tie your friendship around your friend’s wrist, or even attach it to a card or a small gift to make it extra special.
290
Wow, very pretty, though very simple!
Great braided designs . Very casual!
My page: Costume Jewellery
Love the site!
Kate
So cute I’m so going to do this. <3
If you want to make these with kids and don’t have dry time use duct tape. I had kids rubber band the 6 pieces together and duct tape to the table, braid, add another rubber band to the end. I pre cut strips of duct tape ( they have lots of pretty stuff) Grey t-shirt matches the regular grey duct tape. Have them tape tightly next to the rubber band. Take band off, cut ends and then the 3rd piece of tape to tape the 2 ends together. No need for the magnet!
You need a picture tutorial for this. I would LOVE to see it!
I love this idea- it’s simple and non-expensive!
I love your blog! This project is so much fun! I tried it using my favorite Turks Head knot tutorial. It makes a bracelet using only one length of T-shirt yarn. I hope this helps, expense and look wise. I’ll be tuned in for more great crafts!
love it! I’m definitely gonna make this <3
very cute. I make knots on the end of mine and attach a jump ring on one side and jump ring attached to a lobster claw and there you have it. I like this magnet thing as well. they do have magnetic closeres as well. gotta love craftyness! love it:) very nice colors:)
when you do the magnets is it supposed to be magnetic or is it just supposed to hold together?
Is there a trick to braiding with the raittail cord? When braiding only 2 of the strands appear on the bracelet.
Love these bracelets….thanks for sharing!
make sure the colorful cord is directly on top of the t-shirt strand, you gotta keep that in place :)
i just saw this via pinterest & i am so looking forward to making these! i got a giftcard to michaels for christmas & i am heading there as soon as i can to pick up some supplies. you are so creative and talented! i love crafting, but i’m only good at following what others have already “invented”. thank you so much for sharing this and giving such a wonderful tutorial! do you think hot glue would work just as well as tacky glue?
Love these! Just a thought for those having a problem with magnets. Magnets have a positive and a negative side. So make the strongest connection before glueing
I’m doing a fundraiser at my school to help the victims of hurricane Sandy. We decided to use this idea for bracelets and they turned out GREAT! It’s going to be hard to put them up for sale because they’re all super adorable! Thanks for the idea!
That’s fantastic! What a great idea, thanks so much for letting me know :)
Thank you so much Bonny!
what size are the magnets
I would use neon colors base: white, gray, or black!!(:
Hey! I am doing adoption fundraisers for our international adoption, would it be okay if I used this pattern to make some bracelets for people to buy? They totally rock!
Of course!
I found this on Pinterest and tried it with my 10 yr old step-daughter… SO CUTE, SO FUN AND SO EASY!! I bought the same brand (i think) of magnets and they worked FABULOUS! Although they were a little $$ at the little hardware store so I’ll be hunting for a better source…. Thank you so much for sharing this idea!
Thank you so much for stopping by to let me know Jennifer! I’m so glad you and your daughter had fun making these!
Where did you buy the magnets?
I bought mine at a local craft store – you should be able to get them at Hobby Lobby, Jo-Anns or Michaels.
On estimate how much would 9 bracelets cost to make?
Probably less than $5 if you use t-shirts that you already have on hand.
This is awesome. Can I use your idea and use it for a livelihood project for mothers that needs extra income?
of course! link to the post if you like.
I’m pinning this so I can make it later!!
Would another tshirt work in place of the cord?
Great tutorial though! Ingenious idea :)
~H
Make sure to use high setting on glue gun and extra strong magnets. Awesome project:)
Made w/ red tee and black wool, came out great. I didn’t use magnets but I knotted one the ends and slipped one through the gaps in the plaiting, so it is really easy to adjust
sounds great!
what did you use to cut your shirt i used regular scissors but everything just got uneven and it was just a mess .. could you tell me what you used to cut your shirt and btw that is a amazing bracelet :D
just regular scissors! perhaps it was the fabric?
Could you tell me where you found the magnets? Or the exact name for this type magnet? I love the bracelet and love that you are willing to share!! Thanks.
I love this! A great craft for my girls and I this summer!
Hi Stephanie!
I loved this idea. I’ve done one in grey and an orange cord, just like yours and it looks great. Only I didn’t had magnets at home and decided to tie it to a ring and a “hook”. I loved the look and just didn’t like that the piece of cloth is stretchy and the cord is not. ;)
Thanks for sharing! Great blog! :)
xo,
Sofia
Amazing!! Never thought of this – why get ripped off $60 when we can do it at less than a fraction of the price?!
What is rattail cord? Is it the same as parachute cording?
Hello,
I love these, got all my supplies and glued my magnets on with hot glue… And they are weak now, they were very strong till I glued them on. I am so confused. What am I doing wrong?
Did you glue the magnets on backwards by any chance? Or cover them up with too much fabric? That’s the only thing I can think of … let me know!
I love this! I couldn’t find magnets here in my town (small place where hardly anyone crafts) so I decided to sew the ends together…and then just finish it off the way you did…with it wrapped with the extra fabric. It slips on and off my wrist pretty well, and I have a chunky hand!! Thanks for this tutorial!!!
I think that doing a loop/knot would not only look better, but would also secure it on better…..
Tracy, you need to learn how to give feedback. Although your comment is helpful, it is very unkind in its delivery….
Thank you for the tutorial, Stephanie, I happened upon your site from pinterest. Great job!
I think this is really interesting and i have tried it out. It is a really cool idea so thank you Stephanie! It was really good! :)
Thanks guys :) I tried knotting but there’s so much fabric that I starts to get really bulky. But do what works for you!
Did you have any trouble with keeping them on? My magnets seem weak! If I jerk my wrist or thrust my arm it goes flying! Just wondering how these were for every day wear on you… Could you email me back & let me know?? Thank you so much! Paula
This problem might have been caused because you did not glue on the magnets properly. If you do glue the magnets properly, Paula, it would not go flying under any circumstances. I hope that i have answered your problem. :)
Love the pop of color with the cord added in. Might have to teach my 6 year-old how to make these this summer!
Where do you buy the cord?
you can find the cord at JoAnns for around 50 cents a yard, they have amazing color selection!
I’ll be featuring you Tuesday night at the beginning of {wow me} wednesday. You were one of the most viewed links at last week’s party. Yay! Thank you so much for linking up!
Ginger @ gingersnapcrafts.com
Love the magnet part.. the braid like you said we have done that.. but the small style and the closiure.. yah-hoo!! Making for the kids in my life.. all kinds of sizes. Five yearolds to 23. I know some will love these. and the colors!!
I pinned this for my daughter thanks:)
I’m going to save/pin this project for 4H kids to do this summer.
Oddly, though, there is some box that shows up on your website in the instructions that blocks out part of the text on numbers 4 and 5. Can you see that?
Judith
Very cute idea.
Love this – it is SO cute, and I have so many scraps of knit just waiting to be used up :-)
I love that you used magnets to close them. Great idea!!
It would be a great idea of covering the magnet.This would be a fun project for my tween!
Wonderful idea…..I just had to make one or “several” I went right to Jo-Anne fabric today and supplied up. A couple things I did was, when done braiding I kept rubber bands on each end, snipped it evenly and glued on my magnets. Turned out perfect, and also make sure cord i held in place on top of fabric. Thank you so much for the wonderful craft idea.
oh these are fantastic! what a great way to keep a little bit of my daughter’s favorite shirts as she outgrows them. i do have one concern though. the magnets are a quick and simple idea, but they could demagnetize your computer, phone, credit cards etc……has anyone had this problem??
I haven’t made them yet, but I assume that they are not super strong, and probably not even strong enough to affect those items… but I could be wrong…
really cool design n diy! i love the magnetic clasp idea
Love this idea! I’m going to use my daughters baby shirts and make her some bracelets.
I love these! I’ve seen braided t-shirt bracelets before but the color you added in makes all the difference to make them really unique. I”m adding this to my to do list!
wow! i can’t wait to make some of these for my girls! and a great party craft and favor! thanks for sharing!
Featuring Thursday at Bacon Time!
I love the closure on these! My daughter and I were just looking up pics and how to’s yesterday to try some! Thanks for posting!
Really like these. I like the cord you put in them too.
so sweet love these!!
I had actually just ordered some large ribbon crimps to try something like this, the magnets a great idea. I will be trying this one!
I LOVE these! I actually repinned this from pinterest the other day, and then clicked on your blog from your comment on mine. : ) can’t wait to try these!!
I am so gonna be making these for my grand-daughters! And the are simple and very inexpensive to make…thank so much for sharing..
what a great idea for all those t-shirts that don’t ever get worn. I love this idea, kids would love to make these too. I would make them in fun pinks and green!
Tweeted 533 times?! WOW! It looks like you have a popular post on your hands. :D And I can see why–this is ingenious! I think I’ve seen those bracelets before too and I liked them, but never gave them a second thought because anything over $20 is more than I will spend on jewelry.
this is so genius and they are SO pretty! Plus, no sewing and only the tiniest bit of DIY skill involved. perfect!
Wow! You’re a pro because this looks super good!
I love the colors you went with! Fab, fab, fab.
Oooh I love these – they look so chic! I can’t wait to try them out.
Love all of your DIY’s and this doesn’t disappoint! So much fun! Pinning!
Great idea Stephanie. I could use something like that as a hair band. I love the braid look.
Very cool! Yes, I’d love some please! You’re a natural with jewelry. Next step-original creations by Steph!
SO entirely cute. I just saw some of these at Urban Outfitters today and they were about $35.00 each, I’d much rather make my own:)
Very cool! I have seen these on Pinterest and have thought about making them! Your turned out really nicely! Love the colors!
adorable
can’t wait to try this
brett
You’re such a clever, crafty little thing Stephanie. These are lovely.
Anne xx
so cute! I love the magnet closure idea.
I love this. Another fun craft for my girls!
Fun fun fun! My daughter would love these! Pinning them!
This is truly fabulous – brilliant work!!
So cute, Stephanie! This would be a fun project for my tween!
Oh my goodness, I need a few of these asap. :)You are so creative, love this!