A few weeks ago I bought way too many flowers for this project. So we’ve been planting like crazy, and, wow, the backyard is so much more inviting. Garden crafting is definitely a good motivator for giving your green thumb a workout. So if you have lots of nail polish sitting around at home here’s an easy project to get crafting and get planting.
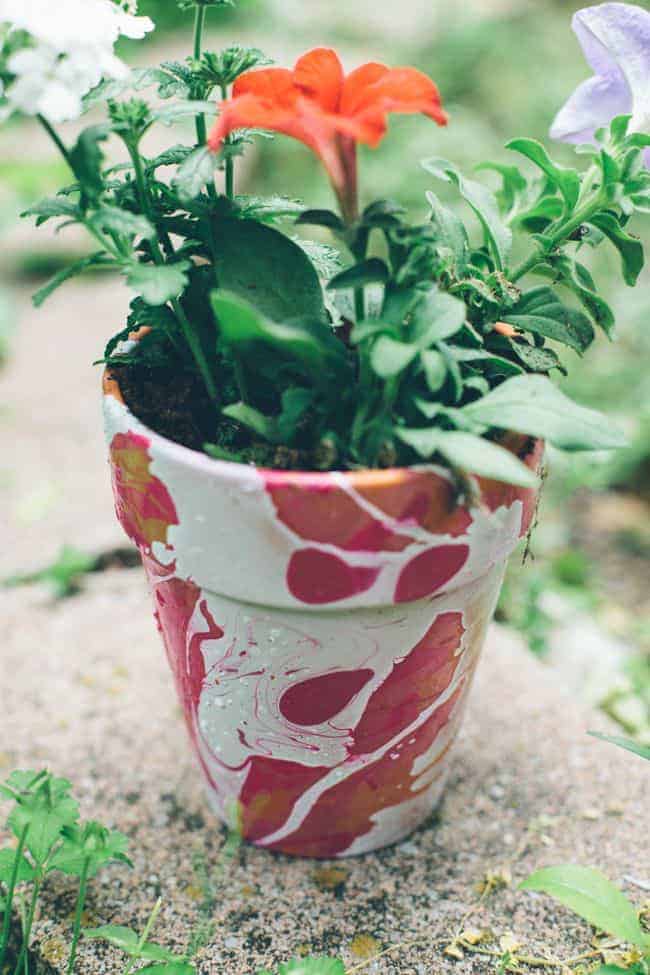
DIY Planters with nail polish marbling
I kind of love nail polish – but not really for my fingers. After experimenting with eggs and wine glasses, the entire house is in danger of being marbled. This project requires more polish that you might want to part with though. So stock up at the Dollar Store for white, turquoise and some bright pinks.
Supplies:
- Planters. I used my old terra cotta ones but I’m pretty sure this would work on any surface.
- Nail polish.
- Big bucket of water.
Step 1: Fill the a bucket about halfway with water and let it come to room temperature. It’s best to do this outside so you have good ventilation.
Step 2: Liberally pour in nail polish. Let it spread out over the water as much as possible. You can help it move with a tooth pick or even just shaking the bucket a bit. The more surface area of the water you cover the greater coverage on the pot.
Step 3: Dip the pot in the water. I found it worked best to dip the pot on its side and let the polish wrap around the sides. If you don’t cover the entire pot in one dip, then dip again if you like.
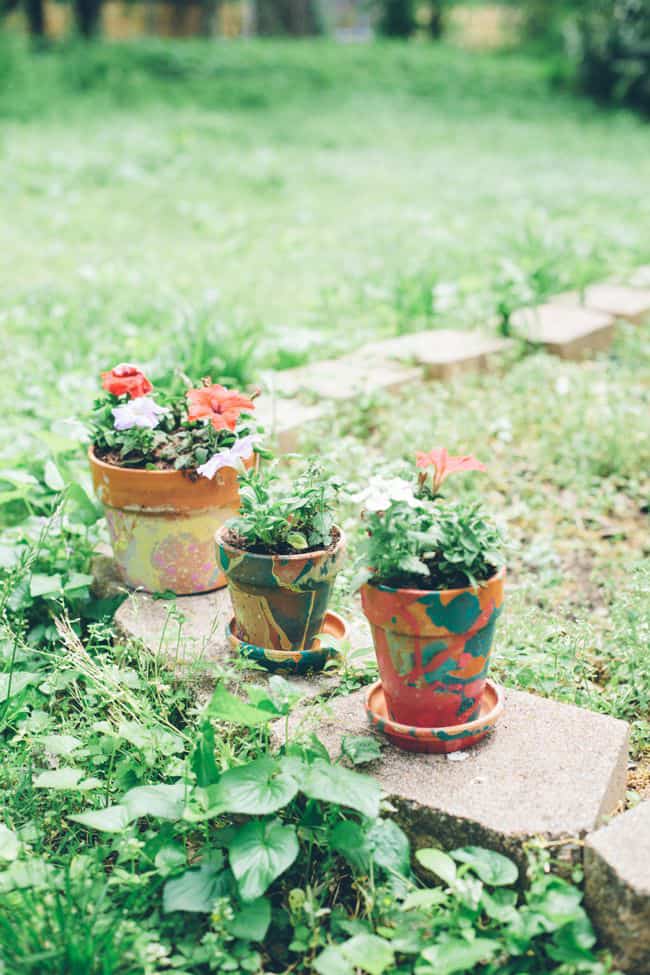
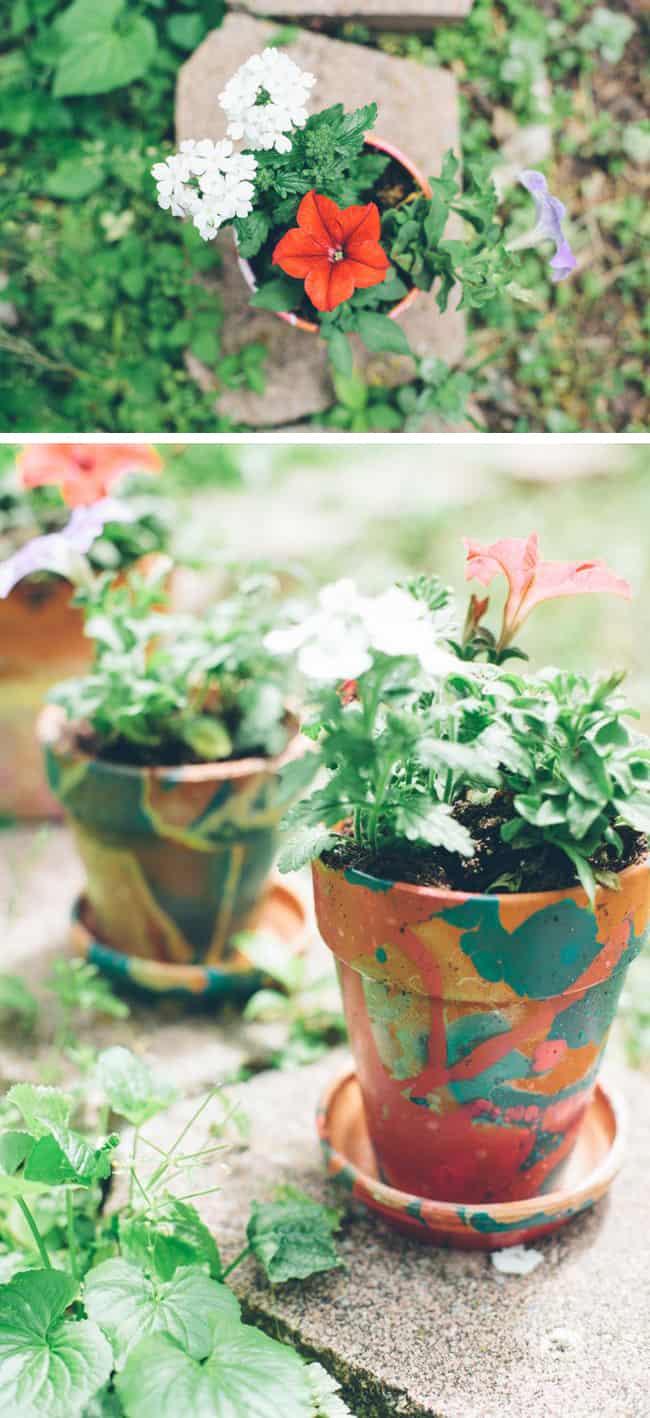
I love how each pot is different! Some colors definitely work better than others on this type of pot. Pink, yellow and turquoise were my favorites.
Hi Stephanie! How have these pots held up for you outdoors? Chipping, fading, rain, freezing, etc.?
LOVE THEM!!!
I tried this and the nail polish didn’t adhere to the clay pot!
if you use glass, will it do well too?
Yes! I used painters tape around the lip of glass. Then dipped with easy.
doesn’t the nail polish make it tacky to the touch or does it dry smooth. I think it looks fantastic.
Amazing. will try soon.
I accidentally came upon these photos and was intrigued by the colors. Love this! Gonna try soon. Thanks for sharing!
Hi, I was Nail Tech for 20+ years and always love finding the DIY projects done with nail polish.
Very Pretty!
Do you need to spray them with a clear coating to keep the color?
Not really, the color holds up pretty well even in the rain, just like on your fingers!
I have done this with spray paint,spray paint into a pail of water and dip pot ,it works very well.even better if you paint the pot a solid color and then dip it.beautiful
Yes! I'm trying this asap. .. turquoise and copper and green.
do you think this work on clear glass jars? I want my kids to create “charity” jars and I think this could be a lot of fun.
I LOVE YOUR SANDALS! oh and the pots are awesome too,haha. :)
Thanks Cheryl! Those are my favorite sandals too – and they are from Target :)
Love this and I can’t wait to try. How did you dispose of the water once you were finished?
Good question. I fished out any remaining polish floating on the surface with a paper towel and then just dumped the water in the grass. Hope you enjoy it!
Do you think the paint penetrates terracotta pots when you paint them? Would it leach chemicals into the soil inside the terracotta pot and into your herbs if you did this to herb pots. I was thinking of using nail polish to paint the outside of a terra cotta garlic keeper, but didn’t know if the toxic nail polish would leach into the terracotta and “poison” my garlic stored inside…what do you guys think?
Just bought a lot of polish for 10 cents a bottle at a thrift store to paint details on birdhouses. Now I have a use for what’s left over.
Do u need to spray it with an indoor/outdoor clear gloss finish ? or Will it be fine the way it is?
I didn’t spray mine with anything and they’ve held up pretty well (we’ve had lots of rain lately) but you definitely can if you have some on hand!
My 10yo and I actually made and had fun making these pots during the Australian school holidays. As for a “top coat/ cheap varnish alternative” I always use/ mix 1 part pva glue (woodworking glue) to 2-3 parts water (depends on weather on the day & how thick u want the coat. Sometimes I even use 4-5-6parts but paint a second coat) I then simply paint on with paintbrush!
We put a top coat on our pots. Used 3 parts water & one coat- worked like a dream.
Thank you so much for sharing this project! Almost 3/4 of the day was spent happily in the yard. (Despite the 114 Fahrenheit days! Lol!)
I can’t believe how simple this actually is. Thank you. Sharing this on Pinterest right away.
Just be aware that nail polish contains a lot of toxic substances – some of them carcinogens – so gloves are a must. Great way to use up all those old bottles when you switch to a safe brand for your nails.
Painted terra cotta pots are popular these days and like these they are very pretty. If you are going to put living plants in painted pots don’t forget that in sealing terra cotta with any sort of paint the pot will no longer be able to breathe. Terra cotta is chosen for plants because of it’s natural porousness. It is the next best thing to planting in the earth. Between a plastic pot and a terra cotta pot, a plant of any kind will usually fare better in terra cotta.
You correctly point out that nail polish contains lots of poison, as most paints do, excepting nail varnishes are exceptionally toxic. Nail polish on a terra cotta planter will leach into the soil. To what degree will vary, but it will give a plant a hard way to go. I would suggest certainly never planting anything you wish to eat in a painted terra cotta pot.
You don’t have to use nail polish. Regular paint works, and might be cheaper than nail polish if you are doing a large quantity. We did this with vases when I was in 1st grade.
Just done my first one and it turned out really well….might have used a little bit too much polish though and forgot that I have no polish remover left so my fingers are very colourful too!!!!
Great DIY! I used big and small ceramic tiles and made coasters and hot plates! Just a tip though, wear gloves and use an old bucket or bin because it will be ruined. Bright colors work the best!
Carli,
I agree this is a GREAT diy! I sealed the coaster with mod podge two coats. Is this enough? How do you wash them? Does the color disinergrate after a while of use?
Yea, so this turned out more messy than I thought! Is it very important that the water be room temperature? Do you do each color at one time? My nail polish ended up getting clumpy and glue-like so not sure what I did wrong!?
Good question, Burnadette. Mine totally did not turn out like the photos & my polish (which was new) clumped. It ended up being an ugly mess.
I’d like to know how much of a bottle should be used? I chose 3 colors and poured the whole bottle of each color into the water. Too much?? ;-)
Hi Allegra! I’m guessing you might have had too much polish – pouring the whole bottle in is a lot – you just need enough to cover the surface area of the water.
Hi Burnadette! Yes, you want the water to be close to room temperature so that the polish spreads out over the water. If the polish beads up and sinks to the bottom of the bucket then you know it’s too hot/cold. I don’t have a precise measurement on the amount of polish but it was more than just a couple of drops but less than the entire bottle. You can definitely do more than one color at once – just don’t wait too long too dip because the polish can dry out.
Can you put multiple colors in the bucket at once or let each dry first?
Yes, you can definitely do more than one color at a time – it’s fun to mix and swirl them together to make interesting designs. Have fun!
Mine didnt turn out like that at all!
I love these! I am planning to decorate pots for planting with my 3rd graders. When you say it takes a lot of polish, how much are talking about? How many pots can you do from one bucket? I have 26 students. If you can give me an idea of how much I might need, that would be helpful.
oh man, that’s hard! For 26 students? I’ve done a LOT of marbling and still haven’t run out yet. So maybe 10-15 bottles? Definitely worth a trip to the Dollar Store.
Or maybe you could send home a note for the families to donate leftovers from home.
I am learning there are so many things you can do with nail polish! :)
These turned out so awesome!
Woo hoo, the nail polish project you promised! I would definitely have to buy some cheapo nail polish to do this (no way am I using the $15 a bottle stuff!), but these are so fun.
Yes, Dollar Store polish is definitely the way to go!
I really love these planters! So beautiful!
I just found your blog and love it! Can’t wait to try this project with all of the nail polish that I buy and then decide the color is not quite right for my toes!
Hi Anne! So glad you found us :) Have fun with the nail polish – it’s addicting!
I love your nail polish projects.
Such a cool idea! And a great way to use up the polish that I don’t wear anymore!
So cool! Great idea to use up old bottles of nail polish. I bet my daughter would love making these!
My son already love it