What is that saying about kissing a lot of frogs before you meet your prince? Yeah, well, I feel the same way about homemade bath bombs! In a recent attempt to make some ultra-relaxing bath bombs, I was (unpleasantly) surprised at the number of useless recipes out there. But the good news is that after trying and failing many times, I finally figured out how to make bath bombs—and here's my perfect, no-fail method!
Let’s just say that it all comes down to the right supplies and one teeny secret ingredient. Here are the secrets to making bath bombs at home!
My issue: if I’m going to invest in a few bottles of citric acid and take the time to lovingly hand craft something, I want it actually to turn out right. I’m not going to discuss the number of batches I attempted (can’t go there—it’s still too soon). But I’m simply going to share what works, so you won’t have to make the same mi$$takes I made.
Let’s start with bath bomb ingredients.
Jump to:
Baking Soda + Citric Acid
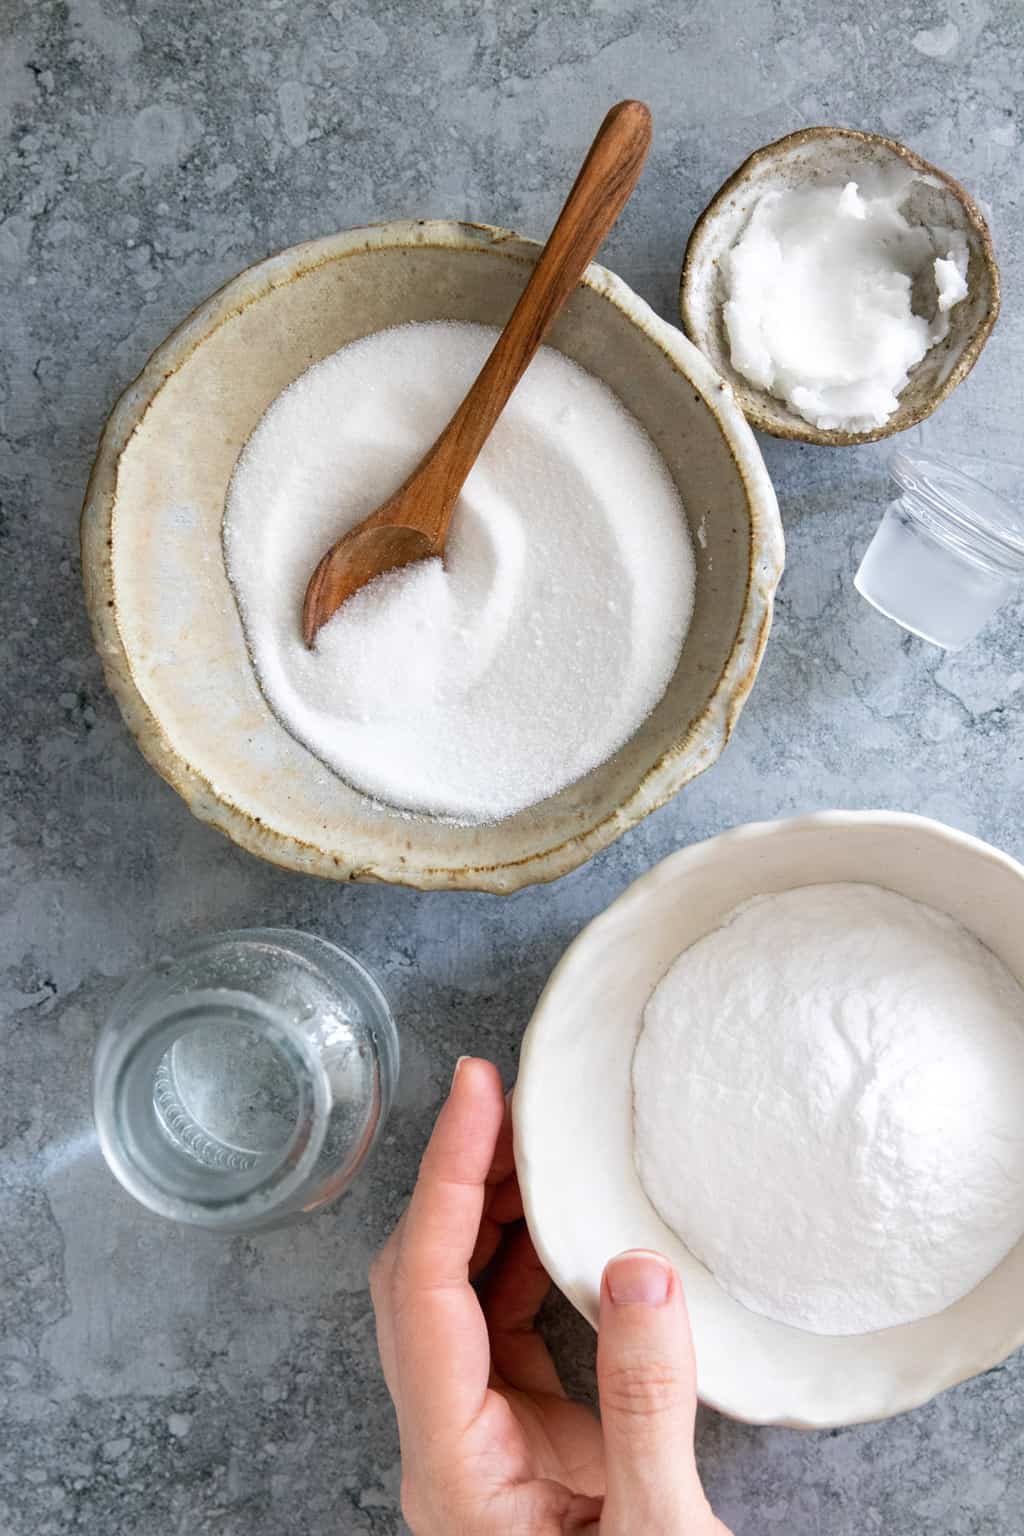
First, the basics. Bath bombs are made with 2 parts baking soda and 1 part citric acid. That causes the fizzing reaction when they're dropped in water. They typically need a liquid to hold together. From there, you can customize them with colors, fragrances, and additives.
Citric acid: So, what is citric acid? It's a weak acid derived from citrus fruits and used for things like cleaning, canning, and cooking. It’s a dry acid, and that is what’s needed for making bath bombs that fizz when wet (and not before).
- Yes, you can make bath bombs without citric acid using cream of tartar but you'll get less fizz.
Baking soda: The other half of the fizzing equation, baking soda is a base that interacts with citric acid to create bubbles. Without both baking soda and citric acid, your bath bombs will simply fall apart and dissolve without fizzing.
Liquid Binder for Bath Bombs
A liquid is needed to make the bath bombs a little sticky so they stay together and holds their shape. Most people use water, but you shouldn't.
The problem? Water evaporates over time, leaving you with dry, crumbly bath bombs that won’t hold their shape.
Water also sets off the fizzing reaction between the baking soda and citric acid. So, to avoid a foamy, fizzy mess on your hands, try these options:
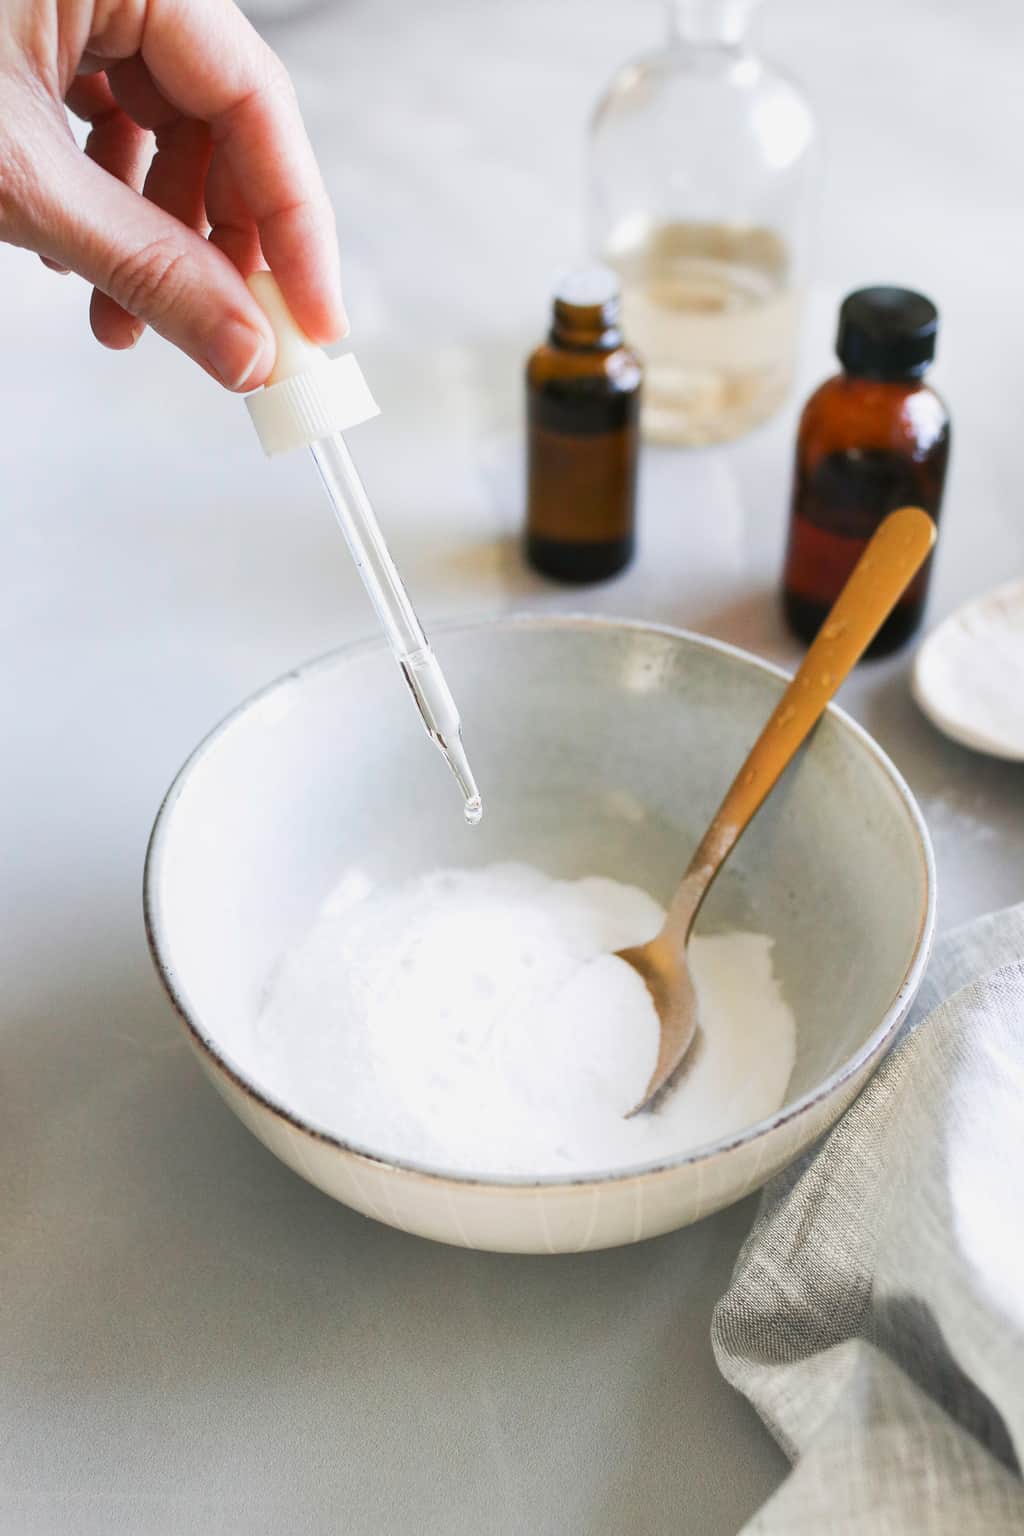
Witch hazel: It evaporates quickly, keeping fizz to a minimum. A few spritzes will create the consistency of wet sand and help hold the mixture hold together.
Carrier oils: Adding an oil is a great way to moisten bath bombs and add skin-loving properties at the same time.
Are you ready for the secret the no-fail bath bombs?
Solid fat: Coconut oil, shea butter, ghee, tallow, and cocoa butter—any fat that’s solid at room temperature—will help your bath bombs pop out of the mold without crumbling and maintain their shape over time.
You don't need much liquid—just enough to slightly wet the the dry ingredients and make it the consistency of wet sand.
No-Fail Bath Bomb Instructions
Combine dry ingredients: Combine all of the dry ingredients in a medium-sized mixing bowl. Whisk well, removing any clumps.
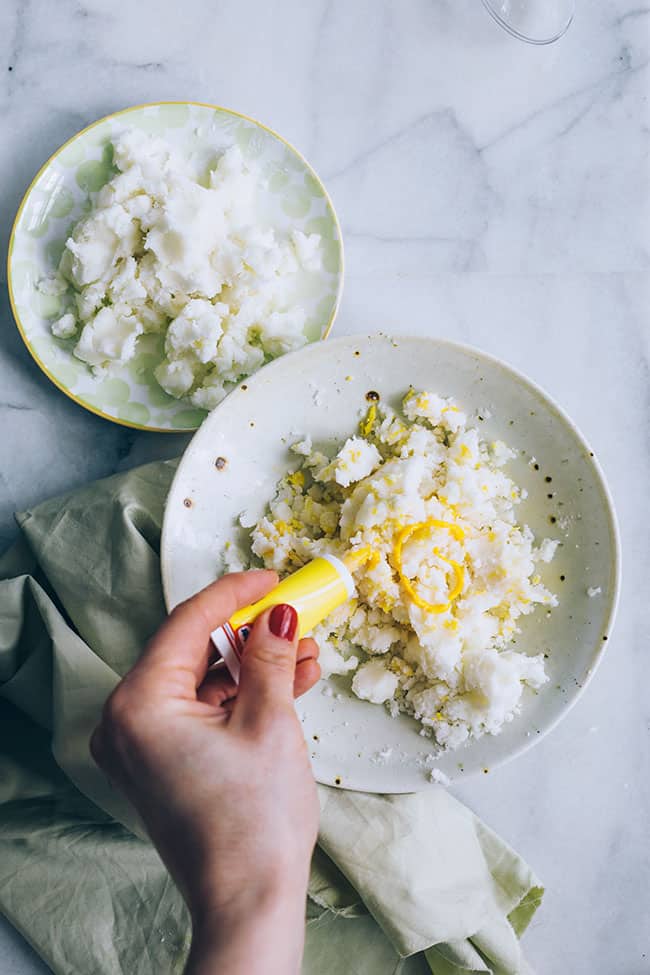
Melt coconut oil: Melt 2 teaspoon coconut oil (or other solid fat) in a measuring cup. Add essential oils, if using, and stir.
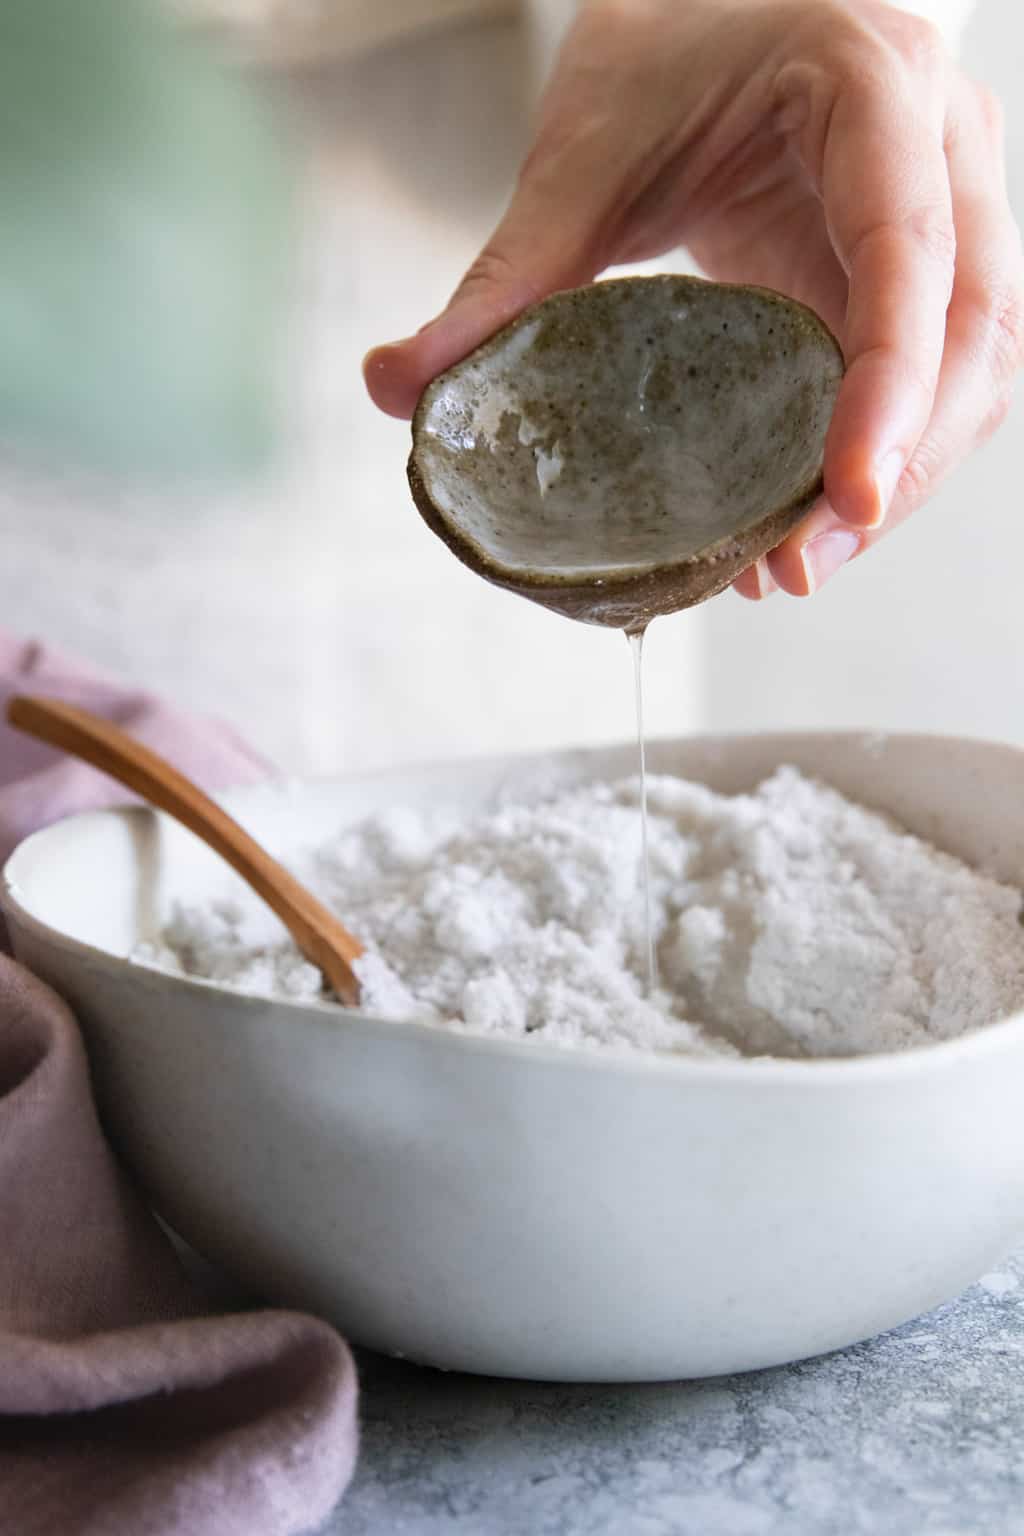
Combine wet and dry: Slowly add the liquid to the dry ingredients and stir as you go. Try to keep the fizzing and bubbling to a minimum.
Mix quickly because it will start to harden as soon as you add it to the cold ingredients.
Test the consistency: The mixture should be the consistency of wet sand. If yours isn’t, spritz it with a little witch hazel (you don’t need much!) and mix well (using your hands, if needed).
Recheck and spritz again, if needed.
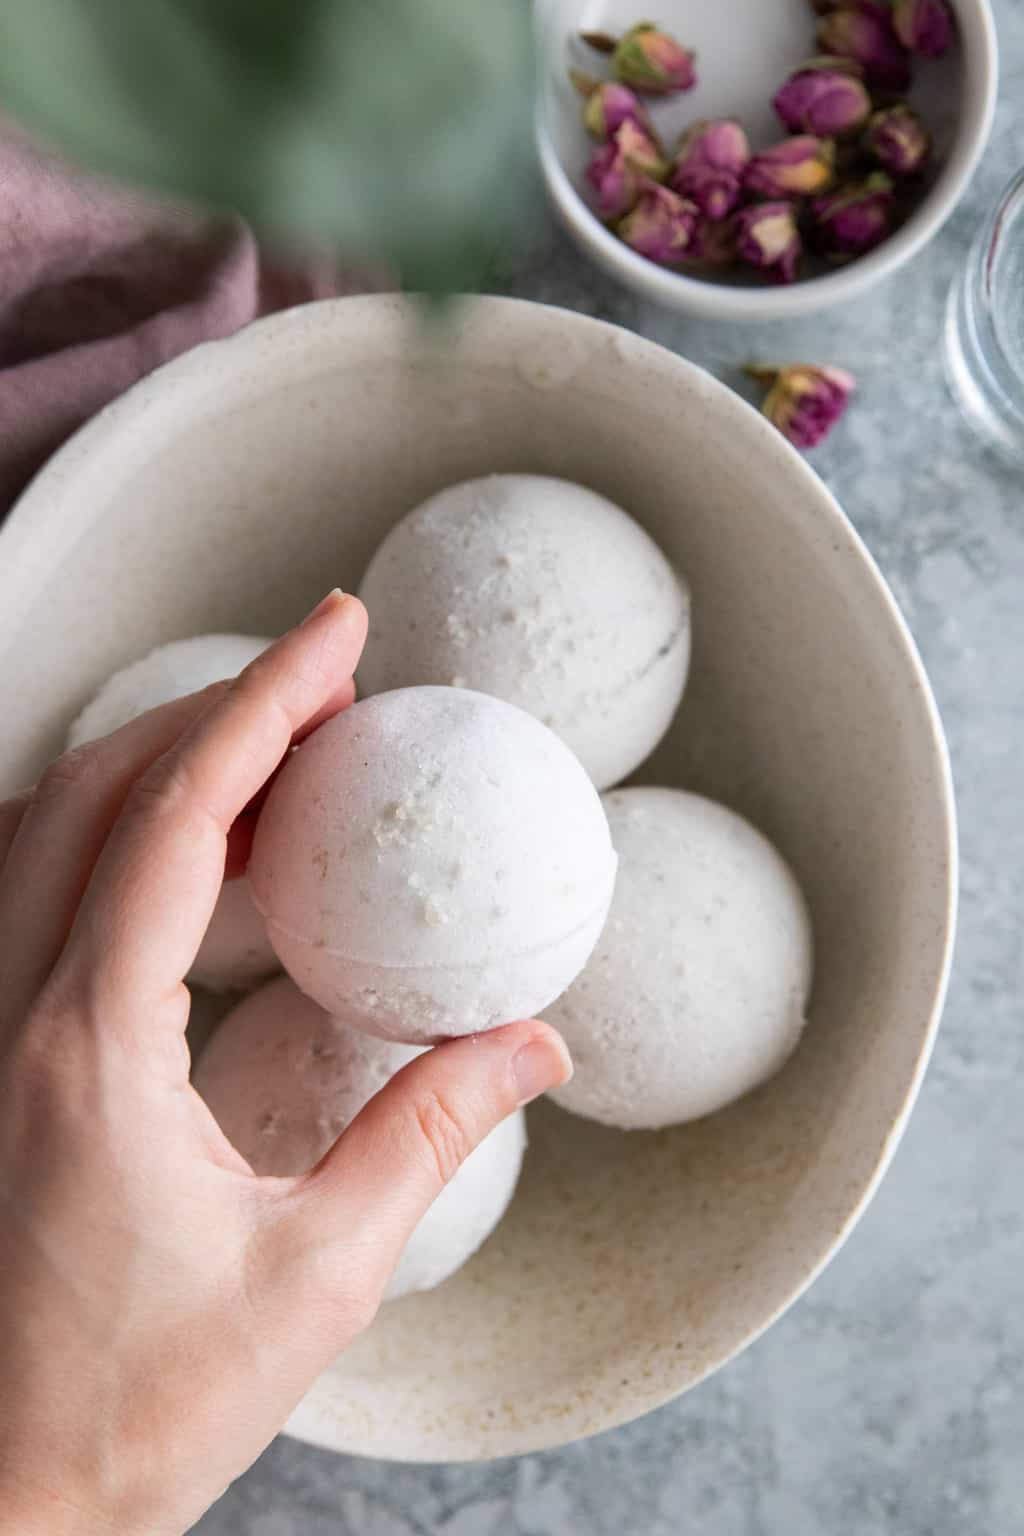
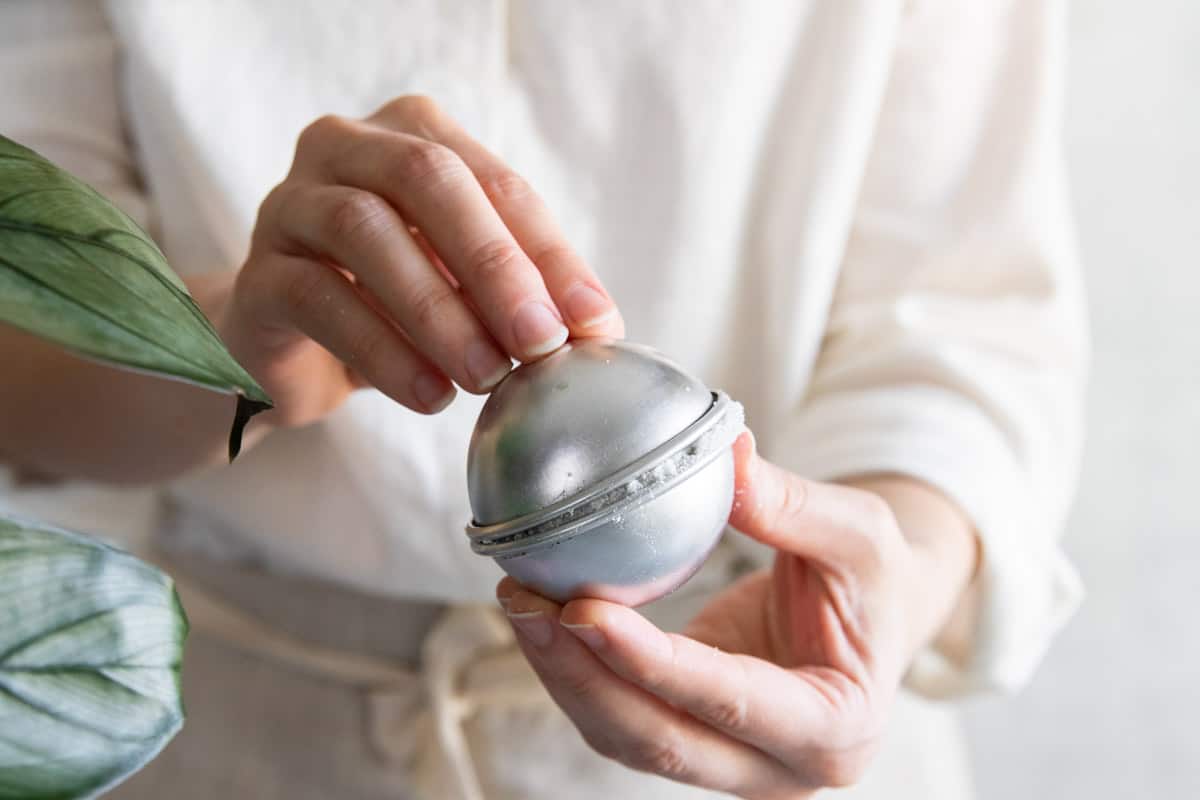
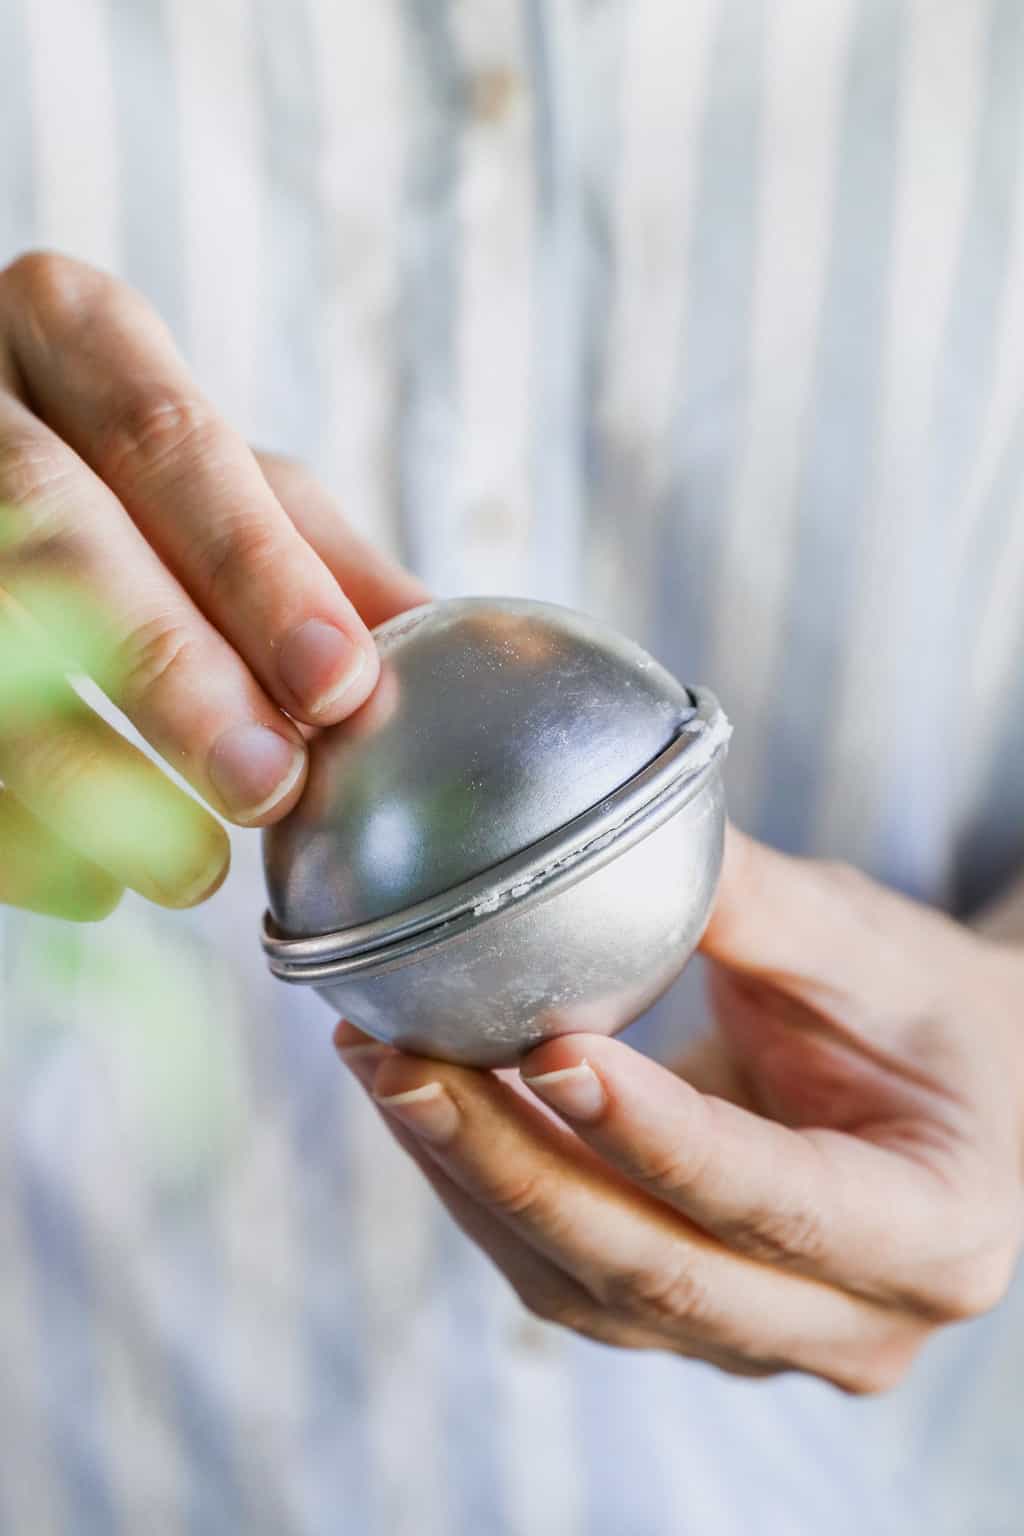
Fill the molds: Grab your molds because it's time to fill! You want to overfill each side of the mold so that when you press the sides together, any excess comes out.
Not sticking together? If you find the two sides of your bomb aren’t sticking together, you might need dump the mixture back into the bowl and add a tiny bit more witch hazel. Then start the molding process again.
Dry bath bombs: Let the bath bombs dry for 24 hours or stick them in the freezer if you're short on time.
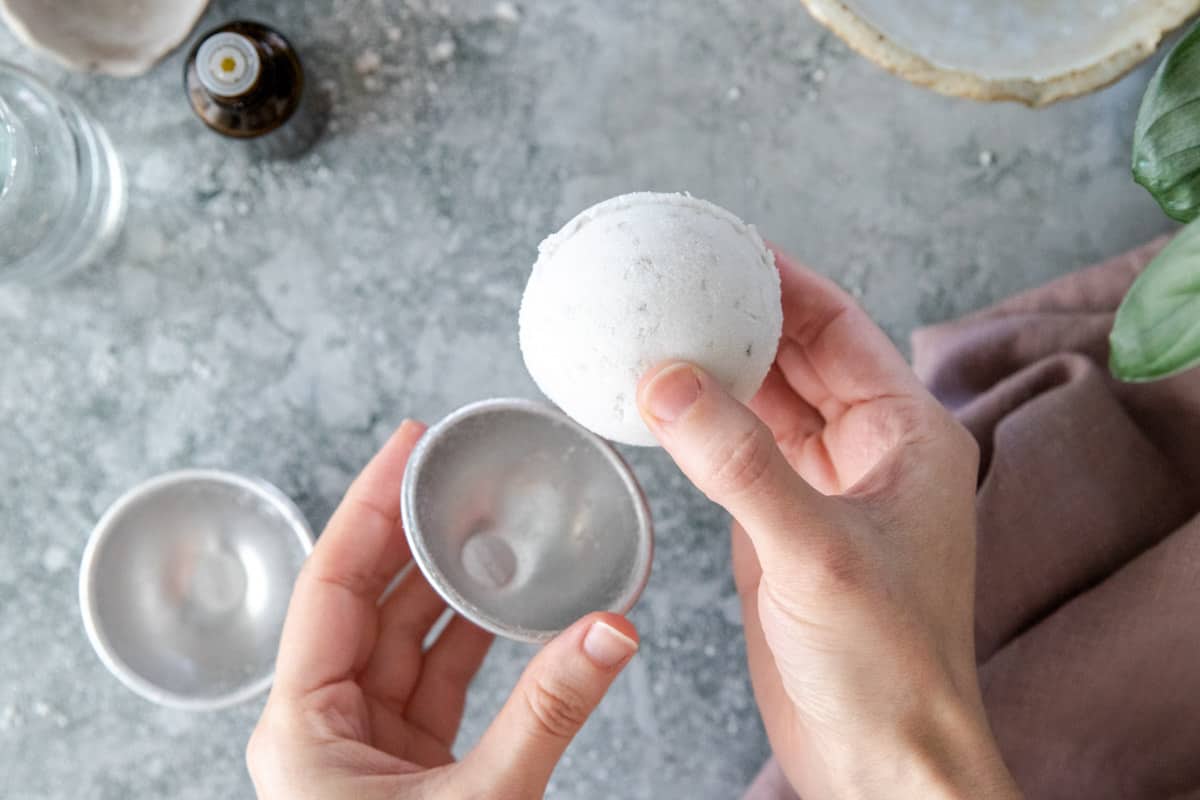
Remove from mold: Gently twist the top and bottom sections in opposite directions to release.
If they don't come out easily, then heat the mold for a few seconds with a hair dryer. Then place the bath bombs on parchment paper and let them continue drying for another 24 hours.
Adding Beneficial Ingredients to Bath Bombs
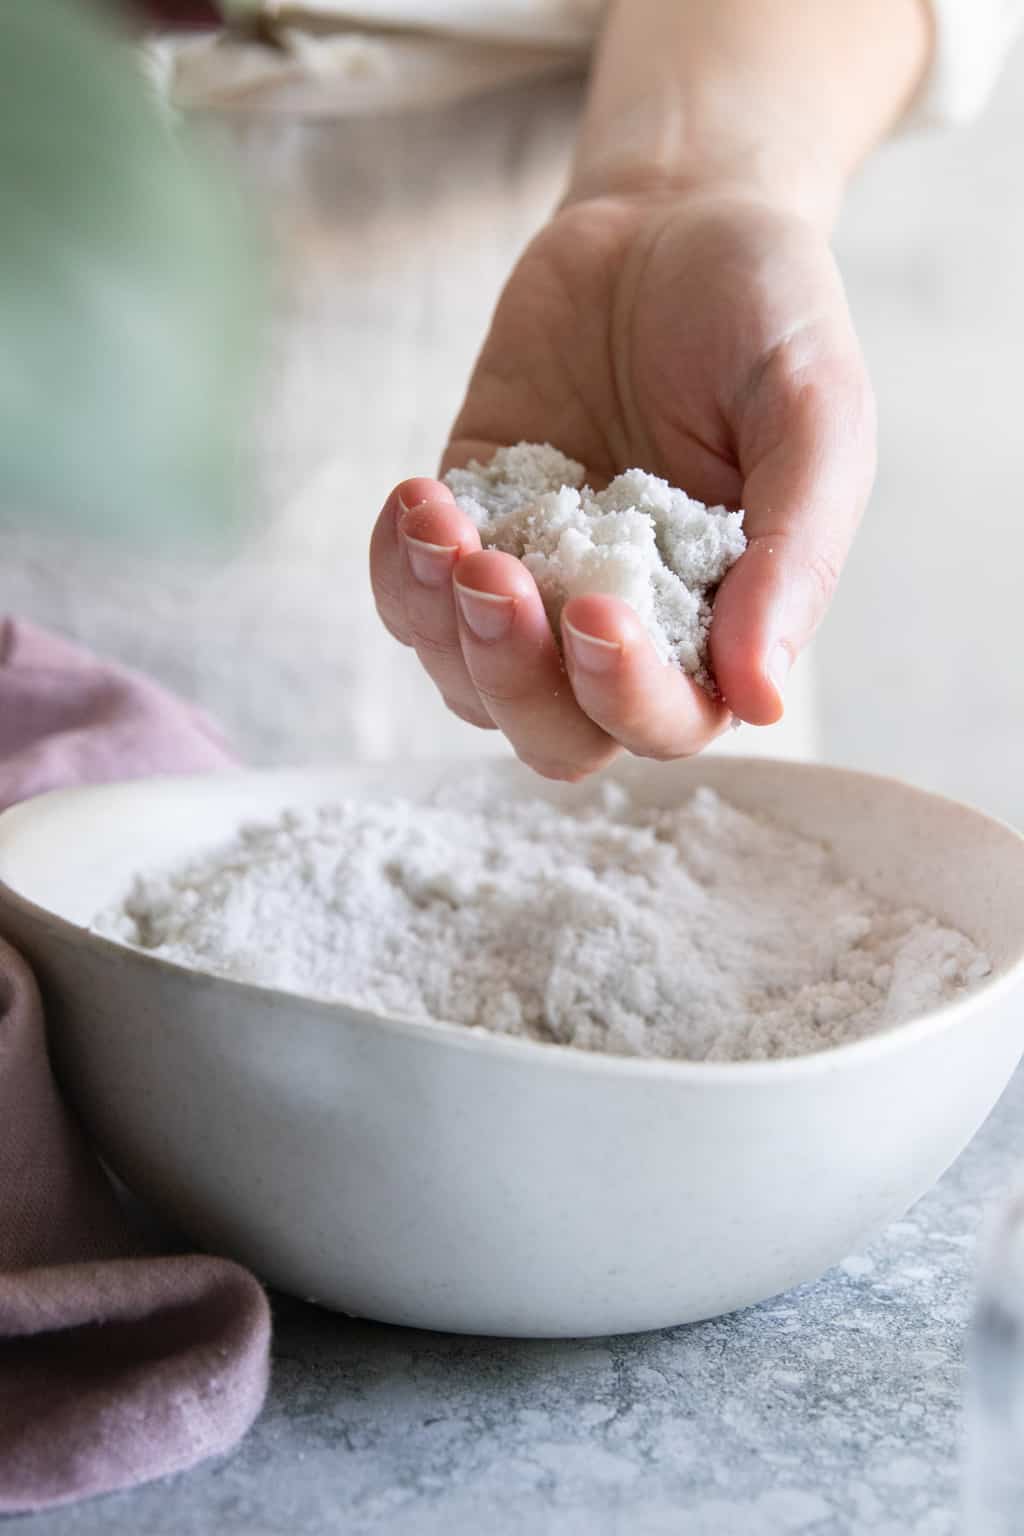
Once you have your basic components taken care of, you can start thinking about optional ingredients. Add 2-4 tablespoon of optional ingredients per 2 cups of bath bomb base (the baking soda and citric acid mixture).
Oils + Butters: Perfect for adding additional hydration. Start with about 1 tablespoon per 2 cups dry ingredients. If you're working with a hard oil or butter, make sure it's melted before it's added to the powders.
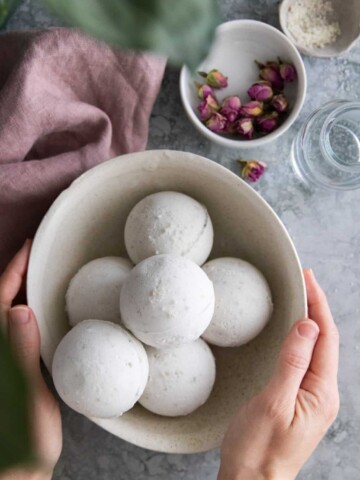
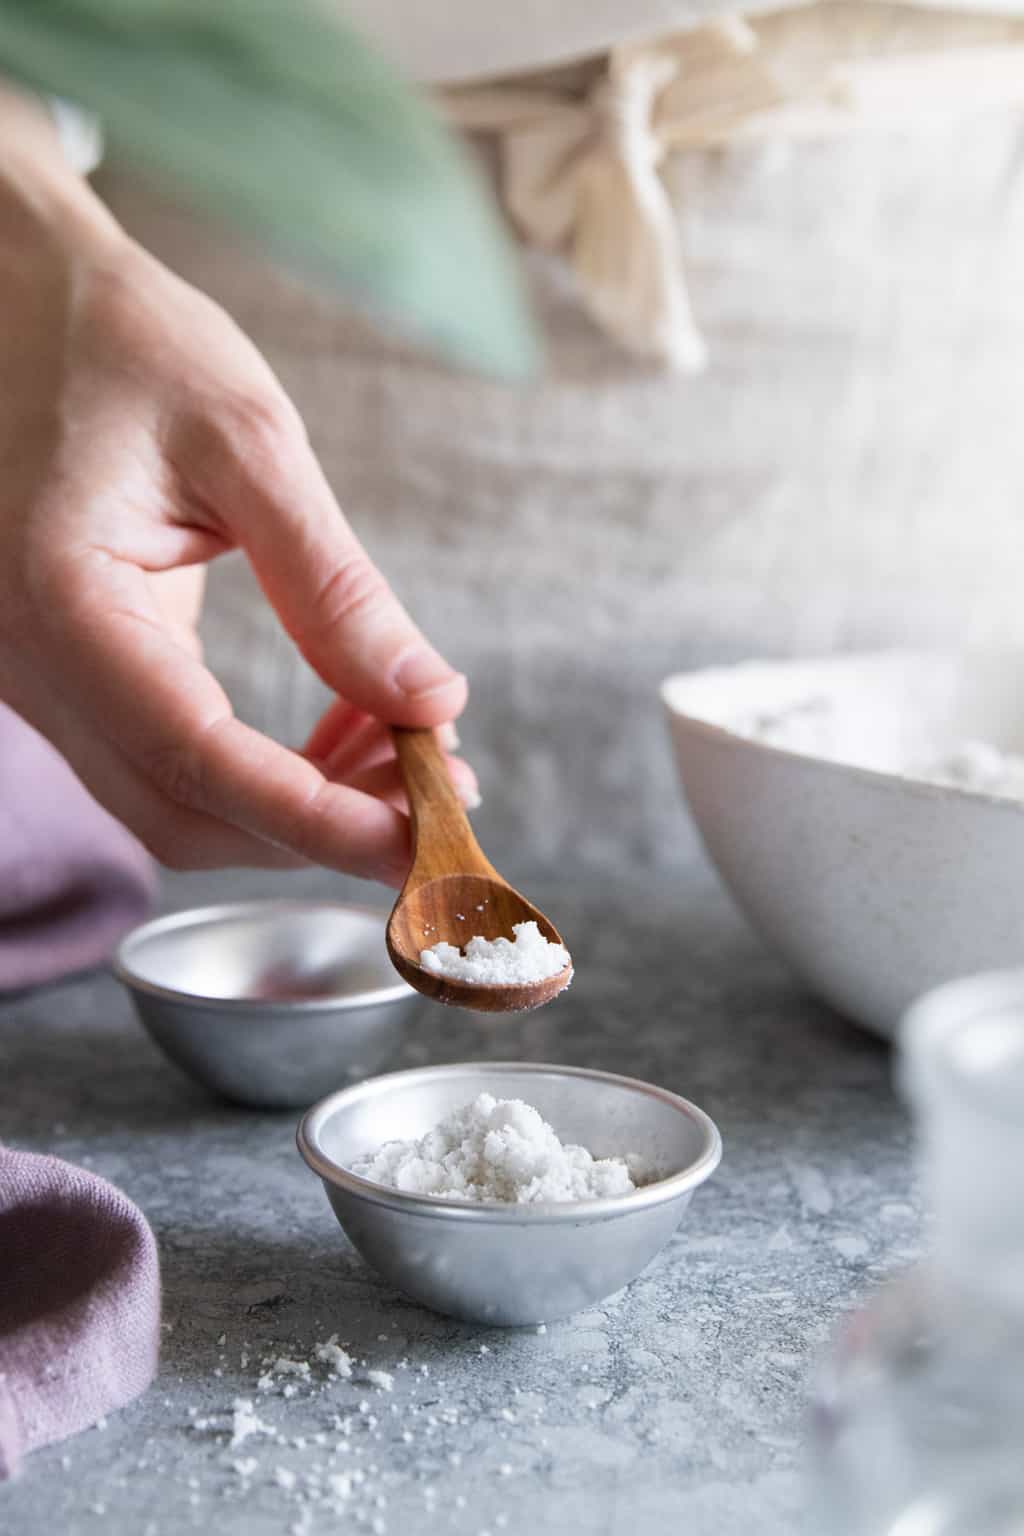
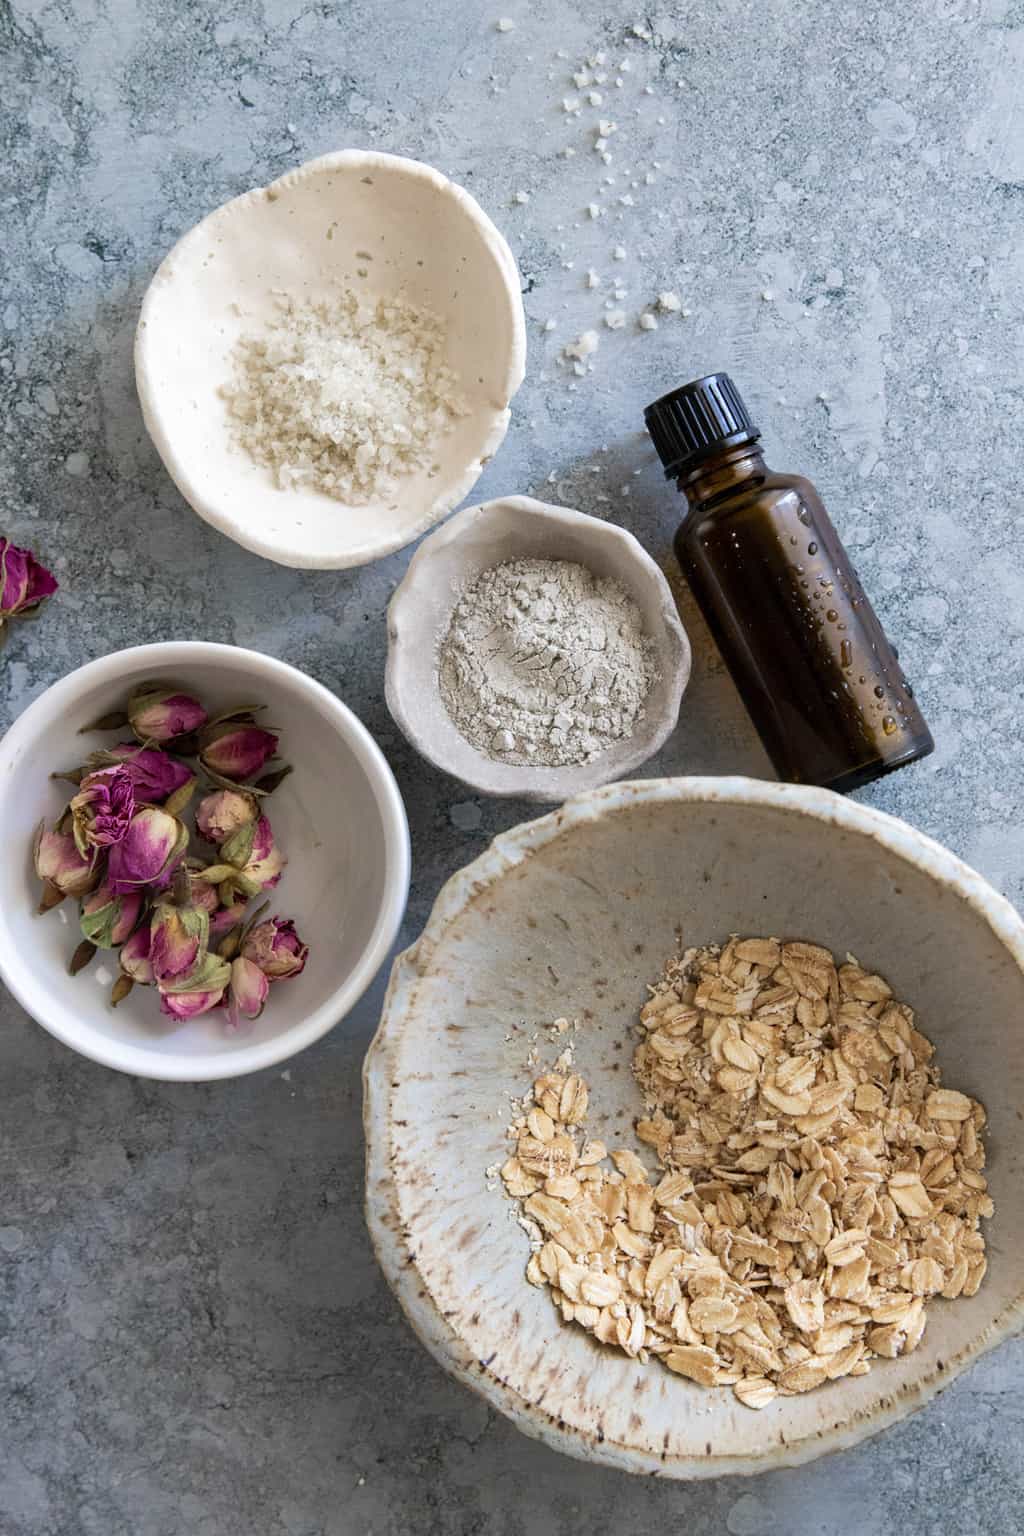
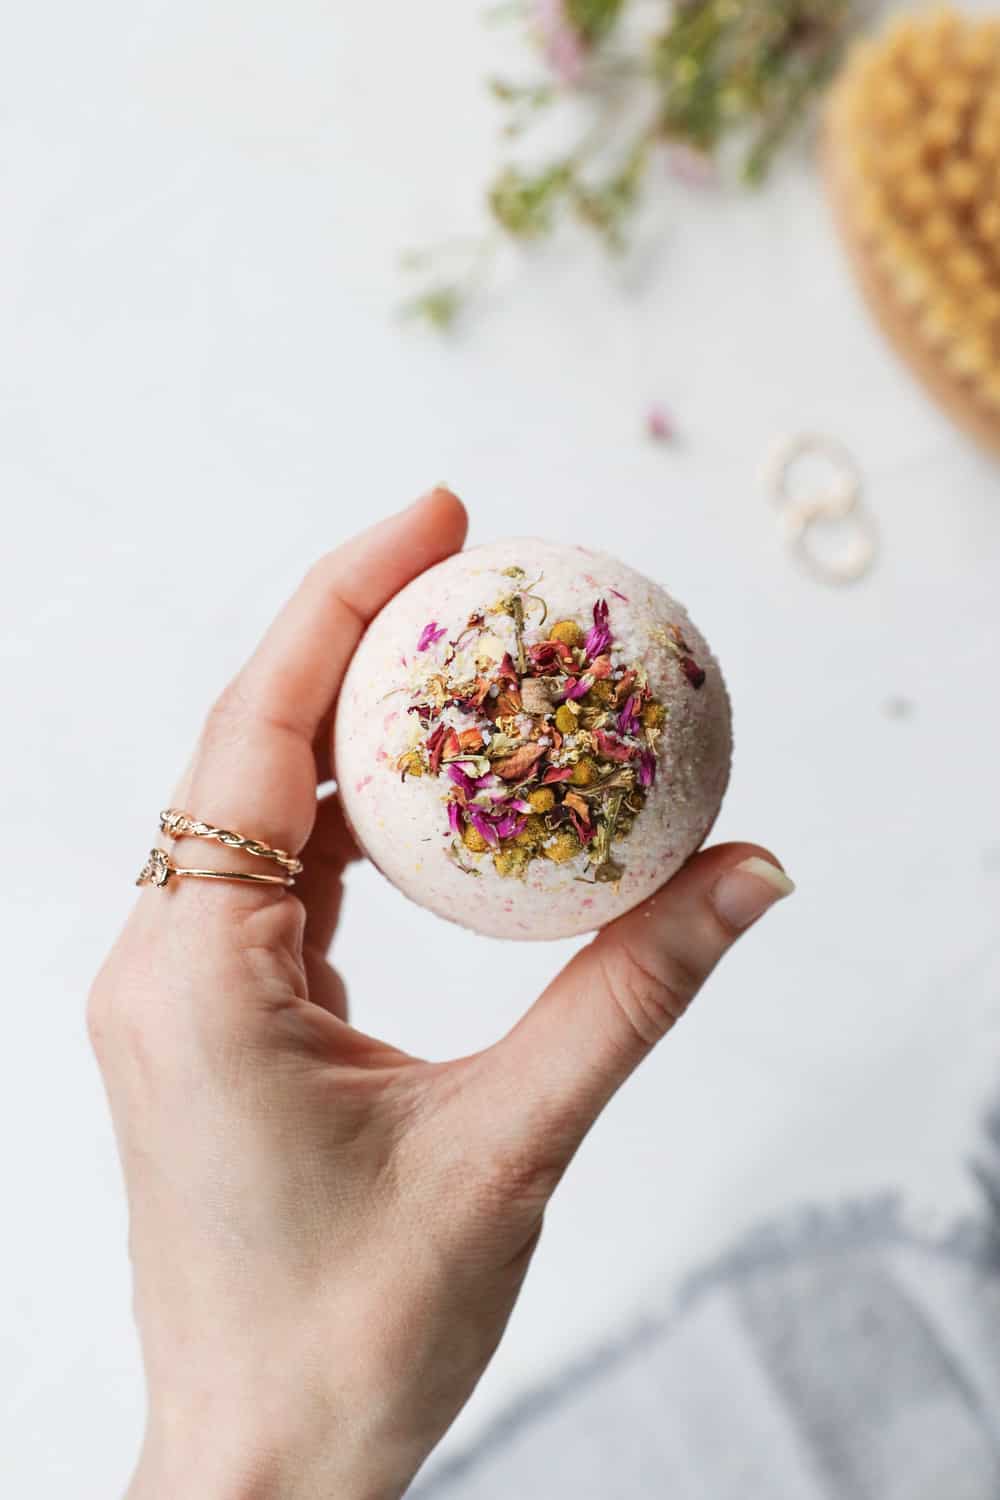
Salt: Try Epsom salt or sea salt to encourage relaxation, calm skin irritation, and boost circulation.
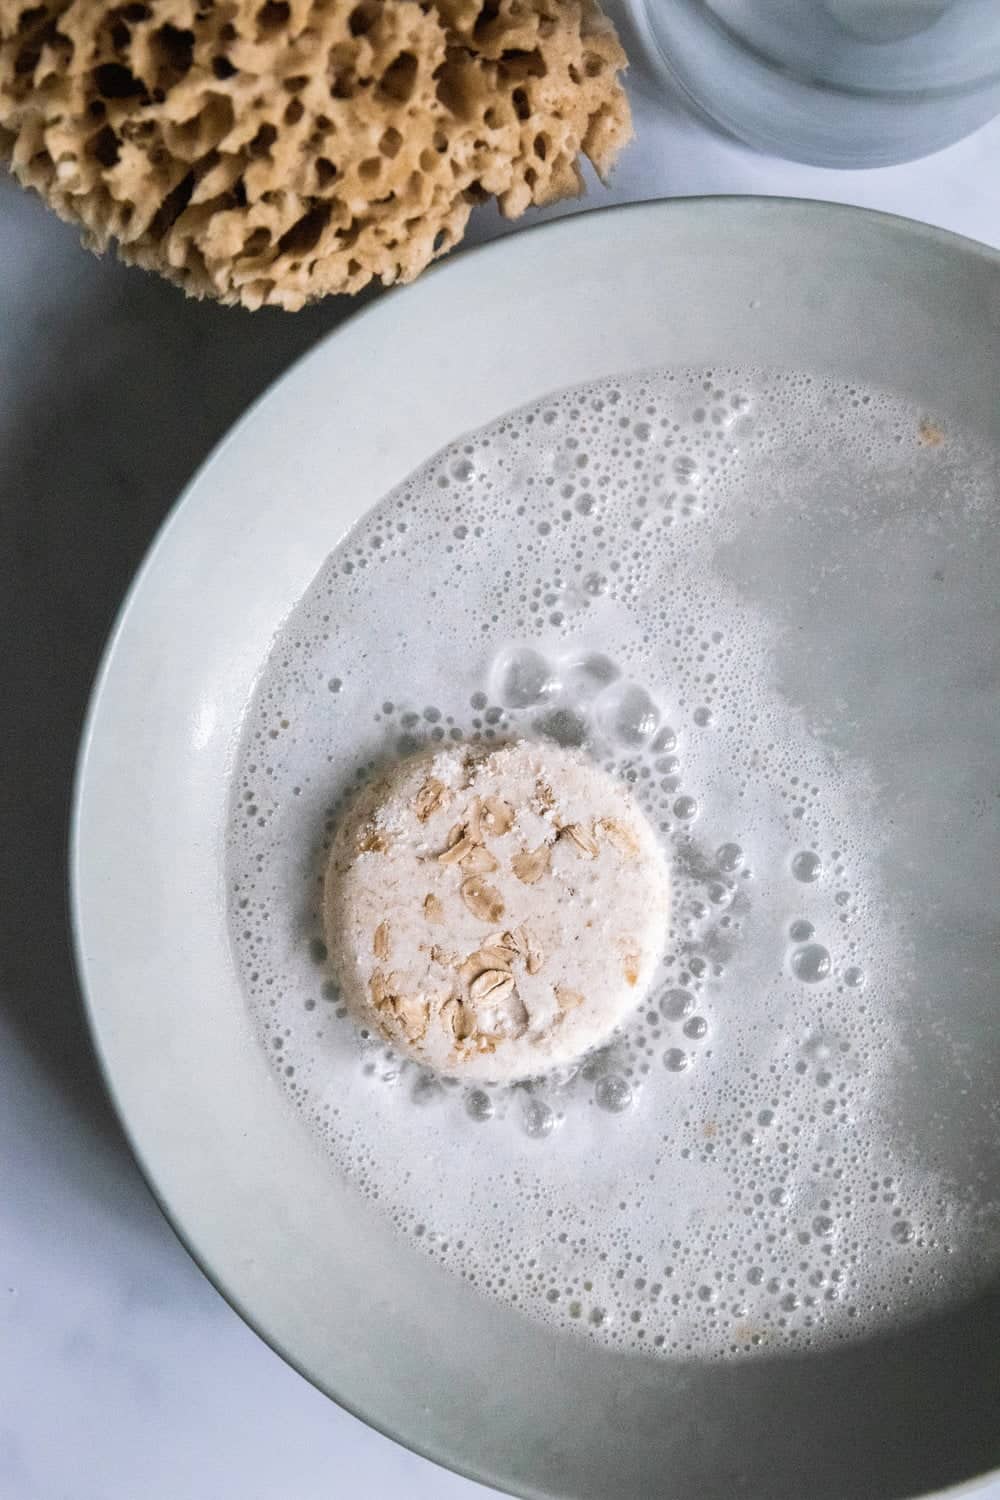
Oatmeal: Add collodial oatmeal to bath bombs to soothe skin irritation and exfoliate.
Clay: Makes bath bombs harder and helps draw toxins from the skin.
Cornstarch: It can help bind the baking soda and citric acid together, slowing down the chemical reaction to make them last longer.
CBD: These CBD bath bombs combine the relaxing effects of CBD with the skin-soothing and hydrating effects of lavender essential oil, Epsom salts, and coconut oil.
Cream of tartar: Adding a bit of cream of tartar will enhance the bubbles in your bombs.
Adding Fragrance to Bath Bombs
Fragrance oils: There are a lot of options now for natural fragrance oils. Try this fragrance calculator to determine how much to use.
Essential oils: Some essential oils are better than others for use in the bath. Roman chamomile is a popular choice for a pre-bedtime bath soak or try one of these options:
If you just need to chill after a long day of being everyone's "person":
—20 drops lavender
—5-10 drops jasmine
—5-10 drops thyme
—5 drops sandalwood
If you're looking for a good early morning wake-up call to stimulate the senses:
—15 drops lemon
—5-10 drops peppermint
—5-10 drops rosemary
—5-10 drops eucalyptus
If you're making room for one more in that big bathtub to spice things up:
—20 drops clary sage
—20 drops geranium
—10 drops lavender
Can I use citrus oil in my bath bombs?
Citrus oils can cause photosensitivity issues if you’re not careful [source], but that shouldn’t stop you from using them altogether. You can also get bergapten-free bergamot to avoid the issue.
When using citrus essential oils in bath products, dilute them in the coconut oil (or other neutral carrier oil, such as almond, jojoba, or argan oil) before adding to the bath bomb mixture and only use a few drops at a time. Also, make sure to wear extra sunscreen or long sleeves next time you go outside.
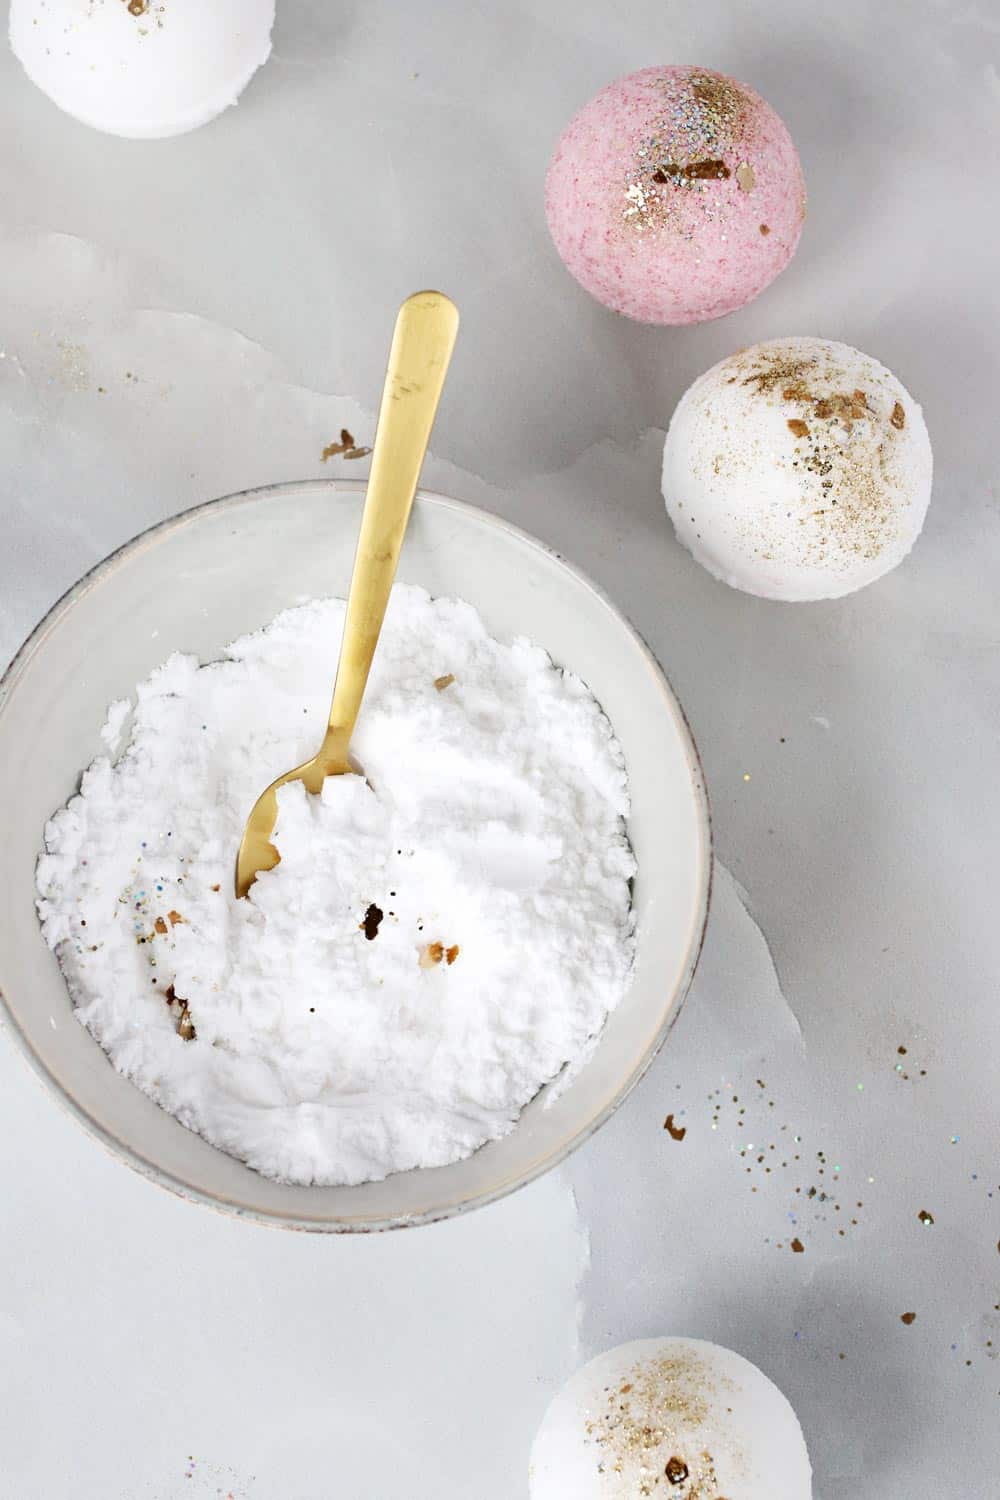
Adding Color to Bath Bombs
You have several options when it comes to creating colors for bath bombs:
Natural colorants: We've used turmeric, dried beetroot powder, chlorella, and activated charcoal to give bath bombs color while also providing skin-nourishing nutrients. You can also use clay (think pink or French green) or salt (think pink or grey salt) to add color. Just add them to the dry ingredients and stir well.
Vegetable-based food coloring: These colorful coconut oil bath bombs use food coloring. Separate the bath bomb mixture into several small bowls and add a few drops of different food coloring to each. Top off each bomb with a tiny pinch of silver mica.
Cosmetic mica: Use 2 teaspoons of mica for 2 cups of bath bomb powder. Hint: use an emulsifier like polysorbate 80 to avoid any staining on your skin or tub.
Liquid soap dye: Mix together all the dry and wet ingredients then add 3 drops of dye. Add more color, if needed.
Adding Fun Stuff to Bath Bombs
Yes, you can add fun colors, bubbles, and scents just like your favorite Lush bath bombs!
Bubbles: You can use SLSa, a nontoxic, natural surfactant that’s often used in natural beauty products to make them suds up a bit. Simply add it to the dry ingredients in bath bombs to get that foamy action. You can also use bubble bath to make bath bombs nice and foamy.
Hidden Surprises: These DIY Hidden Ring Bath Bombs hide a fun surprise inside - and they smell absolutely lovely too. You can also add small toys or small candies to bath bombs.
Glitter: These DIY glitter bath bombs are super simple to make—and so much fun to use, you might not want to get out of the tub!
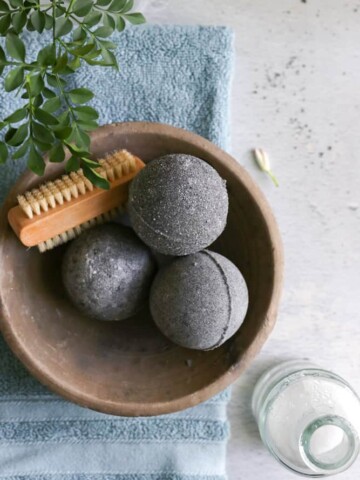
Botanicals: Dried flowers or herbs can soothe skin and rejuvenate tired muscles plus they just look pretty!
Picking the Right Bath Bomb Mold
There are all sorts of bath bombs molds you can use, many of which are cheap or free. Repurposing old containers is a great way to keep waste out of the landfill.
But if you plan to make bath bombs regularly, you might want to invest in some paid options. Store-bought bath bomb molds will last practically forever and cut down on the guesswork, so you know exactly the amount of baking soda and citric acid in each one.
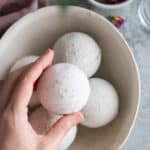
Personally, I like to make my bath bombs using these metal bath bomb molds. They’re perfectly sized, so you know how many bath bombs to use (one!), and the end product looks clean and professional.
But you can also use:
—Ice cube trays
—Muffin pans
—silicone baking cups
—Plastic soap molds
—Cookie cutters
—Measuring cups
—Your hands
—Clean, empty aluminum cans
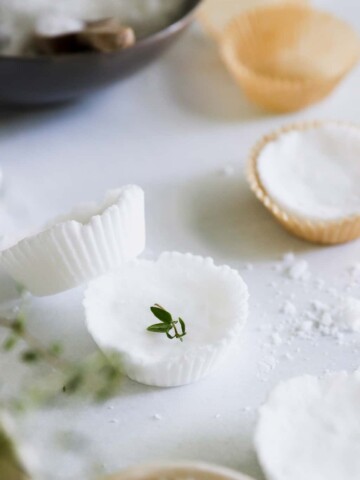
—Paper muffin tin liners (stack several together to keep their shape)
Easter Eggs: Make your own colorful Easter egg bath bombs for a fun, fizzy and fragrant bath experience. Just use natural food coloring and plastic egg molds to color and shape your bath bombs.
Halloween Shapes: Make pumpkins and fun Halloween shapes with a copycat Lush turmeric bath bomb recipe that includes anti-inflammatory turmeric and coconut milk powder.
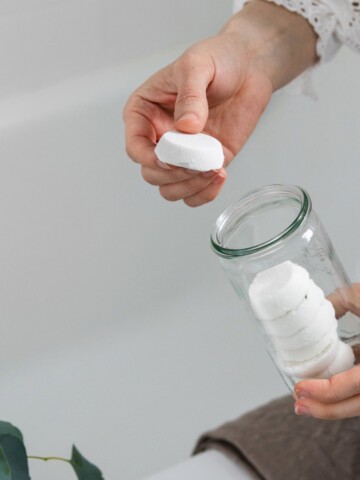
How to Store Bath Bombs
Like most other homemade beauty products, bath bombs are sensitive to the elements. Too much moisture can make them sweat and fizz, while not enough can make them crumbly.
To store your homemade bath bombs, I recommend:
- Wrapping them individually in plastic wrap.
- Keeping them in an airtight container with a tight-fitting lid.
- Don't store them in the bathroom. The moisture in the bathroom can make even the best bath bombs lumpy and crumbly in a matter of days. So keep them in a dry spot.
If stored properly, your homemade bath bombs should last about 6 months.
How to Use Bath Bombs
Ok, this one isn't rocket science! But to get the most foaming action add your bath bomb while the hot water is still filling the tub.
However, if you want the aromatherapy benefits more than a colorful bath, then add the bath bomb after the tub is full and you're in it—that way all of the relaxing scents won't dissipate before you get to enjoy them!
And if your molds are small, you might need to add more than one bath bomb to your soak session. Here's our complete guide to using a bath bomb.
No time for a bath? Try a Shower Bomb!
FAQ
The liquid used in bath bomb recipes can kick off the fizzing reaction and cause your bath bombs to swell. It’s usually not a problem if you add the wet ingredients slowly enough.
But for whatever reason, some people experience a bigger fizzing reaction than others. Either reduce the amount of liquid in the recipe or skip the it altogether and add an extra teaspoon of coconut oil.
At room temperature, the coconut oil in these solidifies and helps hold the bath bombs together. But when you drop ’em into a hot bath, the oil melts and gets released into the bath water.
Since oil and water don’t mix, the oil floats on top of your bath water, nourishing and moisturizing your skin. To avoid this separation, you can use an emulsifier like polysorbate 80.
If your bombs crack after they're out of the mold, they're probably too wet. Use less liquid or if all else fails, try adding 1 teaspoon of kaolin clay per cup of dry ingredients. Clay absorbs moisture and will help your bath bombs hold their shape batter.
You may need more citric acid so try upping the ratio of citric acid and also use less liquid. Another option is to add 1-2 tablespoon cream of tartar to your dry ingredients.
No-Fail Bath Bombs Recipe
Equipment
- Medium bowl
- Measuring cups
- Mold (plastic Easter eggs, muffin tin, plastic craft balls)
Materials
- 1 cup baking soda
- ½ cup citric acid
- ¼ cup Epsom salt (or sea salt)
- Witch hazel in a spray bottle
- 1 teaspoon essential oil
- 2 teaspoons coconut oil, melted
Instructions
- Combine all dry ingredients in a medium-sized mixing bowl. Whisk well, removing any clumps.
- Add in the melted coconut oil slowly, followed by the essential oils. Spritz the mixture with a little witch hazel (you don’t need much!) and stir well.
- The mixture should be the consistency of wet sand. If yours isn’t, spray with a little more witch hazel.
- Once you’ve added all of the liquid into the dry mixture, you’re ready to fill your molds. You want to overfill each side of the mold so that when you press the sides together, any excess comes out.
- If you find the two sides of your bomb aren’t sticking together or falling apart when you remove them from the mold, you might need to add a tiny bit more water to your mixture and start the molding process over again.
- I let my bath bombs rest overnight before removing them from the mold. If you find that they don’t come out readily, warm the mold with a hair dryer for a few seconds before trying again. Remove the bath bombs from the mold, place them on parchment paper, and allow them to dry for another 24 hours.