
You know those people who never wash their face, eat whatever they like, and have never so much as touched a tube of sunscreen, yet their skin still looks amazing—all. the. time? Why does life have to be so unfair?
I wish gorgeous skin was a given, but some of us have to try harder (a lot harder) than others to get radiant skin—and I am definitely one of those people. I would get a full-on spa facial every day if I could, but with two businesses, a family, and lots of fur babies begging for attention, I rarely get an afternoon off for a trip to the spa.
Instead, I’ve mastered the art of the DIY oxygen facial. Not your basic 15-minute face mask routine, this 5-step facial helps infuse your skin with oxygen, making you look fresh, well-rested, and totally reinvigorated—all from the comfort of your own bathroom.
What Is an Oxygen Facial?
Oxygen facials are a popular beauty treatment that promises to rejuvenate and revitalize the skin. Oxygen facial therapy involves infusing the skin with a stream of highly concentrated oxygen, along with other nutrients and vitamins, to stimulate cell regeneration and collagen production. The oxygen facial treatment is believed to increase the flow of oxygen to the skin cells, which can help to improve blood circulation, resulting in a brighter, more youthful-looking complexion.
Many beauty salons and spas now offer oxygen facials as part of their menu of services, and the treatment has gained a lot of popularity in recent years. Oxygen facials can be customized to meet the specific needs of each individual's skin, and there are many different formulas and products available that can be used during the treatment.
During an oxygen facial, the skin is first cleansed and exfoliated to remove any dirt, oil, and dead skin cells. Then, a stream of pure oxygen is directed onto the skin using a special machine that infuses the oxygen into the skin cells. Oxygen facials are often combined with other skincare treatments, such as a hydrating mask or a gentle massage, to further enhance the benefits.
One of the main benefits of oxygen facials is that they are suitable for all skin types, from dry and sensitive to oily and acne-prone. Oxygen facials can help to hydrate and plump up dry, dehydrated skin, while also helping to control oil production and prevent breakouts. Additionally, oxygen facials can help to reduce the appearance of fine lines, wrinkles, and other signs of aging, leaving the skin looking smoother and more youthful.
The good news is that you can get one of the luxurious facials - at home!
How to DIY an Oxygen Facial
When performed at a spa, oxygen facials use a fancy machine to deliver a pressurized stream of oxygen and soothing ingredients directly into the upper layers of the skin. The topical lotions and potions applied prior to the treatment are usually tailored to each person, but things like moisturizer, hyaluronic acid, antioxidants, and peptides are the go-tos at most salons and spas because these ingredients benefit all skin types.
Rejuvenating oxygen and nourishing ingredients are said to make skin look plump and radiant, diminishing the look of fine lines, balancing skin tone, and calming acne. And like most salon beauty treatments, this one can be pretty pricey, which is why it pays to do it yourself at home.

Even without a fancy machine, you can still get some of the benefits at home by following the same basic steps:
- opening pores
- infusing your skin with oxygen
- applying vitamins
- boosting circulation
Like any DIY beauty treatment, the results aren’t going to be as dramatic as a visit to the spa—so don’t expect to suddenly look 10 years younger afterward.
But an at-home oxygen facial will help give you that fresh, rosy glow you’d get from the high-powered tools in less time and for less money. Here's how to do it.
1. Cleanse skin
Start by removing makeup, dirt, and oil with a gentle cleanser and pat skin dry. Sometimes I'll cleanse twice just to make sure I get everything off.
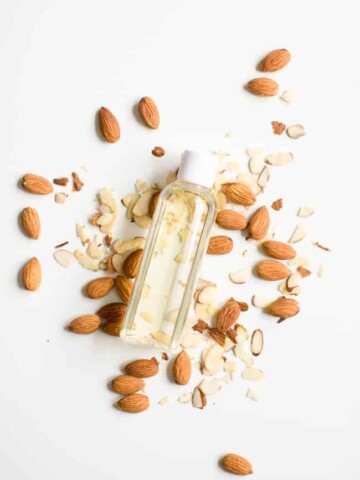
First, cleanse the skin with an organic oil (sweet almond is always a favorite) to get rid of dirt and makeup. Next, use a gentle foaming cleanser to make sure my skin is squeaky clean.
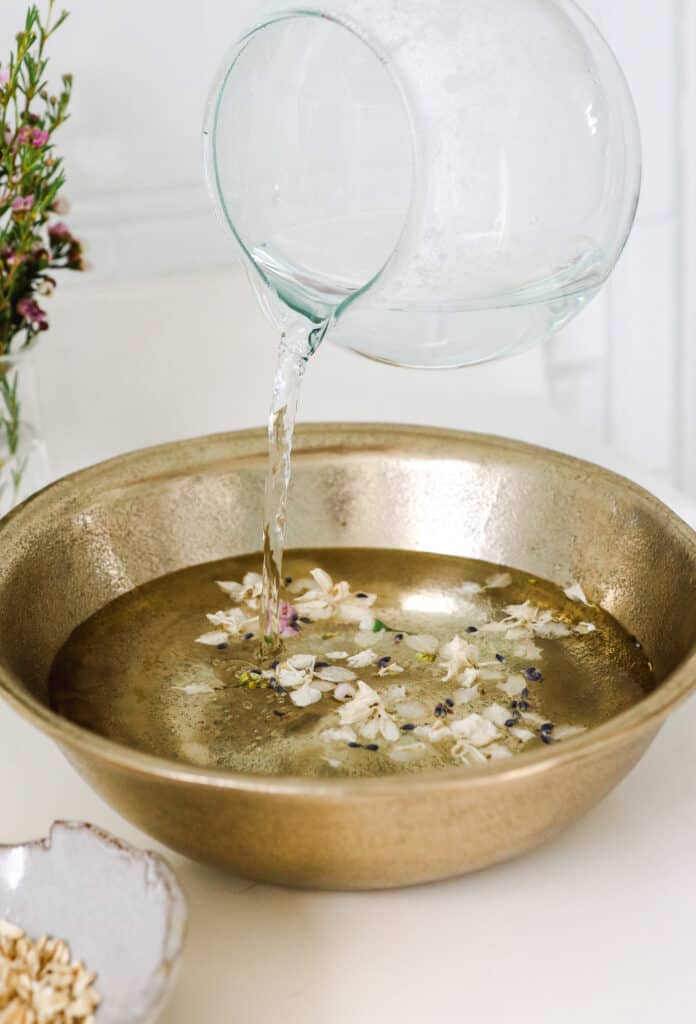
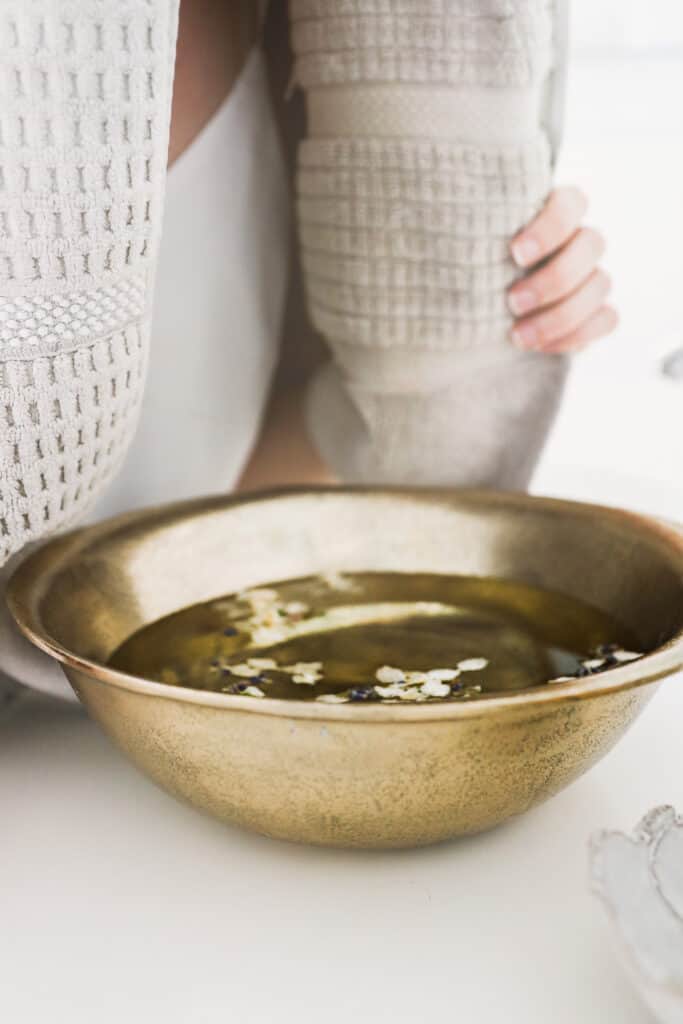
2. Steam pores
There are quite a few benefits of steam when it comes to achieving healthy, vibrant skin. Not only does facial steaming open pores so nutrients can sink in, but it also blankets the face in extra oxygen (a component of good ol’ H2O).
Plus, it cleanses pores, removes toxins, promotes relaxation, and enhances circulation. It should be noted that increased circulation helps boost oxygen in the skin from inside the body by bringing oxygen-rich blood to the skin’s surface. It also gives you that rosy, baby-faced glow that makes facials so popular.
If you don’t own a facial steam machine, just grab a large bowl, a towel, and about 5 cups of boiling water. You can also grab some essential oils, like lavender or chamomile, and some dried flower petals if you like, but it’s not necessary.
Pour the water in the bowl, add your oils and petals, place the towel over your head, and lean over the bowl. Then, with your head about 12 inches above the water (be sure you’re far enough away to not get burned) and the towel trapping the steam over the bowl, let the steam blanket your face for 15 minutes.
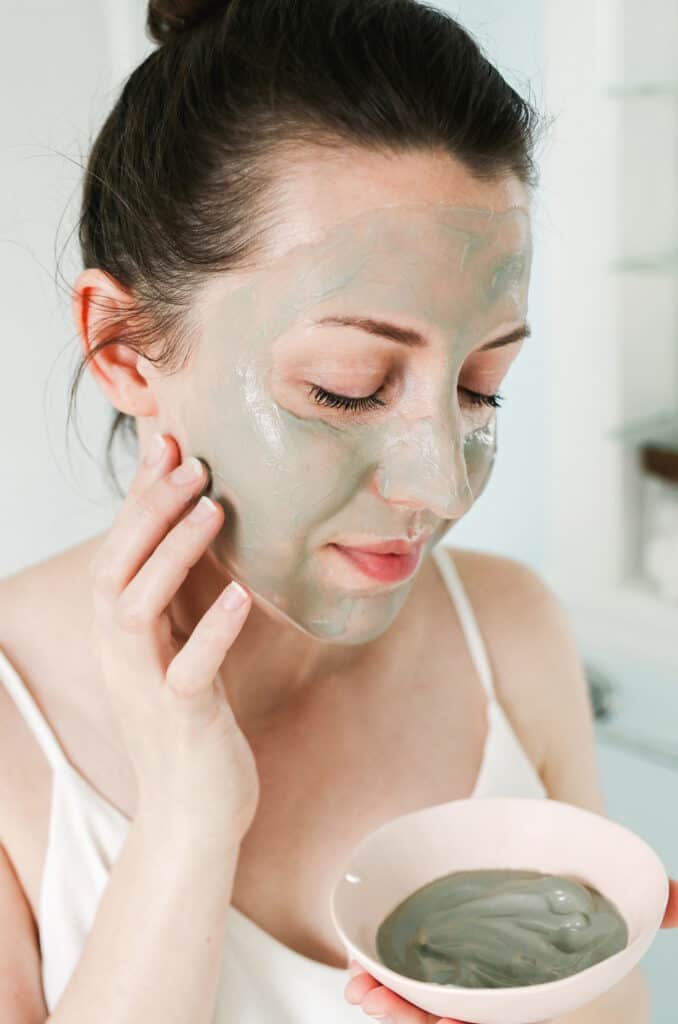
3. Apply a nutrient-rich face mask
With blood flow increased and pores open, now is the perfect time to apply nutrients in the form of a face mask. You can use any type of mask you like, but I use a simple homemade mask with bentonite clay, rose water, finely ground oatmeal, and a couple drops of hydrogen peroxide.
As the name suggests, hydrogen peroxide (H2O2) is loaded with oxygen (O2), which then sinks in and boosts oxygen levels in the skin. It can be a little harsh when applied directly, but a drop or two mixed with other nourishing ingredients can enable you to reap the benefits of extra oxygen without the irritation. More isn’t better in this case, and it can actually be harmful.
You need:
- 2 tablespoons bentonite clay
- 1 tablespoon finely ground oats
- 2 drops hydrogen peroxide
- 2–3 drops rosehip, chamomile, or carrot seed essential oil (see this guide for the best essential oils for your skin type)
- Rosewater as needed to get the preferred consistency
- Small bowl (nonmetal)
Combine all ingredients in a small bowl and mix with a wooden spoon (avoid using metal with clay). Apply liberally to skin.
Not ready to DIY? Try Dr. Brandt Skincare Skin Care Oxygen Facial Flash Recovery Mask.
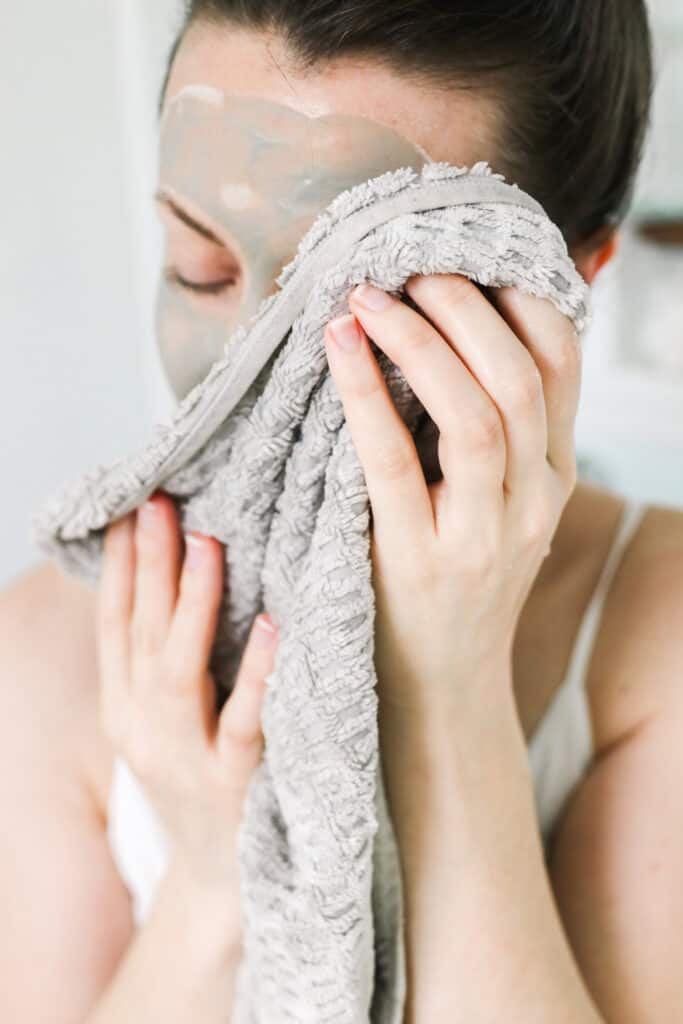
4. Seal the mask with a warm compress
With the mask still on, place a warm, damp washcloth or towel over your face for about 5–10 minutes, re-wetting the washcloth as needed to keep it warm. The steam from the washcloth helps open pores, so the oxygen and nutrients can really sink in. But if you have sensitive skin, you might want to skip this step so you don’t exacerbate any irritation.
After 10 minutes, wash the mask off using fresh water and blot skin dry.
5. Massage serum or moisturizer into skin
Finish by applying hyaluronic acid or a simple moisturizer to seal the skin and keep it looking fresh and dewy. While not totally necessary, a quick face massage encourages nutrients to sink in and releases tension in the face to help you look younger and more revitalized.
This post was medically reviewed by Dr. Jennifer Haley, a board-certified dermatologist with extensive experience in medical, cosmetic, and surgical dermatology. Learn more about Hello Glow’s medical reviewers here. As always, this is not personal medical advice, and we recommend that you talk with your doctor.
292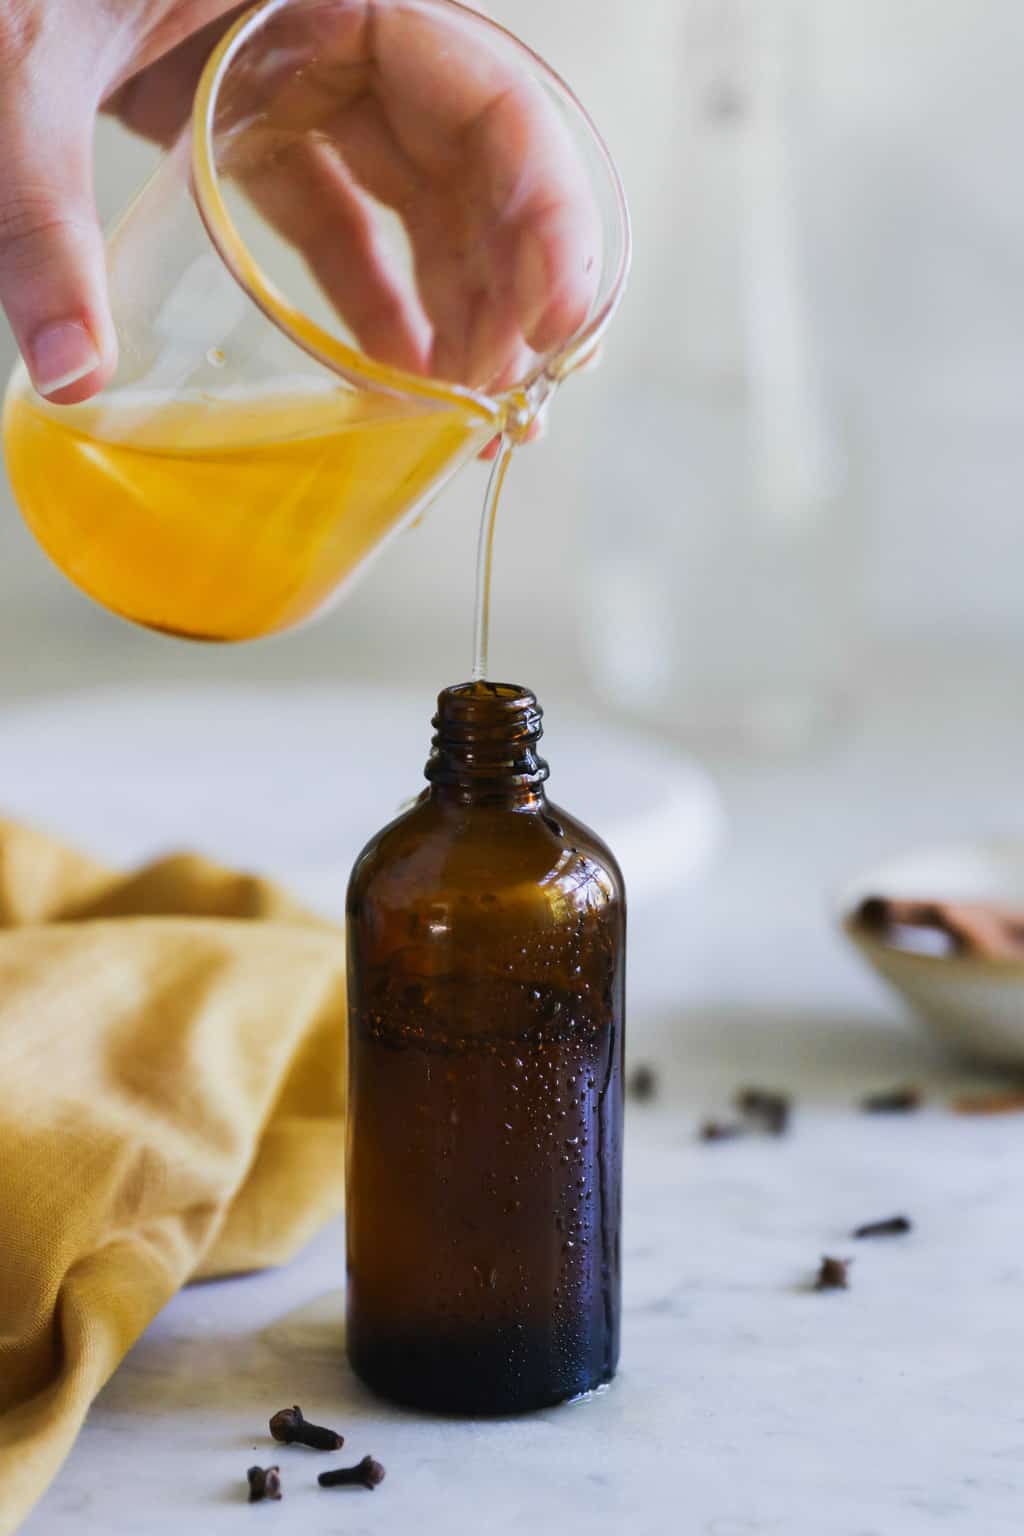

Leave a Comment